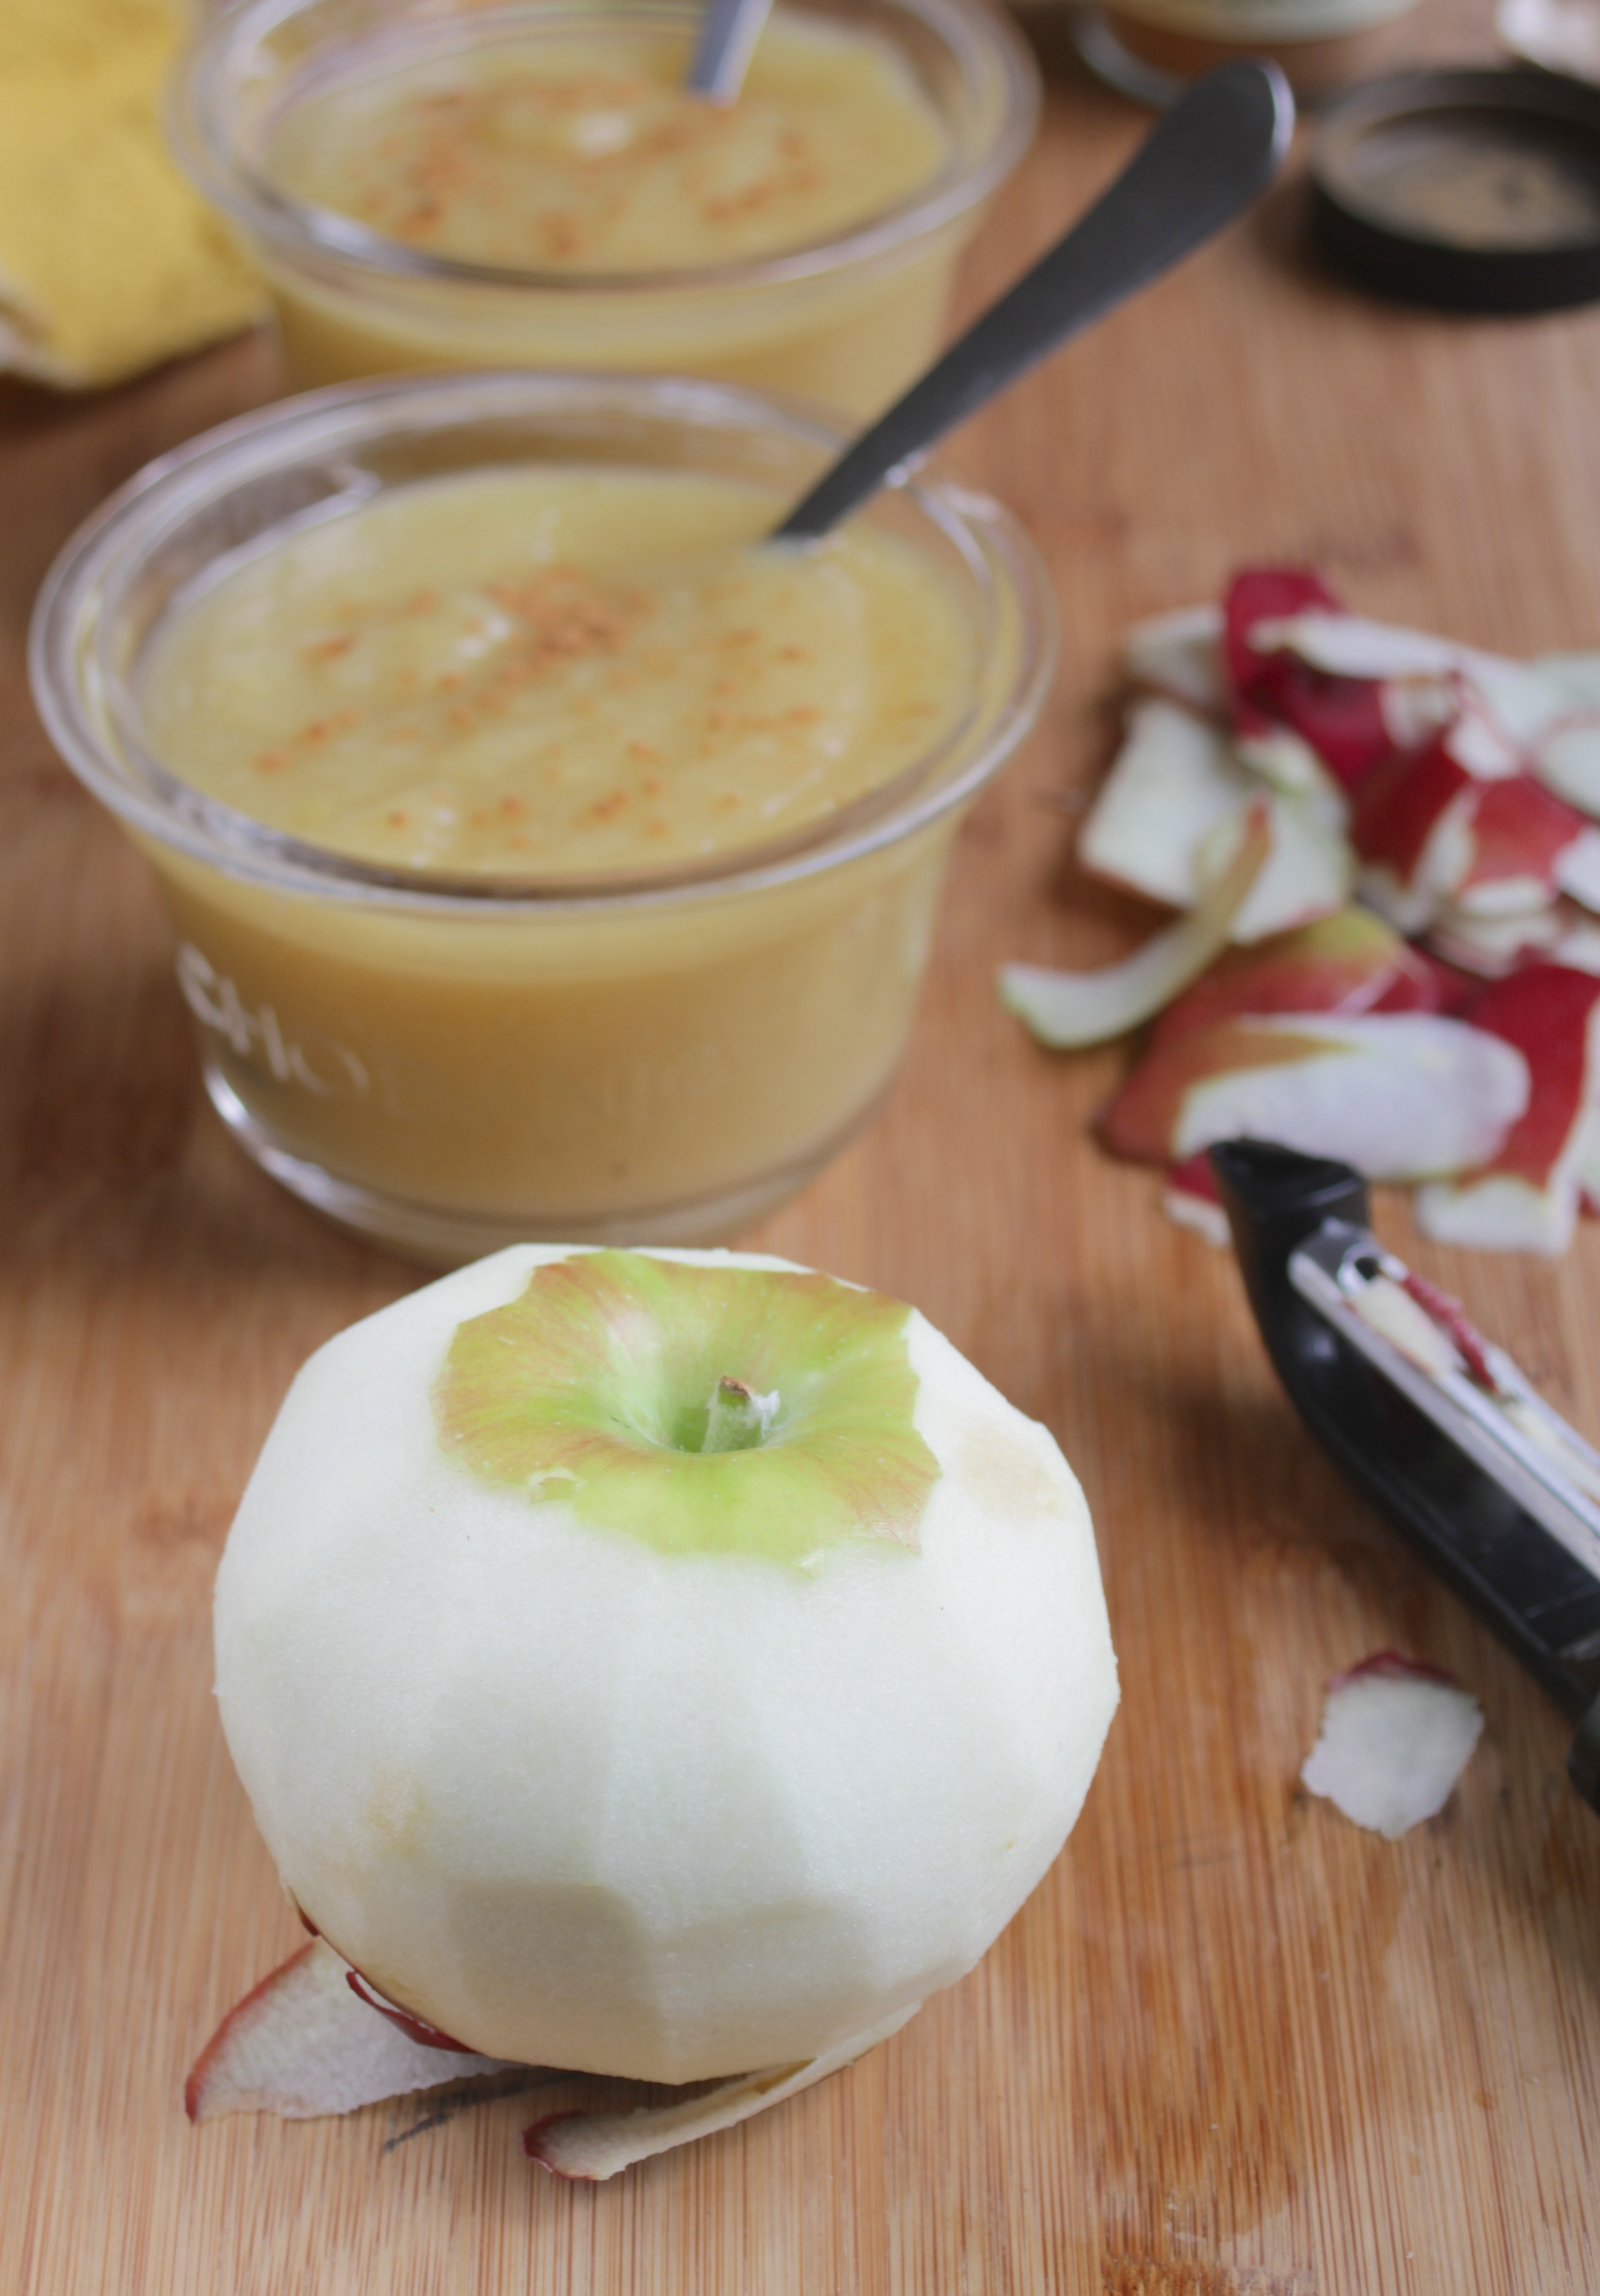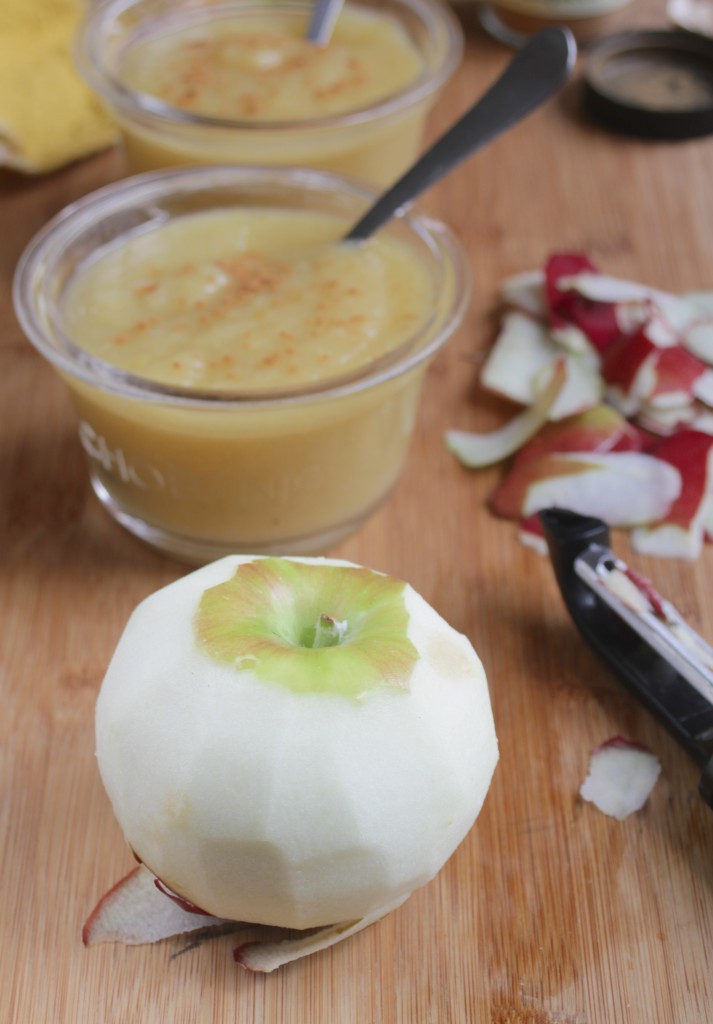
I’ve eaten more applesauce over the last weekend than I probably had over the last decade. If there was a bright side to getting my wisdom teeth taken out Friday, it was rediscovering how good applesauce can be(and mashed potatoes but I already knew that).
Before my surgery I bought a jar of applesauce–that was gone by the second day. By the third day I had a bunch of recently picked peaches I couldn’t bite into to save my life. Making them into more applesauce was a no-brainer.
This recipe has a lot less added sugars than it looks at first when you consider most of it gets poured out with the water. The final recipe has a much lower sweetness than the store-bought kind which the fresh, natural flavors make up for.
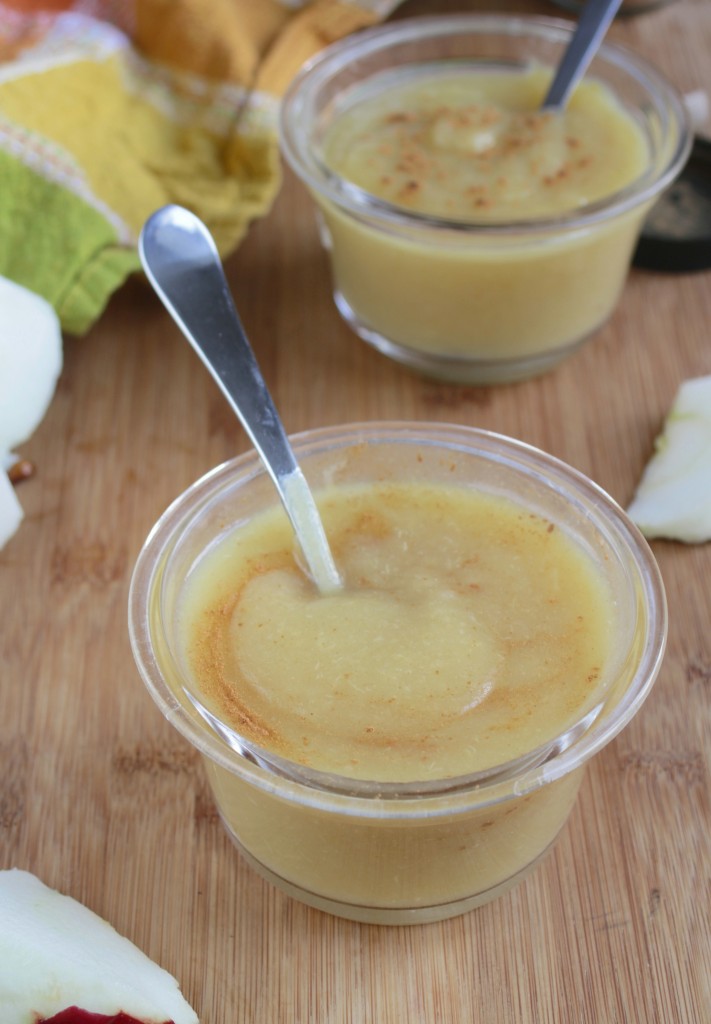
The peaches in this aren’t an overwhelming flavor. If you want more of a peachiness to this, I’d recommend replacing a few more of the apples with peaches and making sure they’re slightly over ripened. You can also use the same recipe with no peaches and have a great, basic applesauce.
Homemade Peach Applesauce
Prep time: 10 minutes
Cook time: 15 minutes
Ingredients(Makes 6 servings):
- 5 Macintosh apples, cored and peeled
- 4 medium sized peaches, pitted and peeled
- Water
- 1 cup sugar
- 1 Tablespoon honey
- 3/4 teaspoon cinnamon
- 1/4 teaspoon nutmeg
Method:
- Add all of the apples and peaches into a large boiling pot that has a lid to it.
- Cover with just enough water that the fruit begins to float.
- Add in the sugar and stir gently.
- Boil the fruit and water on high heat until the apples turn slightly brown and are tender to touch(about 15 minutes)
- Drain as much of the water from the pot as you can.
- Put the fruit into a high-speed blender. Add in the honey, cinnamon, and nutmeg.
- Pulse until the sauce is smooth.
- Remove from the blender and let cool before serving. Store in an airtight container in the refrigerator for up to a week.
When the Summer comes around, it makes me realize how boring the Winter was. Every weekend someone’s having a picnic or a party or a birthday. It’s a really good problem to have.
Assuming you have one(or all) of those lined up for Memorial Day weekend, I wanted to share 4 of my favorite recipes to celebrate the warmer weather(of course if it’s too warm and chocolate starts melting, then it’s a travesty).
Any of these are a great way to finish off a picnic or a backyard barbecue depending on what your mood is. Each recipe is also gluten-free or easily tailored to be.

Gluten-Free Chocolate Flag Cake–Because every memorial day needs some patriotism. The great thing about cake is that it can’t melt, so if it’s hot out you can still have a tasty time. This cake defies normal gluten-free cakes with a super moist base and a rich vanilla frosting. You can’t really go wrong.
Chubby Hubby Cheesecake is on my short list of recipes to make soon. It’s pretty much a home run with any crowd with good taste. It’s easy to make gluten-free, too, by using gluten-free pretzels or even vegan with dairy-free substitutes.

Chocolate Covered Strawberries are of course a classic dessert for any Summer party. As long as it’s not too hot out, these are a refreshing way to cool down. Create a variety by using milk, white, and dark chocolate.
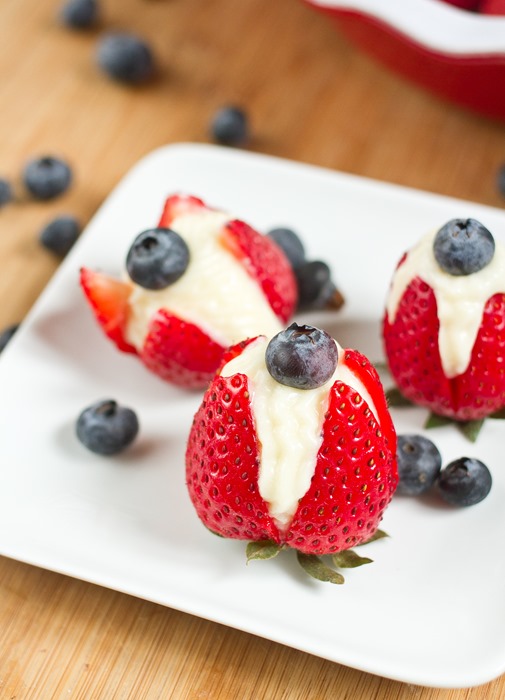
Red, White, & Blue Strawberries take the chocolate covered strawberry idea and flip it inside out(literally). These take a little more time and skill but they’re worth the effort. If you’re up for a challenge and ready to impress, give these a go.
Happy Memorial Day!
The funny thing about being a food blogger is that you make recipes for 4 or 8 or 12 and sometimes end up eating them all by yourself. That’s not a problem when the recipe’s good at least.
All of these dips I can say I’ve eaten half to entire portions of(not in one sitting… usually) and yet I keep making them again and again. They tend to get a lot of hits from Pinterest or Facebook because of how quick and easy they are—two things I always look for in recipes, too—so I thought I’d share them again because you can never have too much of a good thing.

Fruity Peanut Butter Yogurt Dip—Is it yogurt? Is it a spread? It’s somewhere in between; it’s a dip and a tasty one at that. But my favorite thing about this recipe isn’t how easy it is. It’s how many different ways you can make it. I’ve had this with strawberry yogurt, vanilla yogurt, and plain yogurt with nutella and each time it comes out equally good. But as fun as it is as a dip it’s usually always better with a spoon so keep that in mind.

Peanut Butter Chocolate Chip Dessert Hummus—Out of all the times I’ve put beans into a dessert, this is probably the weirdest but also the tastiest. The texture and flavor is a lot like raw cookie dough except without all of the flour, refined sugars, and raw eggs. I’ve been obsessed lately with using this in place of peanut butter in pb&j sandwiches; if you’ve never tried something like this you’d be surprised how much you’ll love it.

Vegetarian Buffalo Chicken Dip—Finally something savory. I made this dip for Superbowl Sunday and have wanted to make it every weekend since. It’s creamy, spicy, and a little tangy all at once. If you’re a new vegetarian or still love eating meat you won’t know the chicken is gone at all. The next day put the leftovers into some warm tortillas and you’ll have a whole new meal.
Enjoy! I hope you’ll find one you like.

Nutella is one of those foods that I think everyone likes. Maybe it’s not for everyone, but it has 17 million fans on Facebook so it must feel pretty loved. I’m sure all those birthday notifications must be a bitch.
Two years ago I shared a fruity peanut butter yogurt dip recipe and since then it’s been pinned on Pinterest almost 190,000 times; who knew there were even that many Pinterest users? I’ve seen countless reviews and variations of it and this is another one to add to the list.

Nutella isn’t exactly a health food but that doesn’t mean you have to pass up on this delicious dip. There are plenty of all-natural varieties of chocolate hazelnut spreads out there and you can even make your own. If you’re using a brand that’s less sugar-laden you might want to add a touch more honey.
Nutella Yogurt Dip
Prep time: 5 minutes
Cook time: 0 minutes
Ingredients(Makes 1 cup):
- 1/2 cup Nutella
- 1/2 cup plain low-fat yogurt
- 1 1/2 Tablespoons honey(optional)
Method:
- Combine all of the ingredients in a bowl and mix well.
- Store in the refrigerator when not eating.

Serve on fruit, graham crackers, and fingers.

When you’re a food blogger, you end up having some pretty weird “snacks”. Leftover cheesecake in the afternoon? Sure. Chocolate granola for lunch and dinner some times. Anything goes.
That’s all great and delicious but there are times when I wish I ate a little bit healthier. Of course, the answer’s simple; if you want to eat healthy you need to buy and make healthy meals and snacks. So to start I made one of my favorites: peanut butter chocolate chip larabars.

Most pre-portioned snacks at the grocery store are overpriced; they’re even pricier if you get them from kiosks or snack stands. By making your own, you control the costs and quality of the ingredients. Larabars have pretty clean and simple ingredients as is, but by buying dates and using other ingredients I already had I was able to bring the cost down.
You could make your own and use almonds instead of peanuts to adapt these for someone with a peanut allergy.
Copycat Peanut Butter Chocolate Chip Larabars
Prep time: 10 minutes
Cook time: 0 minutes
Ingredients(Makes about 6 bars):
- 8oz pitted dates
- 1/2 cup peanuts
- 2 Tablespoons peanut butter
- 1/4 teaspoon salt
- 1/3 cup chocolate chips
Method:
- Combine the dates and peanuts in a food processor and blend on high until the ingredients start to form a paste.
- Add in the peanut butter and salt and continue blending until a dough begins to form.
- Lastly, add in the chocolate chips and pulse a few times.
- Line a loaf or baking pan with plastic wrap.
- Drop the dough on top of the plastic wrap and press the dough into a square or rectangle about 3/4-inch thick.
- Cut into bars or squares. Wrap individually and refrigerate until ready to eat.

I left mine in squares. You could make bars or balls or really any shape you could think of with these.

To be honest, grilling in the Summer is slightly less fun when you’re a vegetarian. I don’t do it nearly as much anymore. That doesn’t mean vegetarian grilling isn’t delicious; sometimes I just need to be reminded of that.
Just like you can grill any kind of meat, you can grill all different sorts of fruit and vegetables. The heat from the fire makes the fruit taste even sweeter and pairs perfectly with something cool and creamy. Most recipes use a soft cheese or ice cream; this one uses Greek yogurt for a similar taste and texture only a little bit healthier.

Peaches are a great substitute for when cantaloupe isn’t available; you won’t have to change anything else in the recipe. Make sure to use full fat or 2% yogurt; non-fat yogurt won’t have the same depth of flavor or creaminess to really make this satisfying.
Grilled Cantaloupe with Yogurt and Mint
Prep time: 5 minutes
Cook time: 6 minutes
Ingredients(Makes 4 servings):
- 1/2 cantaloupe, cut into quarters
- Olive oil
- 1 16oz container full fat or 2% Greek yogurt
- Small handful of mint leaves
- Honey(optional)

Method:
- Heat up your grill to roughly 400 degrees.
- Brush both sides of each cantaloupe wedge with enough olive oil to cover.
- Once the grill is hot, lay the cantaloupe down and let it cook undisturbed for roughly 3 minutes until grill marks have formed.
- Flip the wedges once and repeat with the other side.
- When the cantaloupe is done cooking, plate it with the skin touching the plate. Scoop about half a cup of yogurt over each wedge. Garnish with mint leaves and honey if desired.
- Serve immediately.


Happy (almost) 4th of July! I know I’m five days early, but consider this my obligatory patriotic post.
A few weeks ago I went to an American citizenship party for some friends who recently passed the citizenship test. There was grilling and beans and red, white, and blue napkins so of course there had to be flag cake.

A family friend at this party recently had to cut gluten out of her diet; one of her favorite foods is chocolate cake so naturally I knew the cake I made had to be chocolate. I’d never experimented with almond flour and coconut flour in the same recipe but I thought I’d give it a shot. The texture was just like any good ol’ fashioned American sponge cake. You’d never guess it was gluten-free and grain-free.
The frosting also got a lot of praise, too. Then again, how can something with butter, cream cheese, and a pound of sugar not be good?

Make sure to use fresh fruit and to assemble it as close to serving as possible. The more the cake sits out, the more the juices from the strawberries runs into the frosting, and no one wants a runny flag.
Gluten-Free Chocolate Flag Cake
Prep time: 30 minutes
Cook time: 35 minutes
Ingredients(Makes 1 9 x 12 cake):
For the cake:
- 3/4 cup chocolate chips
- 1 1/4 cup almond flour
- 1/2 cup coconut flour
- 3/4 cup sugar
- 1/2 cup oil
- 6 extra large eggs
- 1 teaspoon vanilla extract
- 1 teaspoon baking soda
- 1/2 teaspoon salt
- 1/2 cup + 2 Tablespoons hot water
For the frosting:
- 1 4oz stick of butter, room temperature
- 1 8oz block of cream cheese, room temperature
- 1 teaspoon vanilla extract
- 1 1lb box of powdered sugar
Fruit topping:
- 1 half pint blueberries
- 1lb fresh strawberries

Method:
- Preheat your oven to 350 degrees.
- Melt the chocolate in a double boiler or in the microwave.
- While the chocolate is melting, mix together the almond flour, coconut flour, sugar, and oil.
- Mix the melted chocolate into the flour mixture completely.
- Crack the eggs into the batter and beat each in.
- Add in the vanilla, baking soda, and salt.
- Add in the hot water and mix until the batter is smooth and slightly runny.
- Grease a 9 x 12 baking pan. Pour the batter in in an even layer.
- Bake for 35-40 minutes until the center of the cake has set. Remove from the oven and let it cool completely before frosting.
- Combine the butter, cream cheese, vanilla extract, and half of the sugar in a large bowl.
- With an electric mixer, beat together the ingredients until the sugar is entirely incorporated.
- Slowly add more sugar into the mix until all of it is mixed into the frosting.
- Spread a few tablespoons of powdered sugar on top of the cake and brush it all around to prevent the frosting from tearing the top of the cake.
- Spread the frosting out all over the cake in an even layer and around the sides.
- Make a square of blueberries in the top left corner of the cake.
- Remove the stem from each strawberry and cut each in half. Lay them out top to bottom in horizontal lines in a flag pattern.
- Refrigerate until ready to serve.

There were practice American citizenship tests at the party. I scored a 12/20. I think that’s good enough not to be deported, right? Too bad how to make a flag cake isn’t part of the test.

Happy Memorial Day weekend!
I’m really horrible at remembering these federal holidays. I had no idea Monday was a holiday until a friend told me it was last weekend. Back in February I told another friend to have a good Martin Luther King day on Presidents’ Day… while he was in another country that celebrates neither of those. I really need to start looking at a calendar more.

Back to the food—Chocolate covered strawberries are one of those classics that get done again and again but they never get old. They’re so simple you don’t even need a recipe(but you’re getting one). You can make them last minute and they’re near impossible to screw up, so if you’re in a pinch for dessert this Memorial Day then these could be the perfect solution.
Chocolate Covered Strawberries
Prep time: 10 minutes
Cook time: 0 minutes
Ingredients(Makes 2 dozen):
- 2 dozen large strawberries
- 10oz semi-sweet chocolate
- 3oz White chocolate(optional)

Method:
- Gently melt the chocolate in a small bowl until it’s smooth.
- Dip each strawberry into the chocolate and swirl around to cover completely.
- Lift the strawberries out of the chocolate and let the excess fall back into the bowl. Place them individually on a non-stick surface.
- If using the white chocolate, melt it carefully and put it in a pastry bag or Ziploc with a tiny whole cut out one edge.
- Drizzle the white chocolate across each strawberry from side to side.
- Refrigerate the strawberries until the chocolate has hardened. Plate and serve still slightly cold.

When life gives you lemons, make lemonade. And when life gives you strawberries, cover them in chocolate before eating them.

This Summer I’ve been obsessed with these pancakes. Maybe it’s because I hadn’t had good gluten-free pancakes before them. Or because I’m just relishing having a stove that’s not 3 floors down(oh, the life of a student).
As much as I loved having them with a dredge of maple syrup, I figured that couldn’t be good day after day. Instead I wanted to sweeten them the natural way with some fruit. By using chia seeds to thicken the sauce, it comes together literally in minutes but has the texture of a sauce that’s been cooking for much longer.

Look how thick it is(that’s what she said)! It’s hearty, warm, and the perfect pancake companion. The chia seeds not only thicken but also add a healthy dose of omega-3s.
You can use almost any fruit for this—strawberries, blueberries, cherries, grapes, mango. The one exception I’ve found is that using all raspberries creates a very tart sauce. If you want to make a raspberry version, switch out half with a sweeter fruit like strawberries or add a tablespoon of sweetener.
Quick Fruit Sauce
Prep Time: 0 minutes
Cook Time: 5 minutes
Ingredients(makes 1-2 servings):
- 3/4 cup fruit, fresh or frozen
- 1 Tablespoon chia seeds

Method:
- Pour the fruit into a microwavable bowl and microwave on high for 1 minute for fresh fruit or 3 minute for frozen fruit until hot and bubbly.
- Mash the fruit into a puree and mix in the chia seeds.
- Let the sauce sit for 5 minutes to thicken. Pour hot onto pancakes, waffles, French toast, or a dessert.

This is so easy to make, I throw it together in between mixing and pouring the pancake batter. If it gets better than that, I don’t know how.

Watermelon is without question my favorite Summer fruit. I go through 2-3 a week and to be honest I don’t remember what I ate instead before the season started. It’s going to be a real problem when Autumn rolls around but I’m trying not think about that.
I could eat plain watermelon all day, but where’s the fun in that? This no-fuss fancified melon packs a big flavor punch. The lime and the mint balance each other out nicely and make the watermelon even more cool and refreshing.

You can use any time of mint in this recipe–wintergreen, peppermint, spearmint. Just use whichever is on hand or whichever you have a preference for.
Watermelon With Lime And Mint
Ingredients:
- 1/4 watermelon, cut into wedges
- Juice of 1 lime(~3 Tablespoons)
- 2 Tablespoons sugar
- 7-8 mint leaves, torn
Method:
- Mix together the lime juice and sugar until the sugar has completely dissolved.
- Toss together the lime mix with the watermelon wedges so that all the sides get layered with the juice.
- Plate and garnish with the torn mint leaves.