If there’s any way to make peace after 2 weeks of not posting it’s this recipe.
Spending the weekend with friends or family is great but usually leads to a week without recipes. Last weekend was the exception. My friend Eury visited and stayed with me and insisted(she’s going to hate that word–“suggested”) we make the raw fudge pie recipe she’s been working on.
Whether you’re gluten-free or gluten-full, vegan or a meat lover, there’s no denying raw desserts are just better than regular ones. They’re always fudgier, creamier, more flavorful, and easy to convince yourself they’re healthy so you can go back for seconds.

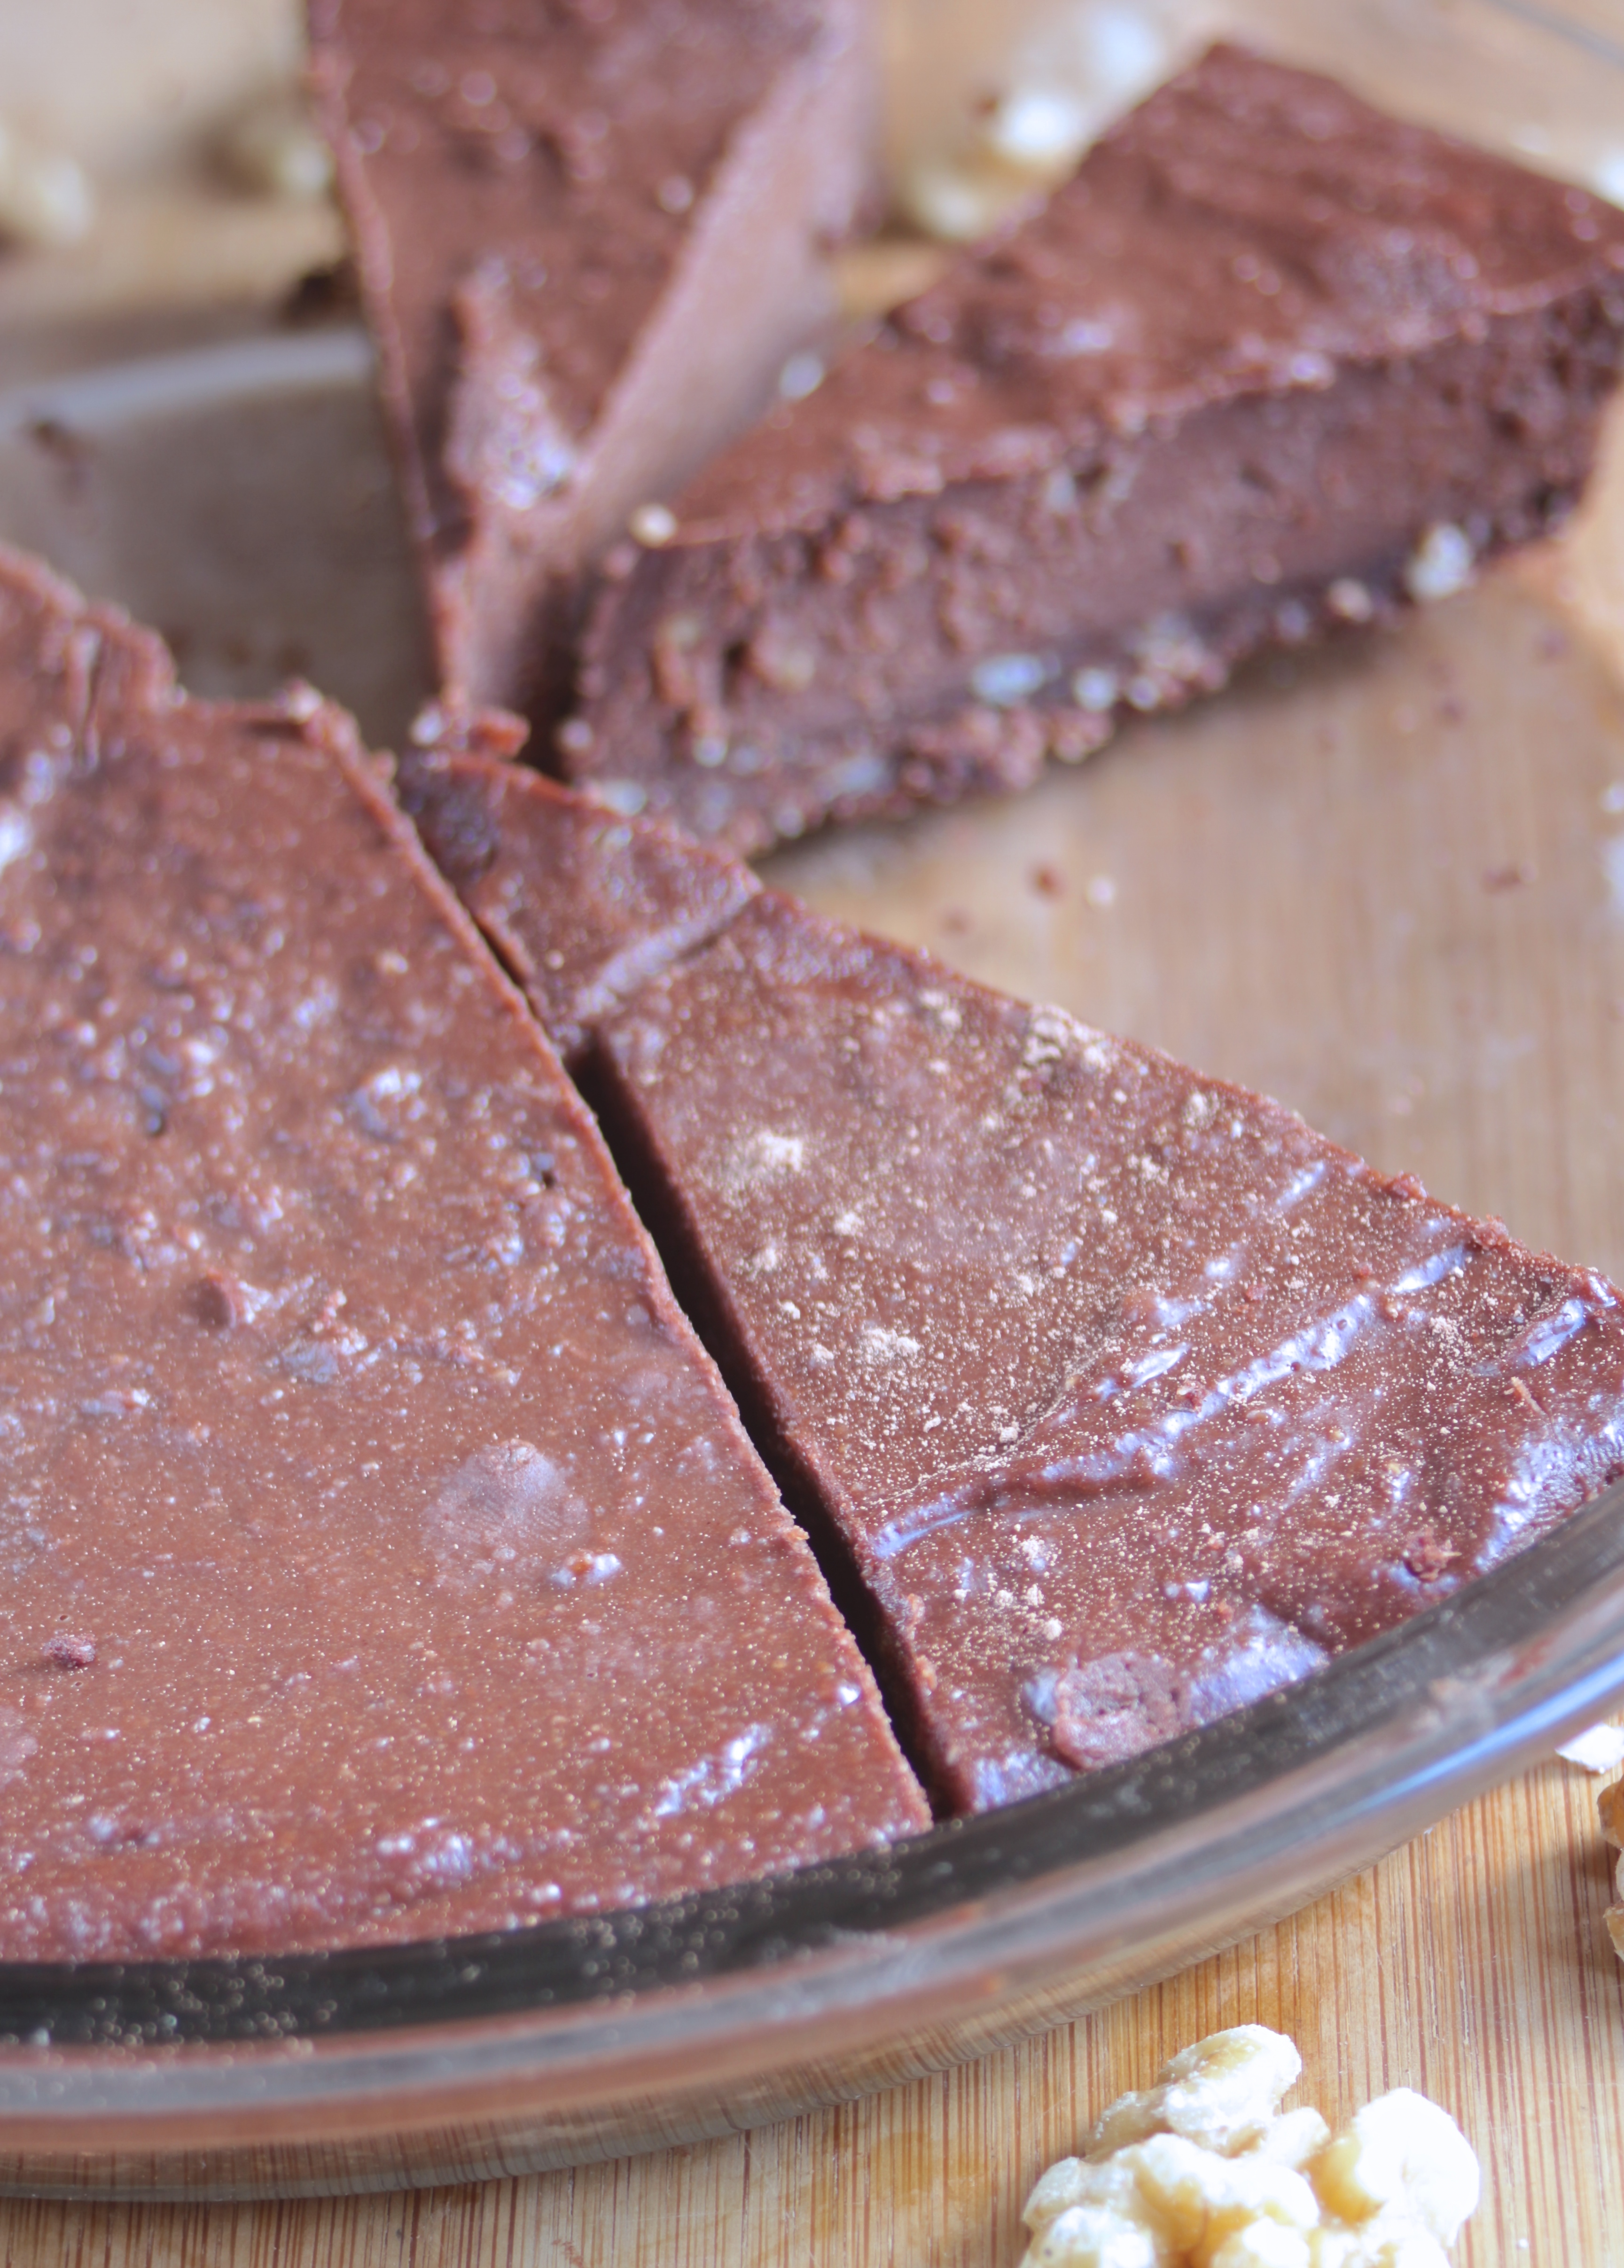
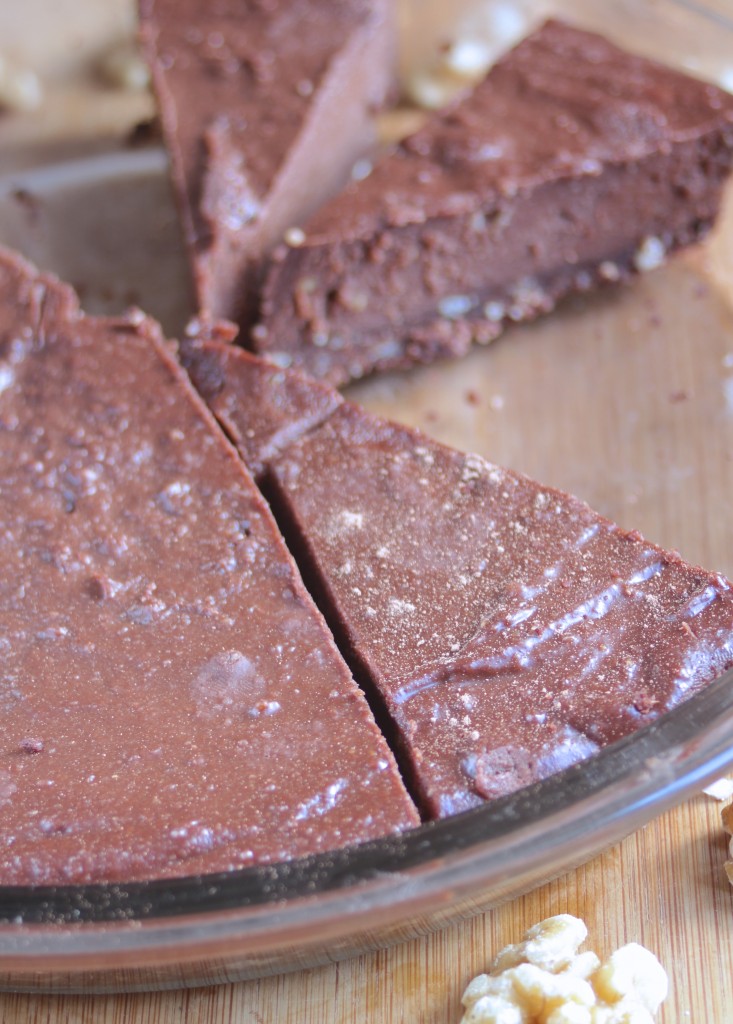
With permission I’m sharing Eury’s recipe which’ll easily win over the staunchest crowd. The cashew filling has the same taste and texture as any milk chocolate fudge. If you do not care about the health benefits of eating raw and only make this because raw desserts have amazing flavors and textures, feel free to substitute the maple syrup for honey, corn syrup, or simple syrup.
Raw Chocolate Fudge Pie
Prep time: 20 minutes
Cook time: 0 minutes
Ingredients(Makes 16 servings):
For the crust:
- 3/4 cup almonds
- 1/2 cup walnuts
- 1/4 cup + 2 Tablespoons unsweetened cocoa powder
- 3 Tablespoons maple syrup
- 1 teaspoon vanilla extract
For the filling:
- 2 cups cashews
- 1/2 cup maple syrup
- 1/2 cup water
- 1/2 cup coconut oil
- 3/4 cup unsweetened cocoa powder
- 2 teaspoons vanilla
Method:
- Pulse the almonds and walnuts in a food processor until finely chopped.
- Add in the syrup, cocoa powder, and vanilla for the crust and continue processing until it forms a mixed dough.
- Press the dough into a 9-inch pan until the bottom’s about 1/4-inch thick.
- For the filling, process the cashews into a fine powder. Make sure not to over blend them into cashew butter.
- Add in the maple syrup and water and continue blending until smooth.
- Add in the rest of the ingredients and process until it forms a smooth liquid filling.
- Pour the filling over the crust and spread into an even layer.
- Refrigerate for ~4 hours until the center has set. Cut with a sharp knife into servings. Refrigerate when not enjoying.

These are not the best cupcakes I had for my birthday. In fact, the cake part didn’t come out all that well since I made them on the fly without measuring anything(only to be surprised Saturday night with a batch of homemade banana cupcakes with Nutella frosting). But they were entirely edible if only because of the frosting.
This frosting though was just right. It’s sweet and vanilla at first with a nutty peanut butter finish. It’d be great on just about any cake or cupcake, and it’s easy to decorate with chocolate chips or Reese’s Puffs.
For this recipe, look for natural peanut butter without any added oils or stabilizers. It’ll mix in with the other ingredients the easiest and have a better, stronger flavor.

Peanut Butter Buttercream
Prep time: 10 minutes
Cook time: 0 minutes
Ingredients:
-
6 Tablespoons butter, room temperature
-
2 1/4 cups powdered sugar, sifted
-
2 Tablespoons all natural no oil peanut butter
-
1/4 teaspoon vanilla
-
1-2 Tablespoons cream or whole milk
Method:
-
In a large bowl, mix together the butter, sugar, peanut butter, and vanilla with an electric beater.
-
Slowly add just enough milk until the ingredients make a thick but smooth buttercream.
-
Scoop into a pastry bag and use immediately.

I hate the word low-fat, because instantly it conjures up thoughts of dried pastries and a total lack of flavor. That’s nothing anything like these loaves are, soft and bursting with a sweet flavor right out of the oven.
Instead of butter or oil, these are made with two favorite tricks: Greek yogurt and evaporated milk. They’re much better options in baking than low-fat or non-fat margarine because of the simple ingredients and don’t change the flavor.
I used a mini-loaf pan because that was what I had, and the portioning worked out perfectly. Just reheat one at a time and it’s like having a freshly baked breakfast. Since low-fat pastries dry out faster, I’d recommend freezing half of the batch and thawing it later in the week(if you think the first batch will last that long).

Low-Fat Chocolate Coconut Loaves
Prep time: 15 minutes
Cook time: 25 minutes
Ingredients(Makes 8 mini-loaves or 1 large loaf):
- 1 3/4 cups +2 Tablespoons gluten-free all purpose flour(or wheat flour)
- 3/4 cup sugar
- 1/2 teaspoon baking soda
- 1/2 cup chocolate chips
- 1/2 cup sweetened coconut flakes
- 1 5oz can fat-free evaporated milk
- 1 5.3oz vanilla Stonyfield Greek
- 3 eggs
Method:
- Preheat your oven to 350 degrees.
- In a large bowl, mix together the flour, sugar, baking soda, chocolate chips, and coconut flakes until well mixed.
- Add in the rest of the ingredients and beat until it forms a thick batter.
- Grease 8 mini-loaf pans or one large one and pour the batter in.
- Bake for 25 minutes or until the loaves rise and the center has set. If you’re making one large loaf, wait 40-50 minutes before checking if it’s done.
- Remove from the oven and let cool before removing from the pan and slicing.

I can’t believe I haven’t made something this simple yet. Brownies + Reese’s cups. What more do you need?
When it comes to brownie recipes, I have a few favorites that I stick by. On occasion I’ll try a mix, but homemade usually comes out better.
Whether you’re making your own or using a mix, this batch will definitely come out better. Seriously, with peanut butter cups how could you go wrong? Once these cool, the milk chocolate sets again and the peanut butter has a roasted, nuttier flavor. It’ll definitely be a hit with your peanut butter lovers.

Reese’s Peanut Butter Cup Brownies
Prep time: 10 minutes
Cook time: 25 minutes
Ingredients(Makes 16 servings):
Method:
-
Preheat your oven to 350 degrees.
-
Prepare your brownie recipe according to directions.
-
Grease an 8×8 baking pan well and pour the batter into the pan.
-
Unwrap the peanut butter cups and place them evenly around the pan on top of the batter pressing them in gently.
-
Bake for 20-25 minutes according to directions.
-
Remove and let them cool completely before cutting.
St. Patricks Day has never been a favorite holiday. Perhaps because my birthday’s right around the corner, or Easter which is centered around chocolate eggs filled with candy(I mean, what’s not to love?). Potatoes, beer, and colcannon just don’t do it for me. But there’s one Irish food I can get down with.
Irish cream is made with just about everything bad for you, so naturally it’s one of my favorites. There’s nothing better than making a dessert with it and then sitting down to enjoy it with an ice-cold glass on the side. These are 3 of my favorite recipes with Irish cream you can enjoy this weekend(after the potatoes and beer, of course).

Bailey’s Frosted Brownies
Prep time: 15 minutes
Cook time: 30 minutes
Ingredients(Makes 1 8 x 8 pan):
For the brownies:
- 3/4 cup oat flour
- 1/4 cup cocoa powder
- 1/4 teaspoon salt
- 1/2 teaspoon baking powder
- 1/2 cup + 2 Tablespoons cup sugar
- 3 large eggs
- 1 teaspoon vanilla
- 1/2 cup butter
- 4oz bittersweet baking chocolate
- 1/3 cup Irish cream
For the frosting:
- 6 Tablespoons butter, room temperature
- 1 1/4 cup powdered sugar
- 1 1/2 Tablespoons Irish cream
Method:
- Preheat your oven to 350 degrees.
- Mix together the oat flour, salt, cocoa powder, and baking powder and set aside.
- In a separate bowl, melt together the chocolate and butter.
- While the chocolate is melting, beat together the eggs, sugar, vanilla, and Irish cream.
- Slowly pour the melted chocolate and butter into the egg/sugar mixture while whisking until fully incorporated. Don’t go too fast so that the raw eggs don’t cook upon contact.
- Add the chocolate mixture in with the dry ingredients and mix completely.
- Pour the batter in a greased 8 x 8 pan.
- Bake for 30 minutes or until a toothpick poked into the center comes out clean. Let these cool completely before frosting.
- To make the buttercream, beat the powdered sugar, butter, and Irish cream heavily until it’s entirely mixed. Add a touch more buttercream if it’s too dry at first.

Bailey’s Hot Chocolate Truffles
Prep time: 25 minutes
Cook time: 0 minutes
Ingredients:
- 1 cup(8.5oz) semi-sweet chocolate chips
- 6 Tablespoons Irish cream
- 2 Tablespoons butter
- 1/2 cup powdered hot chocolate mix*
*I wouldn’t recommend using a mix that is overly processed or full of chemicals. You could also mix 6 Tablespoons of sugar and 2 Tablespoons of cocoa powder for a nearly identical coating.
Method:
- Melt the chocolate chips and butter together in a microwave or over a double boiler.
- Mix the Irish cream into the melted chocolate until it’s smooth and shiny.
- Refrigerate or freeze the chocolate until it’s semi-soft and doesn’t stick to your hands. You want it to be a little colder than you think it should be since your hands will warm it over time.
- Pour the hot chocolate mix into a small bowl or onto a small plate.
- With a melon-baller or a spoon, carve out pieces of chocolate about 1-inch in width. Roll the chocolate into as round a ball as you can and drop it into the hot chocolate mix.
- Roll the ball around in the hot chocolate mix until the sides are all covered and move it to an air-tight container.
- Refrigerate the truffles for 30 minutes for the right consistency before eating. Keep them refrigerated when not enjoying.

Hot Amaretto Mochas
Prep time: 5 minutes
Cook time: 0 minutes
Ingredients(Makes 1 serving):
- 6oz fresh brewed coffee
- 1 Tablespoon hot cocoa mix
- 1 1/2oz Irish cream
- 1/2oz amaretto
Method:
- Make sure the coffee you’re using is steaming hot. If not, heat it up gently.
- Stir in the hot cocoa mix until it’s completely dissolved.
- Pour in the Irish cream and almond liqueur and stir well until blended.
- Garnish with whipped cream and chocolate if desired. Serve hot.

Did you know today’s national cereal day? I probably wouldn’t have if the people at Chex cereal didn’t tell me and invite me to celebrate.
I really need a calendar with these fun food holidays like national cereal day, national peanut butter day, and—of course—national margarita day(which was thoroughly celebrated). I even forgot the Oscars were last weekend until that day, but thankfully I already had this classy snack to watch it with.
Black tie events are not my style but white and dark chocolate most certainly are. This Chex mix has a good balance of flavors; it’s a perfect class act for an award show party or just a football party. And it’s fairly easy to put together, too.

When you’re making this recipe, just like any other recipe that involves melting chocolate, make sure to pick a brand you trust and know melts well. Some chocolate chips have too many preservatives added to them and seize up instead of melting. Anything that markets itself as baking chocolate is a good bet for melting.
Black & White Chex Mix
Prep time: 20 minutes
Cook time: 0 minutes
Ingredients(Makes about 8 servings):
- 2 cups chocolate Chex cereal, divided
- 2 cups vanilla Chex cereal, divided
- 2/3 chocolate chips, divided
- 2/3 white chocolate chips, divided

Method:
- In a large bowl mix together 1 cup chocolate Chex cereal, 1 cup vanilla Chex cereal, 1/3 cup white chocolate chips, and 1/3 cup chocolate chips.
- Melt the remaining chocolate chips over the stove or in a microwave.
- While the chocolate is melted, mix in the remainder of the chocolate Chex cereal until it’s well-coated.
- Pour the chocolate covered Chex onto a non-stick surface and gently flatten into a single layer.
- Repeat the same process with the white chocolate chips and vanilla Chex.
- Let the Chex sit until the chocolate has rehardened.
- Break up the chocolate covered Chex into bite-sized chunks.
- Mix the chocolate covered Chex in with the rest of the ingredients well.
- Serve at room temperature or store in a cool, dry place.
I have two half-eaten jars of Nutella in my kitchen. I think I have a problem. (I need more Nutella.)
There’s a store near me that sells imported European jars for less than $4($3 each if you buy 3). At that price it’s hard not to turn into an addict. Not that Nutella on oatmeal or bagels could ever get old, but using it in recipes helps mix it up from time to time.
Here are 4 recipes that take about as much time to make as it does to eat an entire jar. Also, all of these recipes are 4 ingredients or less, so there’s no reason not to enjoy them all. Maybe even in one day.

Easy Nutella Brownies are exactly what they sound like. You can instantly make any brownie mix into Nutella brownies with just Nutella and eggs. There’s no reason to make any other kind.

Nutella Cheesecake Strawberries impressed everyone the last time I made them, which isn’t bad for something with just 4 ingredients. The hardest part is slicing and stuffing the strawberries, but it’s fine if you have a little patience.

Nutella Yogurt Dip will make you feel a little better about eating Nutella by the spoonful. It’s just as tasty but a little more healthy. I like it with fruit and veggies but graham crackers and pretzel sticks work just as well.

Gluten-Free Nutella Cookies have been my afternoon snack since I made them. Since they’re crispy and chewy when they’re done I like to break them up and add it to yogurt. That practically makes them a health food, right?

It’s a good think I never made a resolution to eat less sugar because if I did I’d be doing horribly at it.
I always like to have something sweet after dinner, whether it’s part of a chocolate bar or just a handful of chocolate chips. That’s probably why I buy a bag and end up finishing it before actually making a recipe. Oops.
These cookies are simple because all I had this weekend in my pantry was simple ingredients. But simple can be all you need.

Loaded Peanut Butter Cookies
Prep time: 10 minutes
Cook time: 15 minutes
Ingredients(Makes 18 cookies):
- 1 cup peanut butter
- 3/4 cup cane sugar
- 1 egg
- 1 teaspoon vanilla extract
- 1/2 teaspoon baking soda
- 1/3 cup chocolate chips
- 1/3 cup peanut butter chips

Method:
- Preheat your oven to 350 degrees.
- In a large bowl, beat together the peanut butter, sugar, egg, vanilla and baking soda.
- Fold in the chocolate and peanut butter chips evenly.
- Roll the dough into 1-ounce balls. Lightly press down on the balls with a fork in a criss-cross pattern to flatten it to about 3/4-inch thickness.
- Bake for 12-14 minutes until the tops are firm to the touch and the edges begin to brown.
- Remove the cookies from the oven and let them cool before moving to a separate plate.

Caught the day before Valentine’s Day with out a dessert? Don’t worry, I’ve got you covered.
These are some of the easiest cookies I’ve ever made. At first I was sure they wouldn’t work and would come out flat as a pancake but I’m glad they didn’t. And they tasted great, too!
These cookies are chewy and crunchy. The texture reminds me of a Little Debbie oatmeal raisin cookies. They’d be perfect for making sandwich cookies with raspberry jam or ice cream sandwiches. I only made half a batch because 9 seemed like more than enough, but these would be just as good for a party as they are for a valentine.

To make sure these are 100% gluten-free make sure you’re using gluten-free oats. These cookies would probably work gluten-full with regular all-purpose flour but I haven’t tried that myself.
Gluten-Free Nutella Cookies
Prep time: 5 minutes
Cook time: 15 minutes
Ingredients(Makes 18 cookies):
- 1 cup Nutella
- 2 cups oat flour*
- 1/2 teaspoon baking soda
- 2 eggs
*I always make my own by blending oats in a high-power food processor.

Method:
- Preheat your oven to 350 degrees.
- In a large bowl, beat all of the ingredients together until well mixed. If your Nutella is hard to mix you might want to soften it a bit first.
- Roll the dough into balls and place them on a non-stick baking surface. Do not flatten them out at all.
- Bake for 12-15 minutes until the cookies are firm.
- Remove from the oven and let them cool before moving.

The toughest thing about being gluten-free is not knowing where to start out. You go from baking and cooking with “flour” to suddenly having to choose between 30 different flours and starches that you’ve never heard of before and have no idea what to do with. Most of the time you don’t even know where they come from(Sorghum flour? What’s a sorghum?).
These cookies are my favorite because you’d hardly know they’re gluten free from start to finish. They’re made with almond flour—everyone knows what an almond is—and don’t have any weird starches or gums you’d have to search high and low to find.

Besides that, they just taste good. Soft, gooey, and pillowy like a classic Tollhouse cookie. What’s not to love? Whether you’re new to gluten-free, just dabbling, or an expert, this recipe is worth the try.
Change up the recipe by adding pecans or walnuts into the batter. This time around I used dark chocolate chips and miniature chocolate chips.
You can see the original recipe that I posted almost 3 years ago(!!) here: http://www.thewannabechef.net/2011/05/04/almond-flour-chocolate-chip-cookies/ There are plenty of useful reviews and comments to help you make the perfect gluten-free cookie.