

I really like fancy flavored peanut butter and almond butter and all those butters. The problem is they’re usually double or triple the price. Thankfully they’re so easy to make at home. This is a great DIY recipe if you want to make breakfast a little more special, or even a great homemade gift to give a peanut butter lover in your life.

Honey and vanilla go so well together, even better with peanut butter. I got tired of making this in single servings and decided to make a big batch so I could eat it again and again. You can start with peanuts or peanut butter that’s already ground—the recipe’s pretty much the same either way.
Honey Vanilla Peanut Butter
Prep time: 10 minutes
Cook time: 0 minutes
Ingredients(Makes about 16oz):
- 12oz(3 cups) peanuts OR 12oz(1 1/2 cups) peanut butter
- 1/2 Tablespoon good quality vanilla extract
- 3 heaping Tablespoons honey

Method:
- Put the peanuts into the food processor and blend until it forms a smooth, runny butter(if using peanut butter, omit this step).
- Combine the rest of the ingredients with the peanut butter in the food processor and blend until emulsified.
- Scrape into a seal-tight jar. Store at room temperature for up to a month.

I somewhat wanted to add more honey to this because it wasn’t quite sweet enough for my taste; then again, I have a huge sweet tooth and would turn everything into dessert if I could, so I’m guessing 3 tablespoons is enough for most people, although judge by taste always.
Wednesday marked the start of 6 weeks of vacation. Relieved isn’t a strong enough word for how I felt. But I also know that I’ll get stir-crazy after 6 weeks of sitting around, especially if I don’t have a plan. So I wrote up a list of everything I want to achieve in the time.
Cooking
Obviously I’m looking forward to being home and having a full kitchen at my disposal every day. I have a laundry list of recipes I want to try out including pizzelles, mint chocolate almond butter, fruit cake, raw desserts and many more. I don’t think I’ll have to worry about what to post until at least February.
Photography
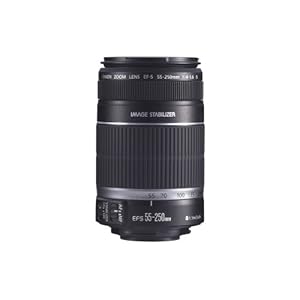
Photography’s become a new hobby of mine. Recently I picked up this lens on Amazon, which is supposed to be good for outdoor shots. I also hear I might be getting a lens from under the tree that’s good for food photography. Since I’m taking a class on photography next semester, I plan to play around with these a lot to get used to shooting with them and seeing how different lenses work(right now I just use the one that came with my camera).
Reading List

Let’s be real: I’ll probably spend most of my time watching all of Roswell on Netflix. But hopefully I’ll do some reading, too, so that my brain doesn’t turn completely to mush. These are the books I picked out that I wanted to read at times during the semester but never found the time to.
Fitness
This semester wasn’t great diet-wise. When I get stressed or depressed I eat chocolate and sugary foods to cope and there was way too much of that over the past few months. I’m definitely carrying around some extra weight I don’t feel comfortable with. Being without a gym for 6 weeks doesn’t make the situation much easier, either. My plan is to eat 4 balanced meals a day, minimize snacks, sugar and desserts, and try to be active twice a day. Some people might say, “Isn’t dieting for after the holidays?” I had more than enough candy corn at Halloween and pie at Thanksgiving that I’m ready to give up the sweets and get back to healthy.
That should keep me busy if I don’t get distracted by any Bravo Top Chef marathons. That’s a pretty big “if,” though.

Hi, again. I’m back after a short posting hiatus. I figured I needed to post something if only so that my parents don’t think I died. I’ve done plenty of writing over the past few days, but not about food; it’s mostly been commentaries on ancient elegiac and epic poetry, and I figured no one wants to read that(I don’t even really want to read that). And cooking? Oh, cooking. Well, there’s plenty of time for that now.
This might be an unpopular opinion, but I really don’t like sriracha sauce—at least not on its own. It’s far too spicy for me; even just thinking about pouring large amounts of it over food makes jump back. I do, however, love the flavor it adds to sauces with a little sweetness to balance the heat. I’ve made this sauce with maple syrup and soy sauce a few times lately and poured it over everything: Lentils, quinoa, eggs—there’s no bad combination.

If you’re a sriracha fan, I’m sure you’ll love this. Even if you’re not a sriracha fan, give it a shot and you might just be surprised how much you like it.
Maple-Sriracha Lentils
Prep time: 5 minutes
Cook time: 40 minutes
Ingredients(Makes 4 servings):

Method:
-
Cook the lentils for 30-40 minutes in the boiling water until they’ve become tender and soaked up all the liquid.
-
Turn off the heat and add in the soy sauce, maple syrup, and sriracha and mix, letting the lentils sit over the burner for a couple minutes to absorb the sauce.
-
Serve hot or cold as leftovers.

The sriracha adds a great complexity to a sauce that’s only 3 ingredients. For a little more depth of flavor you can add a Tablespoon of toasted sesame oil at the end of cooking.
And now I have 6 weeks with not much to do and a full kitchen at my exposal so expect to hear a lot more from me.

I didn’t cook much this weekend; I haven’t had the time. Most meals have been thrown together in 5 minutes or less and were far from blog-worthy. Who am I kidding? Most meals have been candy and Reese’s peanut butter trees because I’ve been stressed. I’m sure life will be back to normal once these last few finals are finished.
Even if I’m not feeling the holiday spirit right now, my taste buds definitely are; I’ve been craving peppermint in everything. I’ve pretty much been satisfying those cravings with peppermint extract in chocolate oatmeal and cheap mints from the store, but here are some recipes I’d make with peppermint in them if I had more time.
Homemade peppermint patties(vegan + gluten-free)

Raw peppermint pudding

Paleo mug cakes(just add 1/2 teaspoon of peppermint extract)

Grasshopper brownies
And now I’ll take one of each, please.

Like I’ve said before, I’m not a big cookie fan. I’m a frosting person. I was the kid who would break apart an Oreo or maple leaf cookie, lick out the inside, and put the cookie halves back in the box. You can’t imagine how much that thrilled my parents.
I was going to fill these with a soft chocolate ganache, but since the cookies are rather unsweet on their own I thought a sweeter filling would contrast nicely and let all the flavors show. Because of that I went with my favorite kind of frosting: Buttercream. The filling is rich, sweet, and creamy adding a whole new level to the cookies.

I give a suggested recipe for the cookies to use but you can really do this with any cookie recipe. Again, this is really easy to make vegan by simply substituting a dairy-free margarine for the butter.
Peanut Butter Buttercream Sandwich Cookies
Prep time: 5 minutes
Cook time: 0 minutes
Ingredients(Makes 9 sandwich cookies):
- 1 batch peanut butter cookies
- 3 Tablespoons no-oil added peanut butter
- 3 Tablespoons butter, room temperature
- 3/4 cup powdered sugar
- 1 1/2 teaspoons vanilla extract

Method:
- Cream together the peanut butter, butter, powdered sugar and vanilla extract until it makes a smooth and thick buttercream.
- Scoop 1 tablespoon of buttercream onto the flat side of a cookie and sandwich together with an equally sized cookie. Repeat until all of the cookies and frosting are gone.


After weeks of unseasonably warm weather, Winter is hitting and it’s hitting hard. It’s rained the past few days; and the temperature has dipped into the 30 and 40s. It’s no wonder I was craving chicken noodle soup recently.
I was thinking of just riding out the craving, since it’s not the easiest thing to satisfy for someone who’s vegetarian and gluten-free. Then I realized I had enough food lying around to make a decent meat-free, gluten-free soup that hit all the right notes.

I loved how flavorful this was, especially for something that was so simple. It was exactly like any good soup I’ve ever had, with a deep and savory broth. The quinoa and tempeh make this totally satisfying, as well. If gluten’s not an issue, I bet the texture of seitan would work great in this soup, too, in place of the tempeh.
10-Minute Chickenless, Noodleless Soup
Prep time: 5 minutes
Cook time: 10 minutes
Ingredients(Makes 4 side servings or 2 entrée servings):
- 2 cups precooked quinoa
- 3/4 cup chopped kale, fresh or frozen
- 3/4 cup peas, fresh or frozen
- 1 block of tempeh, cubed
- 3 cups water
- 1 vegetarian bouillon cube
- 1/2 teaspoon salt plus more to taste

Method:
- Combine all of the ingredients in a large pot
- Bring the water to a boil. Make sure to mix well enough that the bouillon cube dissolves completely into the broth.
- Once heated through, remove from the stove and serve hot.

And then I ate this with 2 clementines because I’m paranoid about getting sick during finals period. Nobody sneeze on me, please.

Well I made it 4 days into December before breaking down and making Christmas cookies. I couldn’t hold up to the pressure any longer.
The truth is I’m not the biggest cookie fan. I have my favorites(like peanut butter cookies) but on the whole would rather have something else. One cookie I love is the peanut butter cookie from Wildflour Bakery which is gluten-free and vegan. It’s so sweet and soft and falls apart in your mouth. I thought I might try to make a cookie like theirs; this isn’t nearly the same, but I like it in its own respect which is why I’m posting the recipe. It’s less sweet but much more peanut buttery; it almost tastes like eating a spoonful of peanut butter in cookie form.
This recipe can easily be made vegan by using a dairy-free butter substitute. I would not recommend subbing in coconut oil for the butter in a 1:1 ratio because they do not act the same in baking and I can’t say for how it would turn out.
Egg-Free Peanut Butter Cookies
Prep time: 30 minutes
Cook time: 16-18 minutes
Ingredients(Makes about 1 1/2 dozen cookies):
- 1 cup no-oil added peanut butter
- 1/4 cup butter
- 3/4 cup maple syrup
- 3/4 cup brown rice flour
- 1/4 cup tapioca starch(or corn starch)

Method:
- Preheat your oven to 350 degrees and line a couple baking trays with parchment paper.
- Beat together all of the ingredients. Put the batter in the refrigerator of freezer to harden until you can handle the dough and roll it into balls.
- Once the dough has reached that stage, scoop the dough and roll it into balls. Place the balls about 2 inches apart on the baking trays.
- Bake for 16-20 minutes until the outside is golden. The cookies will still be very soft to the touch when they’re done.
- Remove the cookies from the oven and let them cool completely before handling. As they cool, the outside will harden up and make them less fragile.
- Store sealed in an airtight container at room temperature when not eating.
")

After a week and a half, this is the final recipe I have to share from Thanksgiving. I’m sorry to drag it on for so long, but I think I saved the best for last.
My favorite part of any meal is dessert. For this celebration I made my recipe for rum raisin ice cream again, only since I was short on time and feeling slightly lazy I skipped the custard base making the recipe totally vegan. You couldn’t tell I changed a thing; it was just as rich and creamy as the first batch.
This ended up being a favorite of everyone’s. I was a little heavy-handed with the rum; I’m sure that helped. My relatives described it as “a frozen tropical bar drink”. We ate almost the entire batch by the end of the day; I take that as a good sign.
Vegan Rum Raisin Ice Cream
Prep time: 5 minutes
Cook time: 20 minutes to churn + 2 hours to set
Ingredients:
- 2 1/2 cups coconut milk, preferably full fat
- 1/2 cup cane sugar
- 1/4 cup maple syrup
- 1/4 cup rum
- 1/4 teaspoon cinnamon
- 1/4 cup Thompson raisins

Method:
- Whisk together the coconut milk, sugar, maple syrup, rum, and cinnamon until it forms a smooth base.
- Turn on your ice cream maker and churn according to manufacturer’s directions. Add in the raisins during the final 2 minutes of churning.
- Put in the freezer to harden for at least 2 hours. Remove from the freezer and let sit on counter for 5 minutes before scooping for best result.

You really can’t go wrong with this plus a slice of paleo pumpkin pie—I’m telling you. Pumpkin, pecans, raisins, cinnamon, and rum. It’s all good.

Let’s look past the fact that Thanksgiving was now 2 weeks ago. You might want to make cranberry sauce for Christmas, or just for anytime, right? Maybe? Sure.
I wanted to make a sauce with a twist. Since my whole family is from northern New Hampshire, I tried adding some blueberries into the cranberry sauce. And a little ginger because who doesn’t like ginger? Orange juice replaces some of the sugar with a less refined sweetness to round out the flavor of the sauce.
And since I figure somebody’s going to wonder or ask: No, that’s not my plate. Yes, I am still a vegetarian. But I did carve the turkey for the second year in a row because I’m damn good at it.
Thanksgiving Cranberry Sauce
Prep time: 5 minutes
Cook time: 30 minutes
Ingredients(Makes around 6 cups):
- 24oz fresh cranberries
- 1 cup blueberries
- 2 cups orange juice
- 1/4 teaspoon salt
- 1/2-inch fresh ginger peeled and grated
- 6 Tablespoons cane sugar

Method:
- Combine the cranberries, blueberries, and orange juice together in a large pot.
- Cover the pot and bring the contents to a boil. Keep boiling until the juice evaporates.
- Once finished, pour the cranberries and blueberries into a food processor. Add in the salt, ginger, and cane sugar and puree until smooth.
- Move the sauce to a container and leave it out to cool. Once at room temperature, place the sauce in the refrigerator to until eating.

Next time I make this I want to swap another cup of cranberries for blueberries to make the flavor more prevalent. Nobody noticed there was blueberries in the sauce; I didn’t even notice and I made it.
I can’t remembered if I mentioned it here but last month I won Attune Food’s October recipe challenge. They’re hosting another challenge for December which you should look into entering, blogger or not. Anyway, that came with a nice $200 prize, and while at first I wasn’t sure what to do with it it pretty soon became clear.
I took the plunge and finally bought Lightroom. Up until this point I’ve used free photo editing software(Picasa Photo Viewer and Microsoft Live Photo Gallery) but I figured since I’ve gotten more serious as a food blogger and am taking a photography class next semester it would be a good investment. Besides, the student and teacher version is on sale on amazon for only $89 now so I would highly recommend students and teacher readers taking advantage of that.

Since it came in the mail on Thursday I’ve been playing around a lot on it. While I’m still far from understanding it all, I must say it’s done a tremendous job at editing photos. With all of the controls, it’s very easy to get the tones and clarity of a picture exactly where you want it to look its best. You can see the Lightroom version on the right is a lot brighter and clearer than the one on the left that was edited with free software.

I’ve started to use it on food photos for this week’s post and again it doesn’t disappoint. Look how much better the color and contrast is in the photo on the right!

Lightroom also does a great job at fixing white balance issues, which I apparently have a lot of because my photos always end up being too blue or too red. I love that you can edit each color hue individually to get something more natural looking.

This is the only one where I’m not sure the photo edited with Lightroom looks any better than the other. I like them both very much. The Lightroom photo(on the right) has a more chocolaty look to it, but I like the brightness of the other photo. I wouldn’t say you need anything more than a free photo editor to get good photos but Lightroom makes it a lot easier to recover the nuances of photos that aren’t so great to begin with.

And now that I can edit RAW files I’ve changed my camera settings to shoot with them. I’m certainly no camera expert, but from what I understand the RAW data is a lot less compressed and gives you a wider variety of things in the photo to edit. I find the best way to learn things is by getting your hands dirty with them so I guess I’ll just keep trying new things and seeing which ones work.


")


