Happy holidays! If you’ve been feeling stuffed from holiday parties and Reese’s Christmas trees, this recipe is for you.
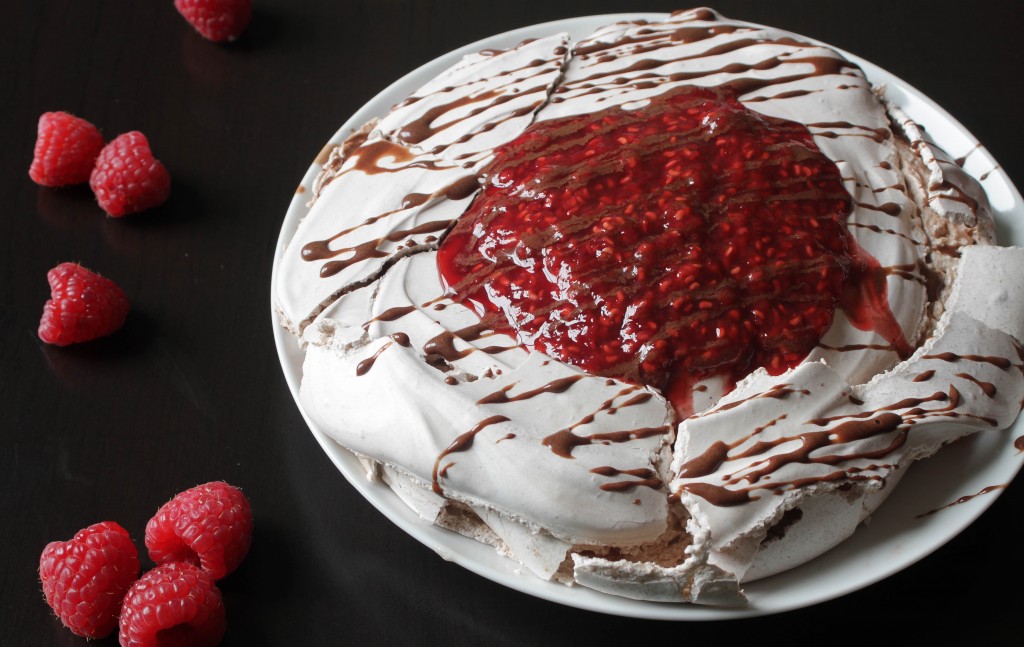
My latest recipe on Life By Dailyburn is a light dessert that’s sure to be a hit. The Cocoa Raspberry Pavlova is completely fat-free and uses some natural sweeteners and real fruit to make it delicious(along with a healthy dose of powdered sugar). The outside comes out crisp and crunchy while the inside is soft and sweet like a mousse. No one has to know it’s actually easy to make!
Head over to the full recipe and check it out!
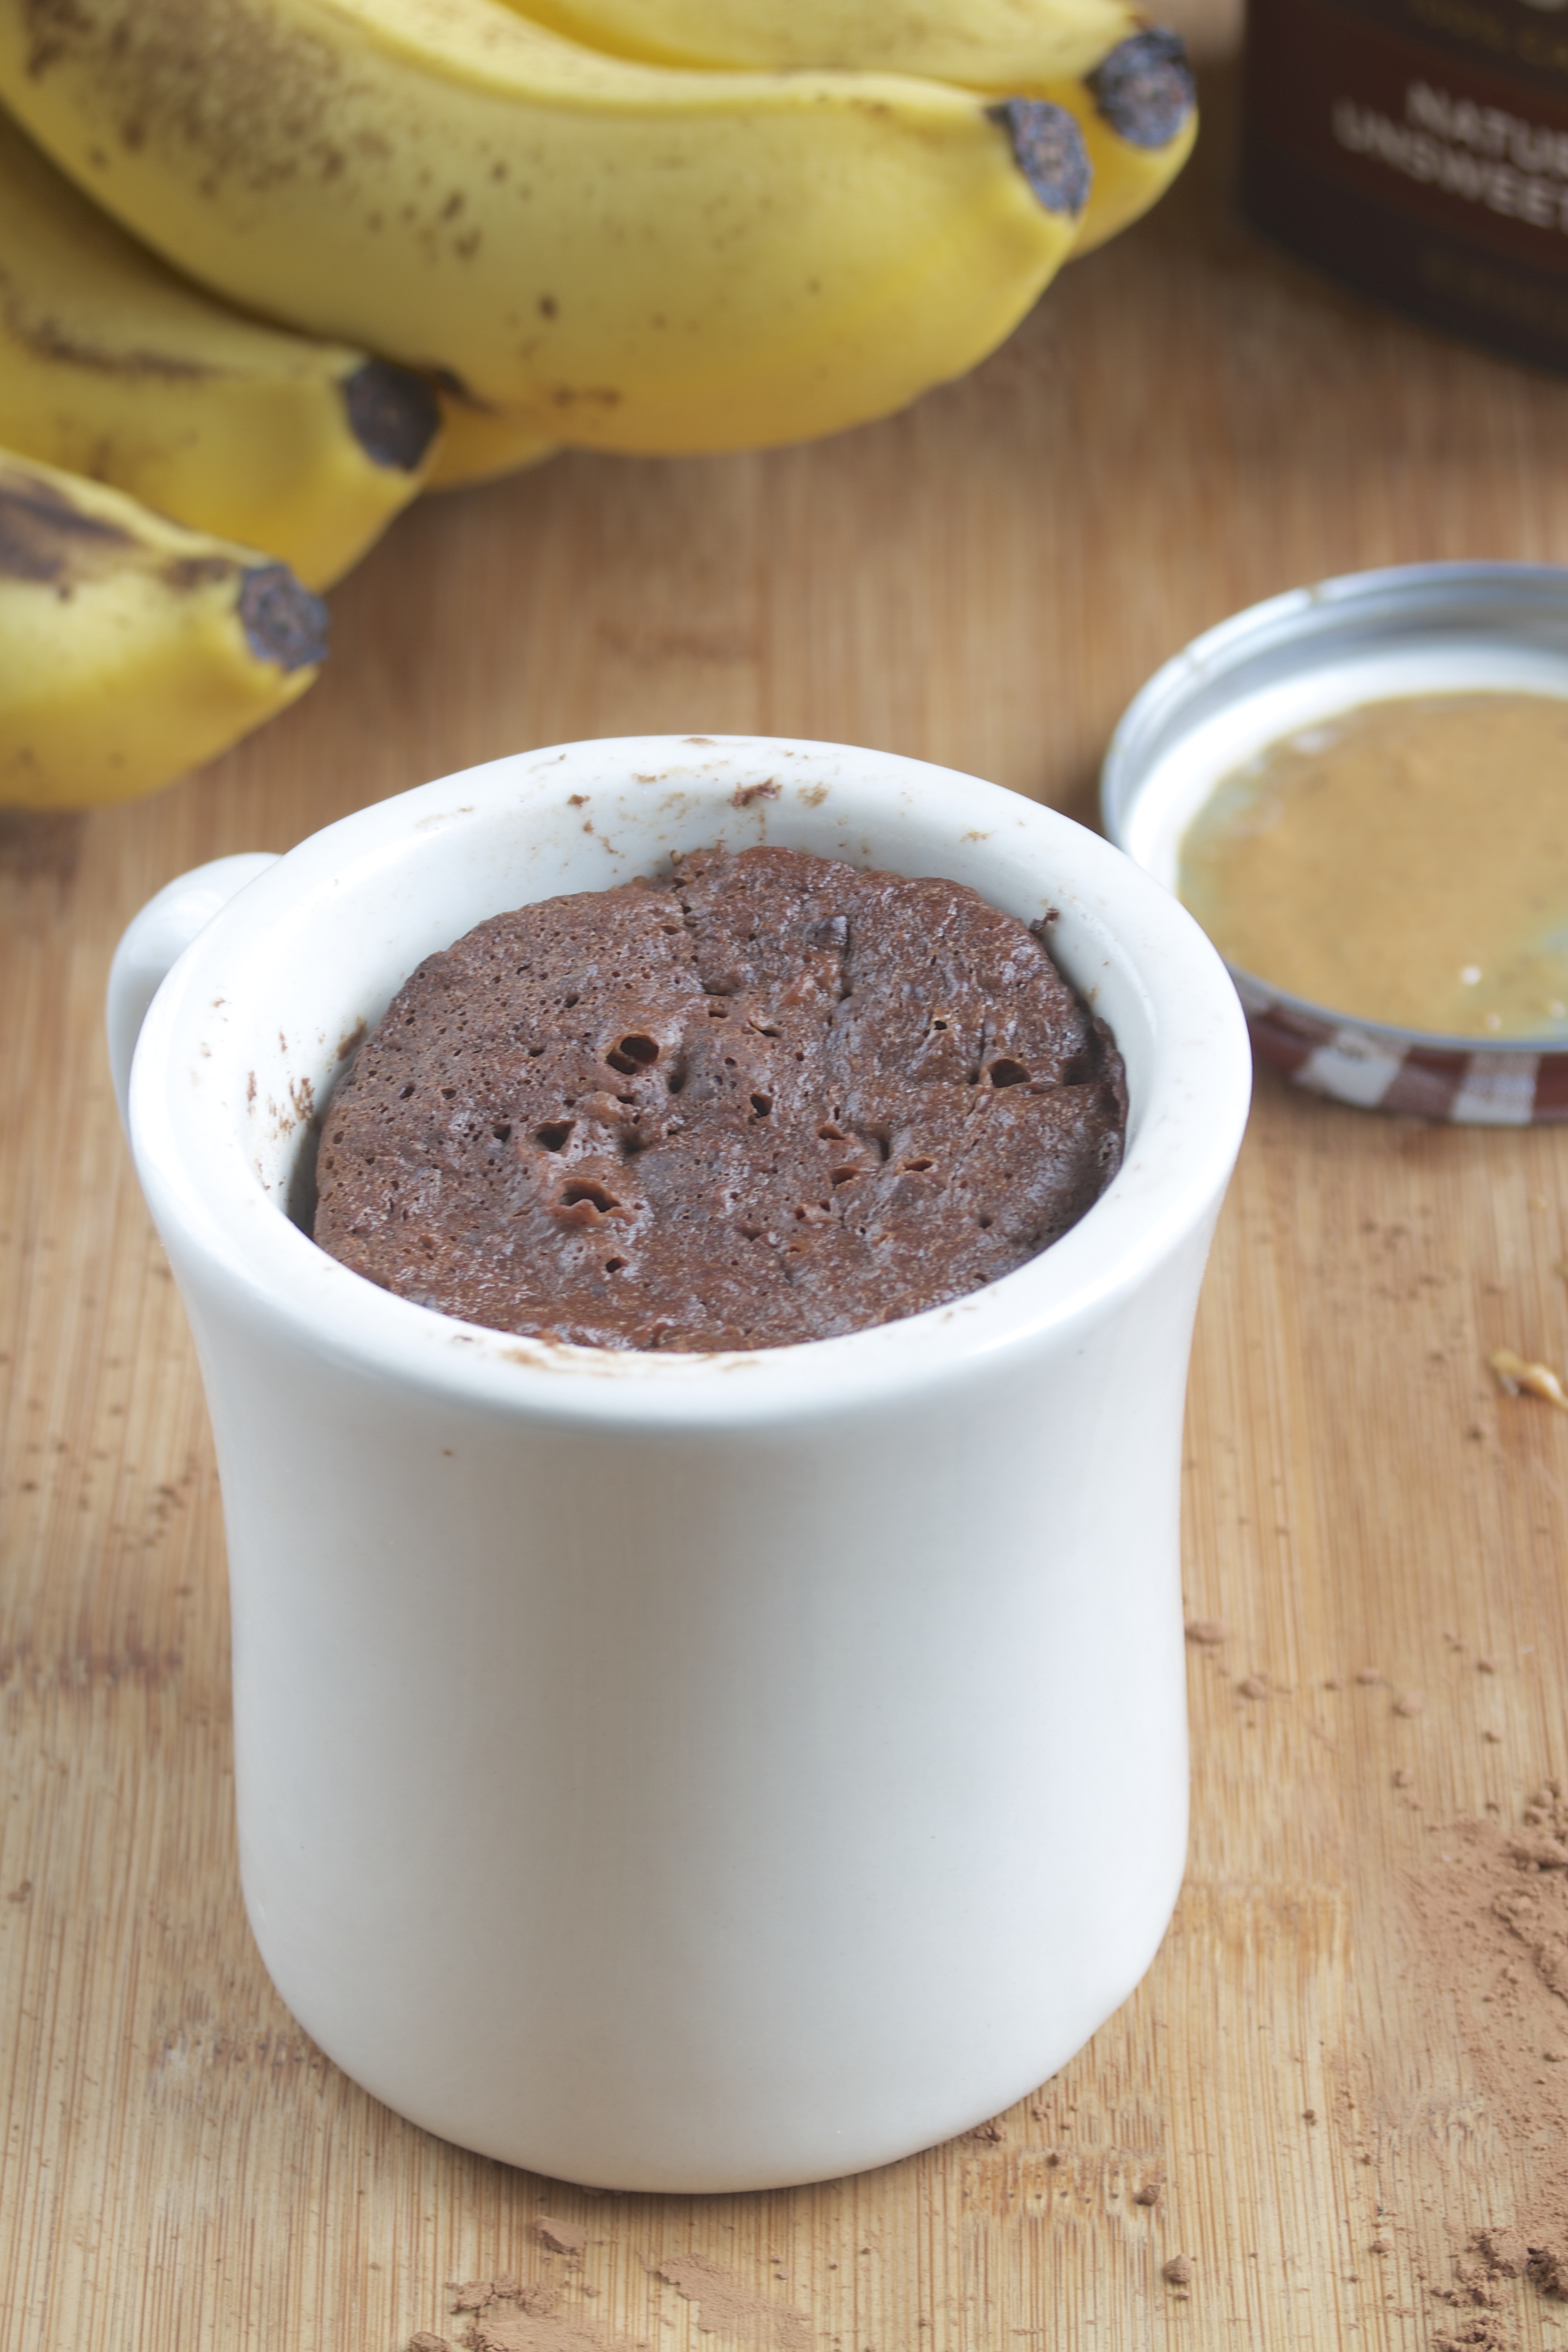
I’m a boring breakfast person. I like to eat the same thing every day until I get tired of it and find something new. For the past couple of months these have been my breakfasts. It’s fast, easy, and chocolate-flavored so it’s easy to love.
This has been one of my most popular recipes. I still have people commenting on the original post who’ve made it and loved it, and that’s a good feeling. The ingredients are fairly common and cheap, so even if you’re skeptical I’d say give it a try. It always tastes better with peanut butter or Nutella slathered on top so if you’re still not convinced I’d say try that.
I’ve never tried any variations but I’ve had readers mention this recipe works just as well with sweet potato puree, butternut squash, and applesauce. You can also mix in other ingredients like chopped walnuts, chocolate chips, or raisins(well, maybe not raisins).
Paleo Mug Cake
Prep time: 5 minutes
Cook time: 3 minutes
Ingredients(Makes 1 cake):
- 1 small ripe banana
- 1 1/2 Tablespoons almond butter(or any nut butter)
- 1 egg
- 2 heaping Tablespoons cocoa powder
Method:
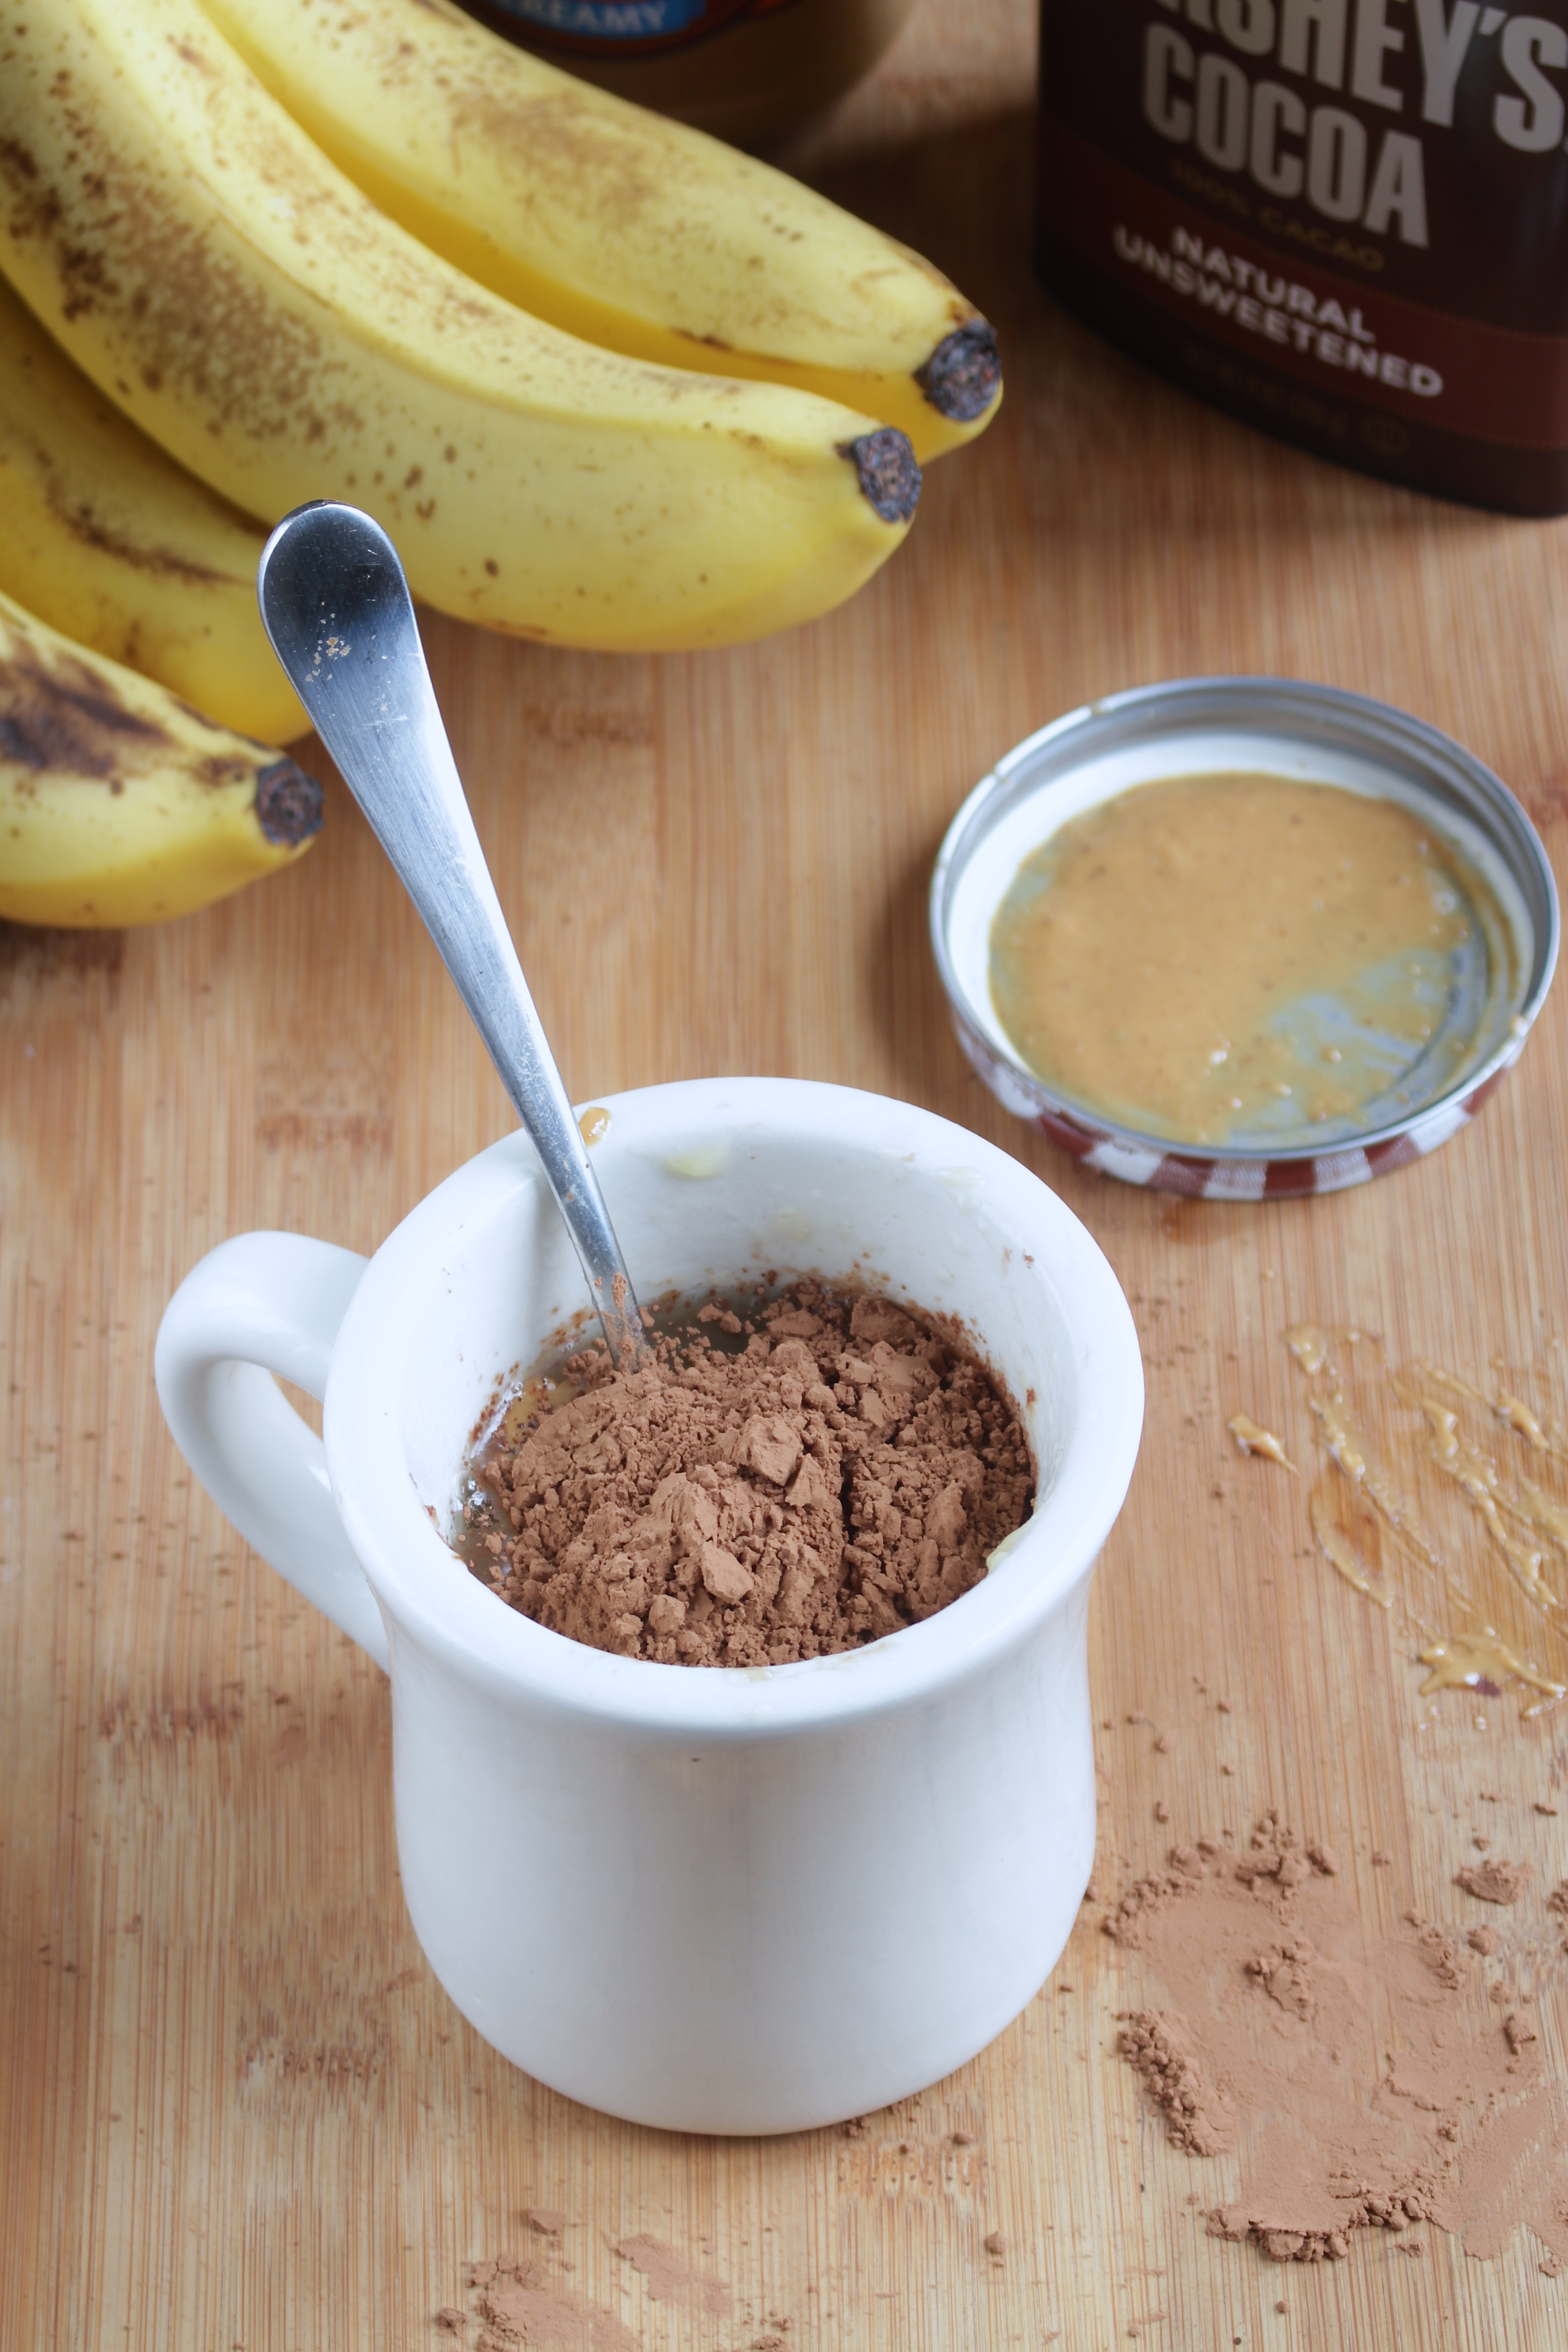
- With a fork, mash the banana into a smooth puree.
- Mix the almond butter, egg, cocoa powder into the banana puree until it forms an even batter.
- Fold in any mix-ins into the batter that you’d like. Otherwise, pour the batter into a mug or other microwave safe container. Be sure to only fill the container up to 2/3rds the way because it will expand in the microwave.
- Microwave on high for 2 and 1/2 minutes until the center is set. Carefully remove the mug from the microwave and enjoy hot, cold, or at room temperature.
If there’s any way to make peace after 2 weeks of not posting it’s this recipe.
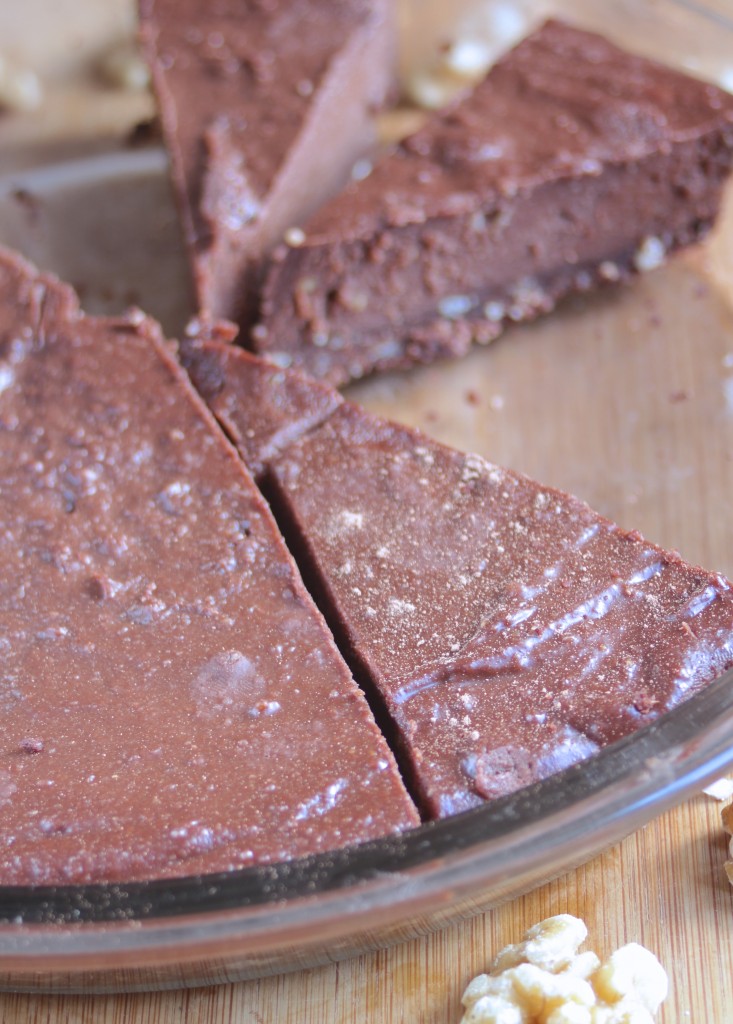
Spending the weekend with friends or family is great but usually leads to a week without recipes. Last weekend was the exception. My friend Eury visited and stayed with me and insisted(she’s going to hate that word–“suggested”) we make the raw fudge pie recipe she’s been working on.
Whether you’re gluten-free or gluten-full, vegan or a meat lover, there’s no denying raw desserts are just better than regular ones. They’re always fudgier, creamier, more flavorful, and easy to convince yourself they’re healthy so you can go back for seconds.

With permission I’m sharing Eury’s recipe which’ll easily win over the staunchest crowd. The cashew filling has the same taste and texture as any milk chocolate fudge. If you do not care about the health benefits of eating raw and only make this because raw desserts have amazing flavors and textures, feel free to substitute the maple syrup for honey, corn syrup, or simple syrup.
Raw Chocolate Fudge Pie
Prep time: 20 minutes
Cook time: 0 minutes
Ingredients(Makes 16 servings):
For the crust:
- 3/4 cup almonds
- 1/2 cup walnuts
- 1/4 cup + 2 Tablespoons unsweetened cocoa powder
- 3 Tablespoons maple syrup
- 1 teaspoon vanilla extract
For the filling:
- 2 cups cashews
- 1/2 cup maple syrup
- 1/2 cup water
- 1/2 cup coconut oil
- 3/4 cup unsweetened cocoa powder
- 2 teaspoons vanilla
Method:
- Pulse the almonds and walnuts in a food processor until finely chopped.
- Add in the syrup, cocoa powder, and vanilla for the crust and continue processing until it forms a mixed dough.
- Press the dough into a 9-inch pan until the bottom’s about 1/4-inch thick.
- For the filling, process the cashews into a fine powder. Make sure not to over blend them into cashew butter.
- Add in the maple syrup and water and continue blending until smooth.
- Add in the rest of the ingredients and process until it forms a smooth liquid filling.
- Pour the filling over the crust and spread into an even layer.
- Refrigerate for ~4 hours until the center has set. Cut with a sharp knife into servings. Refrigerate when not enjoying.

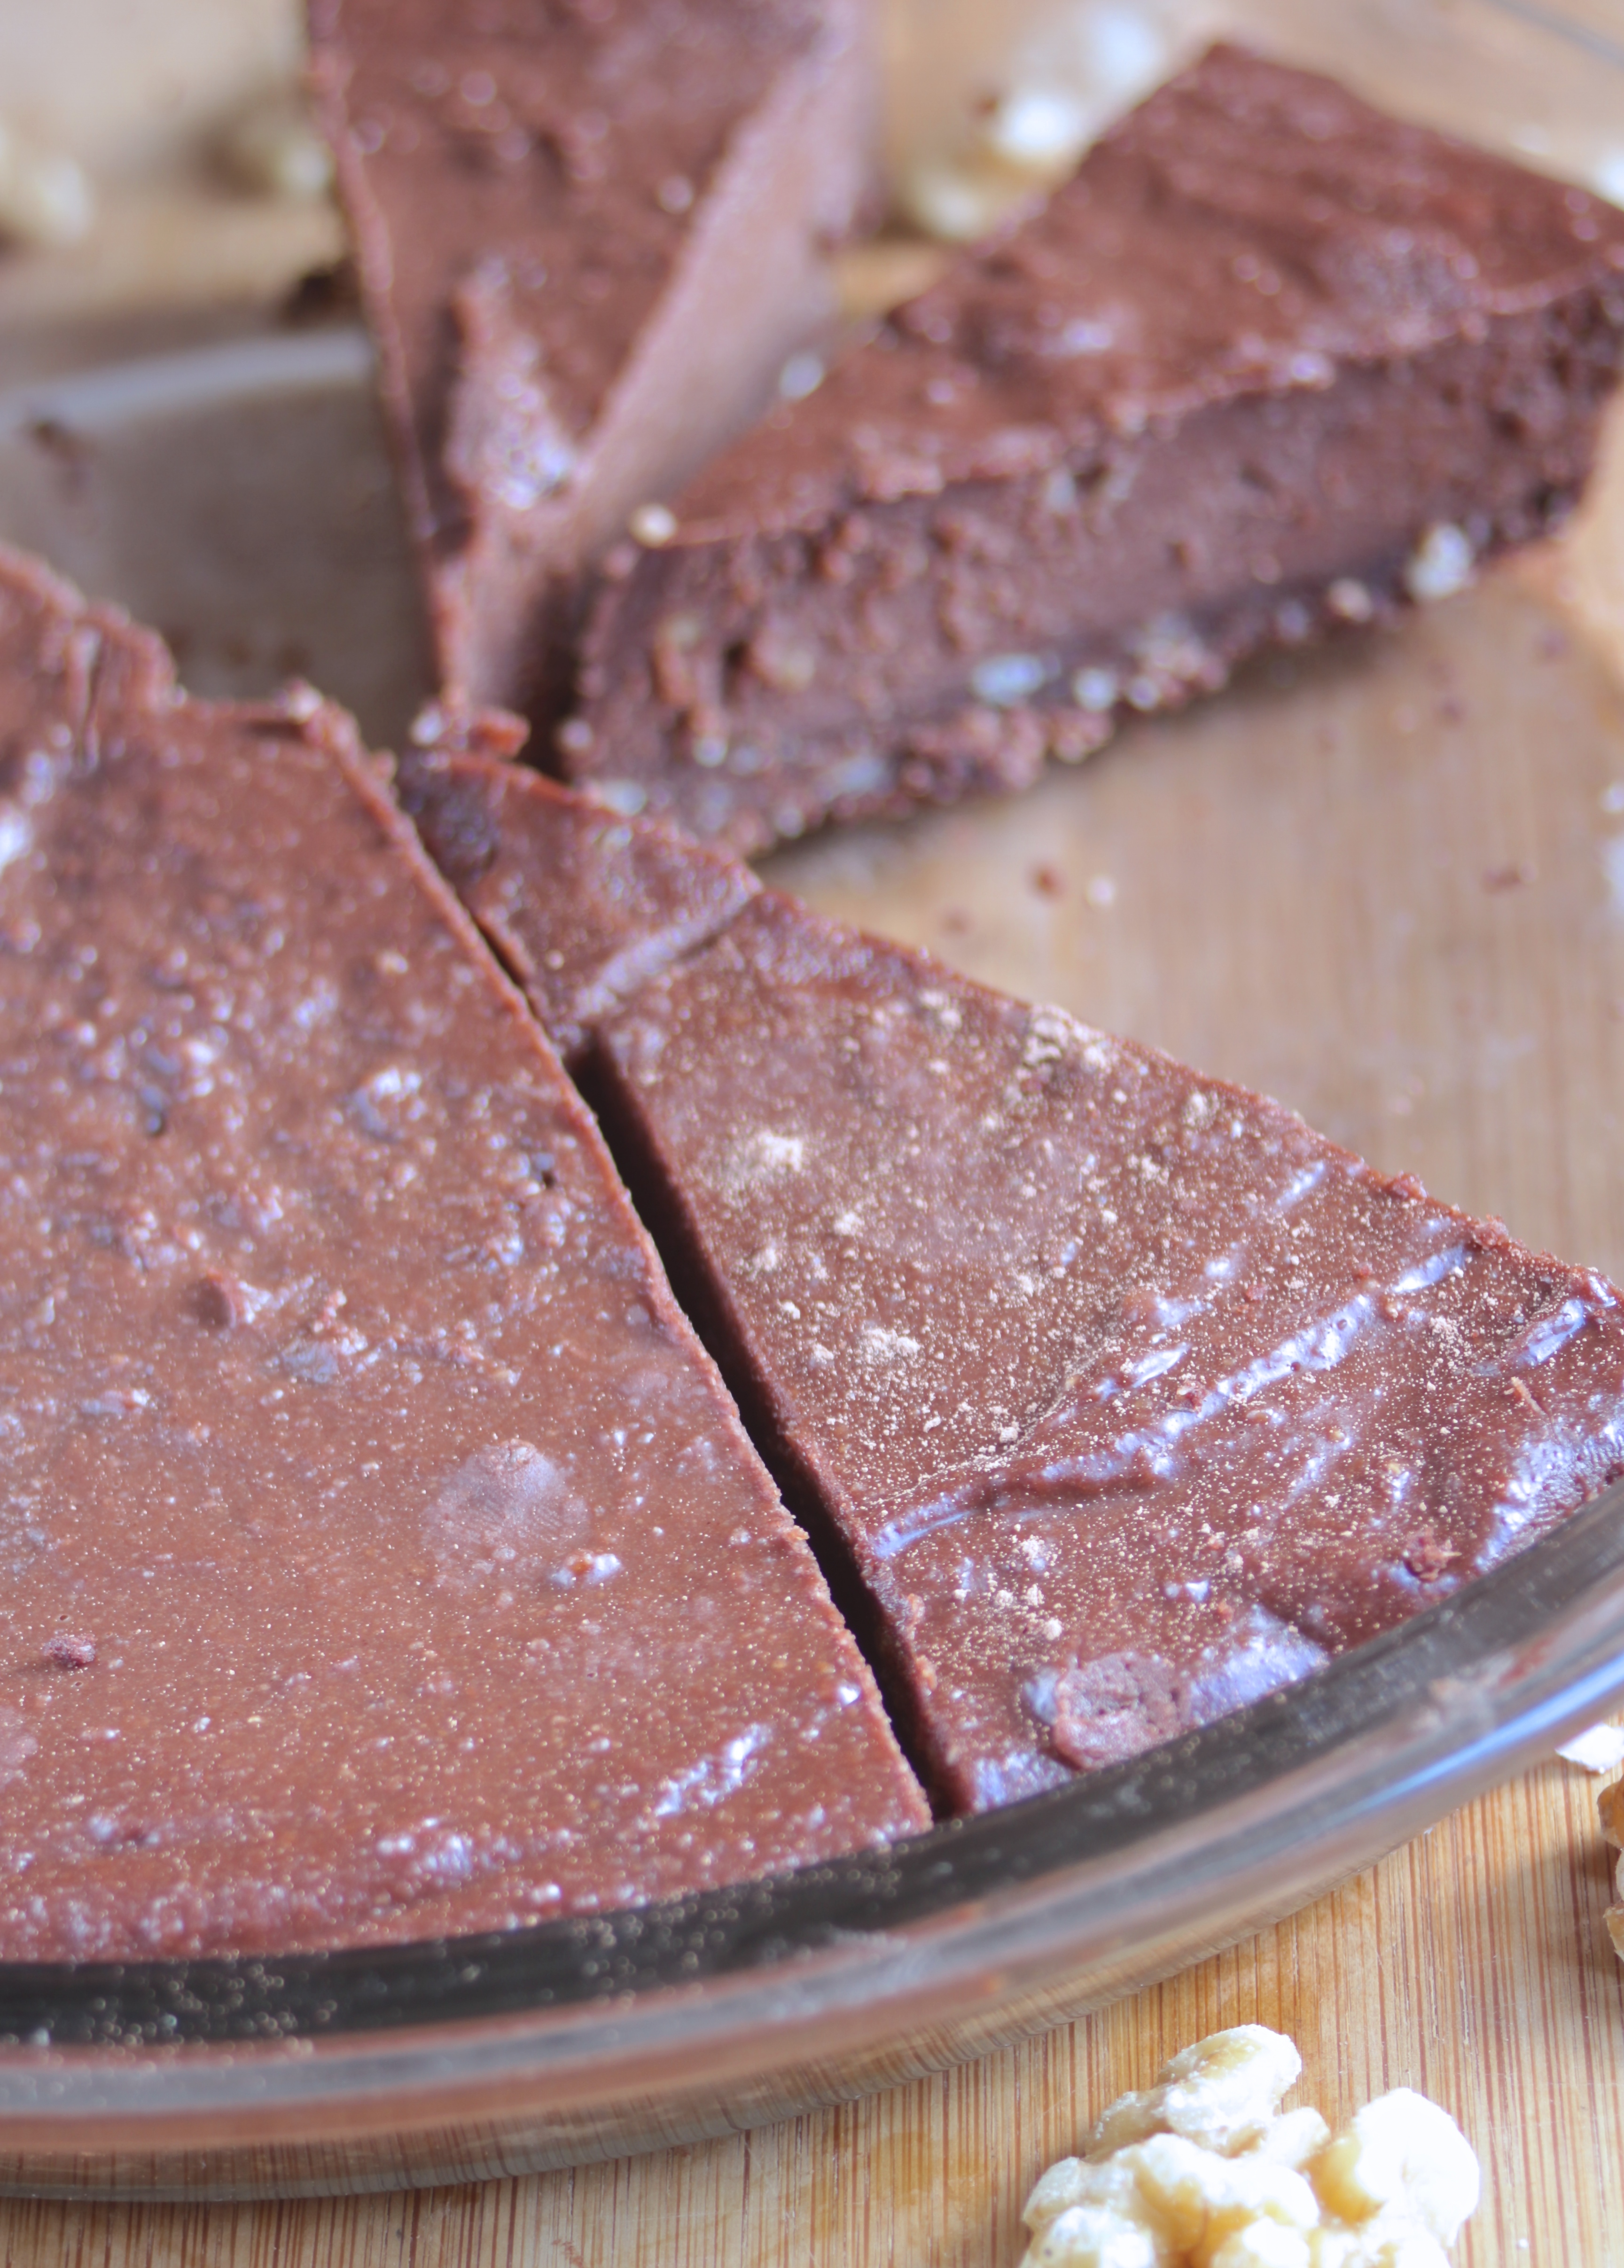
A better title for this recipe might be “My Boss’ Brownies”
Recently my boss, Dave Kerpen, has been on a healthy eating kick. He asked me if I knew any good gluten-free, sugar-free dessert recipes made with stevia. While gluten-free is nothing new for me, I haven’t done much sugar-free baking before, but since I love making food for other people this seemed like a fun challenge to me.
My first attempt at making sugar-free cookies came out edible but hardly servable; those are sitting in my freezer now for when I need a dessert and have nothing else. My second attempt—these brownies—were amazingly a winner. They aren’t my favorite brownies(those would be almond flour brownies), but they taste incredibly fudgy for something that’s low-fat and without added sugars.

These are sweetened with a combination of date paste and stevia which I find balance out the aftertaste stevia has. There’s also a little added cinnamon to mask the flavors of those. You can buy date paste at some stores or make your own by soaking dates overnight and pureeing them with a food processor and a little water.
Gluten-Free Sugar-Free Brownies
Prep time: 10 minutes
Cook time: 25 minutes
Ingredients(Makes 8 brownies):
- 1/2 cup + 2 Tablespoons gluten-free all purpose flour
- 1/2 cup date paste
- 1 1/2 Tablespoons stevia powder
- 6 Tablespoons butter, softened
- 1/4 cup cocoa powder
- 1 egg
- 1/2 teaspoon cinnamon
- 1/2 teaspoon baking soda
- 1/4 teaspoon salt

Method:
- Preheat your oven to 350 degrees.
- Combine all of the ingredients in a medium-sized bowl and mix well until they form a batter.
- Grease a small loaf pan and scoop the batter in. Spread it out into an even layer.
- Bake for 25 minutes until the brownies are cooked and set.
- Remove from the oven and let them cool slightly before slicing.

Cashews and chocolate are an underappreciated combination.
Peanuts and chocolate have Reese’s. Almonds and chocolate have Trader Joe’s chocolate covered almonds. Hazelnuts and chocolate have Nutella. When will cashews get their moment to shine?
Until they do, we’ll all have to settle for homemade, which really isn’t so bad once you taste it. The cashews have a nutty, roasted flavor that perfectly mixes with the cocoa powder’s bitterness. If you have powdered vanilla, it’s a great way to add another depth of flavor. Starting the day off with a spoonful of this on toast or oatmeal will certainly keep you happy and healthy.

You can use roasted or unroasted cashews for this recipe, whole or halves and pieces. Since you’re pureeing them into a butter anyway, I would recommend choosing whichever is cheapest at the store.
Chocolate Cashew Butter
Prep time: 15 minutes
Cook time: 0 minutes
Ingredients(Makes 16 ounces):
- 3 1/2 cups unsalted cashews
- 1 Tablespoon oil
- 1/4 cup cocoa powder
- 5 Tablespoons sugar
- 1/4 teaspoon salt
- 1/2 teaspoon vanilla powder(optional)

Method:
- Combine the cashews and oil in a food processor or high-speed blender and puree according to the manufacturer’s directions until the cashews make a smooth butter.
- Add in the cocoa powder, sugar, vanilla and salt and blend until its mixed.
- Move to a sealable container and store at room temperature when not eating.


Sometimes the simplest recipes are the best. I don’t think that’s true always, but certainly in this case it is. It’s amazing what you can make with just dates, walnuts, and cocoa powder.
This is something I’ve been making for years now. I think I learned the originally recipe from a food blog that no longer exists; it’s simple enough that you don’t have to write it down or bookmark a page to remember it. The trick to making these well is recognizing what consistency the dough should be; thankfully these are very forgiving and it’s easy to figure out after making a few batches(and you’ll want to make a few batches).

You can use any nut for this but I think walnuts are the best both for flavor and texture. They also pack a lot of omega-3s which are great for anyone’s diet. I’d suggest adding crushed walnuts into the batter dough after processing to give these a crunch.
Raw Walnut Brownies
Prep time: 10 minutes
Cook time: 0 minutes
Ingredients(Makes 8 squares):
- 2 cups pitted dates
- 1 cup walnuts
- 3 Tablespoons cocoa powder
- 1-2 Tablespoons water

Method:
- Blend the dates in a food processor until they are pulverized and start to stick together.
- Add the walnuts and continue blending until the dough starts to stick to itself. Add water as necessary if your ingredients are too dry to clump.
- Lastly add the cocoa powder and continue blending until it’s mixed in.
- Dump the processed ingredients onto a piece of parchment paper. With your hands, clump them together into a square or rectangle.
- Freeze the dough for 5-10 minutes until it’s firm and cut it into even sized squares. Store in the refrigerator for freshness.

You can add chocolate chips or other dried fruit to make this a little more exciting, but I think this is a perfect snack or pick-me-up for after a meal all on its own.

I hate to admit it but even after years of cooking long, detailed ingredient lists and steps still scare me away from a recipe. If there’s a way to do something easier, I’ll take it. These truffles are about as easy as they come; they’re JUST chocolate, butter, and Kahlua. How easy is that?(Shoot, now I probably owe Ina Garten royalties)
The hardest part about these is rolling them in cocoa powder, which isn’t hard at all; you just have to pay attention to the chocolate and and keep coating it until it can’t take in any more cocoa. When you’re done you get a nice, rich center and a mess-free surface.

When making anything that involves melting chocolate, it’s better to use a baking chocolate rather than chocolate chips. You can get high-quality baking chocolate near the cheese section in some grocery stores or use Baker’s brand chocolate. Unlike chocolate chips, this will melt easily and smoothly.
Easy Kahlua Truffles
Prep time: 40 minutes
Cook time: 0 minutes
Ingredients(Makes 14 truffles):
- 8oz semi-sweet or bittersweet chocolate
- 3 Tablespoons Kahlua liquor
- 2 Tablespoons butter
- 1/2 cup cocoa powder

Method:
- Melt the chocolate and butter in a microwave or over a double boiler.
- Mix the Kahlua into the chocolate and butter and beat until smooth and silky.
- Let the chocolate cool in a refrigerator until it’s a semi-soft solid. It shouldn’t be as hard as a rock, but it shouldn’t stick to your hand when you handle it.
- Pour about 1/2 cup of cocoa powder onto a flat plate.
- With a melon baller, form small balls of chocolate and drop them onto the plate of cocoa powder, rolling them around. Alternatively, you can take small amounts of chocolate, roll it into a ball in between your hands and drop it into the cocoa powder.
- Roll the truffle around in the cocoa powder until the outside is entirely coated and place it on a separate, clean plate. Repeat with all of the chocolate.
- When the truffles have set and hardened, shake off any excess cocoa powder and store them in a sealed container keeping the truffles at room temperature.


First granola bars, now granola; I’m on an oaty roll.
I’ve never been particularly fond of granola until I had Love Grown Foods’ cocoa granola last Summer. I didn’t realize something could be so chocolaty and also healthy. Every time I’ve made granola myself in the past it never clumped; this recipe clumps. The banana chips and peanut butter naturally pair with the chocolate. It’s really a winner.

Want to make it a little more delicious? Add in 1/3 cup of chocolate chips after the granola has cooled. This recipe is also vegan as is but I didn’t want to call it that because I ate mine with a big bowl of cow’s milk yogurt.
Elvis Granola
Prep time: 5 minutes
Cook time: 25 minutes
Ingredients(Makes about 3 1/2 cups):
- 2 1/2 cups quick-cooking oats*
- 1/3 cup maple syrup
- 2 Tablespoons oil
- 1/4 cup cocoa powder
- 2 teaspoons vanilla extract
- 1/4 teaspoon salt
- 1/2 cup roasted peanuts
- 1/2 cup banana chips, crushed
*To make this gluten-free make sure to use gluten-free oats.
Method:
- Preheat your oven to 350 degrees
- In a bowl, mix together the oats, maple syrup, oil, cocoa powder, vanilla extract, and salt thoroughly.
- Lay the oats out on baking tray and press down until the oats are about 1/2 an inch thick.
- Bake for 25 minutes, gently shaking the tray every 5 minutes or so.
- Remove from the oven and let the granola cool.
- Once cool, break the granola up and mix with the peanuts and banana chips. Store in a sealed container for up to a week.

I can’t understand people who eat granola with milk. Yogurt is granola’s best friend; you can’t break them up.

After the vanilla cupcakes were all gone, I was feeling empty inside. Well, not totally empty—just a little snackish. You know when you want something sweet but not anything really healthy. And since I still had my bag of coconut flour, I thought why not try some chocolate cupcakes?
These are just as good as the vanilla ones if you ask me. They do have a stronger taste of coconut, but I think it helps since the cocoa powder needs a fatty flavor to give it some chocolaty richness.

Paleo Chocolate Cupcakes
Prep time: 10 minutes
Cook time: 35 minutes
Ingredients(Makes a dozen cupcakes):
- 1/2 cup +2 Tablespoons coconut flour
- 4 eggs
- 2 egg whites
- 1/3 cup cocoa powder
- 1/2 cup cane or palm sugar
- 1 cup coconut milk
- 1/2 teaspoon baking soda
- 1 teaspoon vanilla extract

Method:
- Preheat your oven to 350 degrees and line 12 cupcake holders with paper liners.
- Mix together the coconut flour, eggs, egg whites, cocoa powder, sugar, coconut milk, baking soda, and vanilla extract in a large bowl.
- Slowly add just enough water so that the batter is slightly runny and easy to mix by hand without exerting too much effort.
- Scoop the batter evenly into the cupcake liners. Hit the pan against the counter a few times to even the batter and knock out any air bubbles.
- Bake for 30-35 minutes until the tops are firm to the touch.

If you like these cupcakes, you might like my paleo vanilla cupcake recipe.

This weekend I’m moving back to Providence, which means I’ll be just a short bus ride away from my favorite bakery again. Lord help me, my stomach, and my wallet.
I keep trying to make some of their desserts in my own kitchen to save a little money, and I think I’ve figured out another one. Their rum truffles from what I can tell are a blend of dates, walnuts, cocoa powder, and rum that tastes amazingly close to a “real” chocolaty dessert for something that’s made with whole foods. Since I’ve been kind of on a date ball kick lately, I wanted to see if I could make these, too.

Ps. If you’re ever around Providence you need to get the gluten-free chocolate pound cake that’s lurking in the back. I’m not even a big fan of cake but will happily eat a slice or two of that. It’s high on my list of recipes to recreate right behind this one. All I need is about a dozen taste testers who are willing to eat through a couple failed pound cake attempts.
Semi-Raw Chocolate Rum Truffles
Prep time: 15 minutes
Cook time: 0 minutes
Ingredients(Makes about a dozen):
- 3/4 cup walnut pieces
- 2 Tablespoons rum
- 8oz pitted dates
- 6 Tablespoons cocoa powder plus more for rolling
- Extra 1/4 cup walnut pieces(optional)

Method:
- Blend 3/4 cup walnut pieces in a food processor until it turns into a smooth, buttery consistency. You can add the rum at the beginning to help the walnuts blend faster.
- Add in the dates and continue processing until the dough sticks to itself and starts forming into a ball.
- Add in the cocoa powder and continue mixing until all of the powder has been worked into the ball.
- Stop the food processor. Add in the extra walnuts if using and work them into the dough using your hands.
- Pour some cocoa powder into a flat-bottom bowl or plate. Break off pieces of the truffle dough and roll them into circles in your hand, rolling them in the cocoa powder afterwards to cover all sides.
- Store at room temperature in an airtight container.

These were good but a little lacking in the rum flavor. Next time I might try extract for a stronger punch of flavor. The originals also look better than mine came out, but isn’t that how it always is?