Tag Archive: Healthy

My First Life By Dailyburn Recipe

Low Sugar Chocolate Hazelnut Granola

The internet is a crazy awesome place because it’s full of resources for any life you want to live, whether it’s gluten-free recipes, vegetarian restaurant hot spots, of just a chocolate-filled life.

I’m excited that Dailyburn‘s blog Life By Dailyburn asked me to be a recipe contributor for their site. They’re an amazing resource for anyone looking to be healthier and get whipped into shape.

The first recipe I made for them will hopefully pique your interest. If you want to cut out sugar in the morning but still eat flavorful food making your own is a must. This cocoa hazelnut granola recipe only uses maple syrup for sweetness to keep the flavor but ditch the processed sugars. It also tastes great and can save you money–what’s not to love?

And if you’re also looking for a healthier life and haven’t yet, follow them on Facebook and Pinterest for some daily inspirations to eat great and workout.

Homemade Peach Applesauce

Homemade Peach Applesauce

I’ve eaten more applesauce over the last weekend than I probably had over the last decade. If there was a bright side to getting my wisdom teeth taken out Friday, it was rediscovering how good applesauce can be(and mashed potatoes but I already knew that).

Before my surgery I bought a jar of applesauce–that was gone by the second day. By the third day I had a bunch of recently picked peaches I couldn’t bite into to save my life. Making them into more applesauce was a no-brainer.

This recipe has a lot less added sugars than it looks at first when you consider most of it gets poured out with the water. The final recipe has a much lower sweetness than the store-bought kind which the fresh, natural flavors make up for. 

Homemade Peach Applesauce

The peaches in this aren’t an overwhelming flavor. If you want more of a peachiness to this, I’d recommend replacing a few more of the apples with peaches and making sure they’re slightly over ripened. You can also use the same recipe with no peaches and have a great, basic applesauce.

Homemade Peach Applesauce

Prep time: 10 minutes

Cook time: 15 minutes

Ingredients(Makes 6 servings):

  • 5 Macintosh apples, cored and peeled
  • 4 medium sized peaches, pitted and peeled
  • Water
  • 1 cup sugar
  • 1 Tablespoon honey
  • 3/4 teaspoon cinnamon
  • 1/4 teaspoon nutmeg

Method:

  1. Add all of the apples and peaches into a large boiling pot that has a lid to it.
  2. Cover with just enough water that the fruit begins to float.
  3. Add in the sugar and stir gently.
  4. Boil the fruit and water on high heat until the apples turn slightly brown and are tender to touch(about 15 minutes)
  5. Drain as much of the water from the pot as you can.
  6. Put the fruit into a high-speed blender. Add in the honey, cinnamon, and nutmeg.
  7. Pulse until the sauce is smooth.
  8. Remove from the blender and let cool before serving. Store in an airtight container in the refrigerator for up to a week.

Easy Corn Esquites + A Giveaway

Easy Corn Esquites

It’s almost Labor Day, which means Summer’s almost over, which is pretty darn depressing.

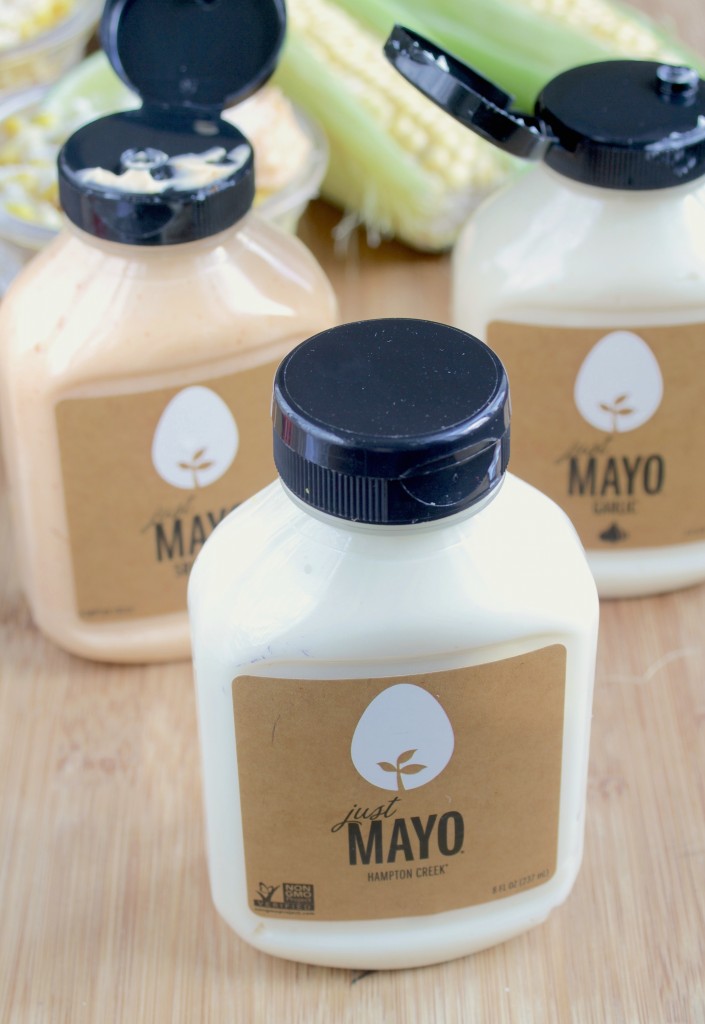
Luckily, I got to try the Just Mayo line from Hampton Creek for one last taste of Summer and a lift in spirit.

For my whole life I didn’t think I liked mayo up until a couple of years ago when I actually tried it and–surprise, surprise–got hooked on the savory spread. I loved all of the Hampton Creek flavors, but the sriracha was by far my favorite even though I don’t like regular sriracha. It’s just the right amount of spice and cooling creaminess.

The garlic came in a close second when I made a killer potato salad for a camping trip with it that got eaten up almost immediately. Overall I love that these get a ton of flavor from a few simple ingredients. 

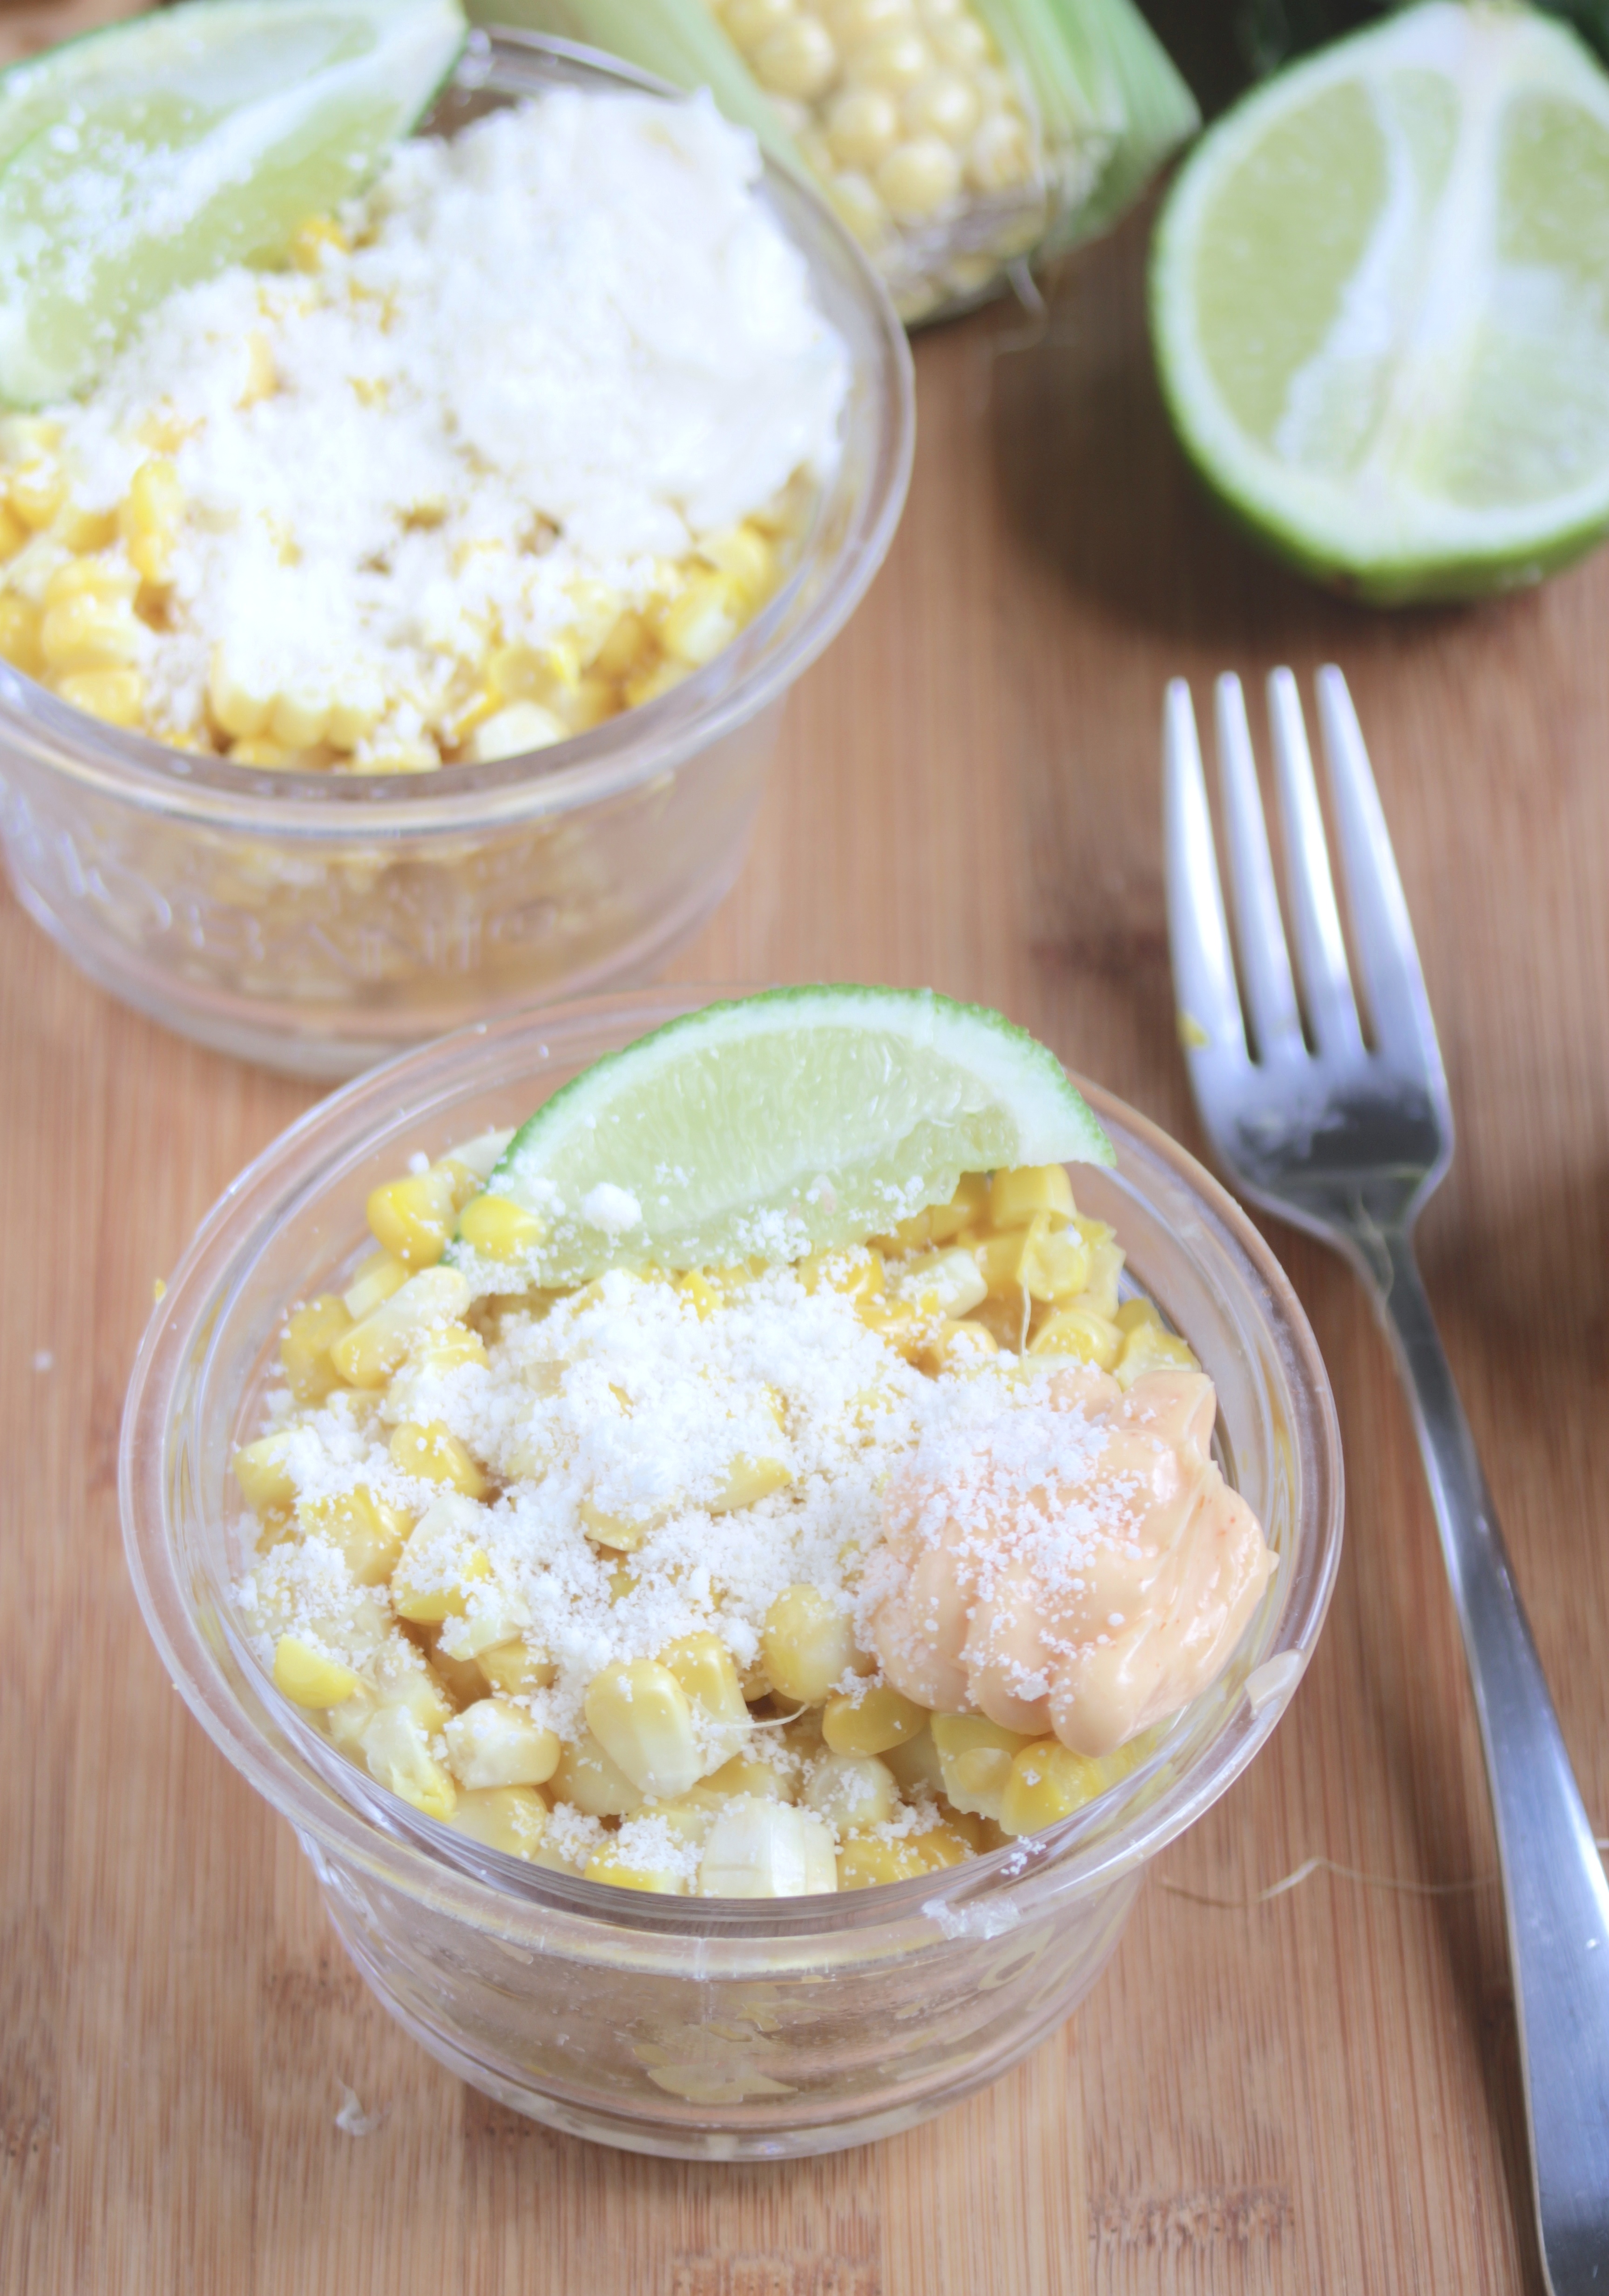
I had an amazing corn salad in the city with chipotle mayo, parmesan, and smoky spices. I knew I wanted to try it out myself because it highlighted the flavors of the ingredients with true simplicity. I’m sure you’ll eat more corn and mayo over Labor Day weekend but be sure to sneak this recipe in, too. 

Easy Corn Esquites

You can really prepare the corn for this anyway you want(you can even use frozen–just don’t admit to it). I roasted it since that’s easiest to do in a small NYC apartment but grilling would add a great smoky flavor.

Easy Corn Esquites

Prep time: 5 minutes

Cook time: 30 minutes

Ingredients(Makes 2 servings):

  • 2 corn cobs, washed and cleaned 
  • 2 Tablespoons oil
  • 1/4 teaspoon salt
  • 2 teaspoons lime juice
  • 1/4 teaspoon chili powder
  • 3 Tablespoons parmesan
  • 2 Tablespoons spicy mayo
  • 2 lime wedges for garnish

Method:

  1. Preheat your oven to 350 degrees.
  2. Lightly grease the corn with the oil.
  3. Roast for 30 minutes until the corn turns golden.
  4. After the corn’s cooled slightly, separate it from the cob with a sharp knife.
  5. In a large bowl mix together the corn, salt, lime juice, and chili powder.
  6. Scoop evenly into two small bowls. Sprinkle the parmesan and a dollop of mayo on top. Serve with a lime wedge at room temperature or slightly warmer.

Hampton Creek Mayo

Giveaway!

Want to try some of every flavor? Tell me what mayo-centric recipe you would make with it. Including what flavor/recipe you would use is optional but encouraged. I’ll pick a winner at random next Tuesday, the 2nd, right after Labor Day. Good luck! 

Roasted Garlic Parmesan Brussels Sprouts

Roasted Garlic Parmesan Brussels Sprouts

Brunch is the best meal there is; the competition’s not even close. You can go sweet or you can go savory(you can even go both!). It can be at 10am or 3pm. And even when it’s at 10am it’s always acceptable to have alcohol. What could be better?

My favorite items on any brunch menu are the different roasted vegetables(and home fries, but that’s a given). They’re something that you have to put time into but end up being well worth the effort.

If you want to wake up with savory food, these brussels sprouts are perfect for you. They’re just the right amount of crispy, satisfying, and seasoning to wake you up. Combine them with a runny yolk from a fried egg and they’re that much better. 

Roasted Garlic Parmesan Brussels Sprouts

Roasted Garlic Parmesan Brussel Sprouts

Prep time: 10 minutes

Cook time: 35 minutes

Ingredients(Makes 2 servings):

  • 1 1/2 cups brussels sprouts, trimmed and washed
  • 1/4 teaspoon salt
  • 3 Tablespoons olive oil, divided
  • 1 large garlic clove, diced
  • 3 Tablespoons parmesan

Method:

  1. Preheat your oven to 350 degrees.
  2. Toss the brussels sprouts, salt, and 2 Tablespoons of oil together.
  3. Lay the brussels out on a non-stick baking try and roast until slightly crispy(about 30 minutes for small-medium brussels)
  4. Heat the remaining Tablespoon oil in a pan over low heat.
  5. Toast the garlic until browning.
  6. Add in the brussels sprouts and toss until well mixed and they’re cooked in the oil.
  7. Remove from the heat. Sprinkle the parmesan over and toss until well-mixed.
  8. Serve hot. 

Creamy Feta and Sun-Dried Tomato Dip

Creamy Feta and Sun-dried Tomato Dip

The best way to be a better cook is find recipes you like and learn to make them your own way. Some months I get lazy and never make anything new–I don’t mind the same lunch every day of the week. But reading blogs help me find recipes good enough to break me out of my rut.

This recipe from Mississippi Kitchen looked too good to pass up. I never buy as much spinach and salad mixins as I should so instead I wanted to take the same flavors and put them in a dip. This has a ton of savory, salty flavor and surprisingly healthy ingredients. You could serve this at a party and they’d never know it’s a bean dip!

Creamy Feta and Sun-Dried Tomato Dip

Seasoning should be the last step of this recipe. There’s no right amount of salt–you’ll need to taste it and figure out how much to add based on how salty your ingredients are.

Always taste a sauce or dip with whatever you’re using for dipping; if you’re using vegetables you’ll want the dip to be on the saltier side, while if you’re using seasoned crackers keep it on the bland side.   

Creamy Feta and Sun-Dried Tomato Dip

Prep time: 5 minutes

Cook time: 0 minutes

Ingredients(Makes 12 servings):

  • 1 can cannellini beans, drained

  • 1/2 cup sun-dried tomatoes

  • 1/3 cup sour cream

  • 1/2 cup – 3/4 cup buttermilk

  • 4oz feta, crumbled

  • Salt to taste

  • Vegetables for dipping 

Method:

  1. Add the beans to a food processor and pulse until smooth.

  2. Add in the tomatoes, sour cream, 1/2 cup buttermilk, and feta and process.

  3. Slowly add more buttermilk to get the dip to the right consistency while processing. Only add as much as you’d like to make it the right thickness.

  4. When done, season to taste with salt.

  5. Serve at room temperature. Store in an air-tight container in the refrigerator when not enjoying. 

Vegan PB & J Smoothie

Vegan PB & J Smoothie

I somehow have become a morning exerciser. The first day of waking up, rolling out of bed, and putting on gym shorts instead of a pot of coffee was rough. The second was just as rough. But every day since it’s gotten a little easier.

After working out I’ve been more inclined to make a smoothie than bowl of oatmeal or anything else. It’s quick and easy to drink when getting ready for work. I’ve been trying different mixes to keep things interesting every time and this one is a winner.

It has the classic flavor of the inside of a PB & J, just in liquid form. It’s perfectly sweet and even packs some greens in it, too, if you opt in for the spinach(which you won’t be able to see or taste fully blended–I promise). 

IMG_7064_2

If you’re not a fan of peanut butter or just don’t have any lying around try making this with almond butter or even coconut butter.      

Vegan PB & J Smoothie

Prep time: 5 minutes

Cook time: 0 minutes

Ingredients(Makes 1 meal serving or 2 snack servings):

  • 1 medium banana

  • 1/2 cup frozen mixed berries

  • 1/3 cup frozen spinach

  • 2 Tablespoons peanut butter

  • 1/2 cup water

Method:

  1. Add all of the ingredients to a high-power blender. 

  2. Pulse briefly and then blend until the ingredients make a creamy smoothie. Add water if necessary to make smooth and creamy.

  3. Pour into a tall glass and drink cold. 

Chocolate Covered Strawberry Smoothie

Chocolate Covered Strawberry Smoothie

Now that it’s no longer cold out it’s hard to get excited about a bowl of oatmeal or stove-cooked breakfast in the morning. It’s a lot easier to down a quick smoothie–especially if it’s chocolate. 

You’ll be surprised how much this smoothie tastes like a chocolate covered strawberry, especially since it’s fat-free. There are no chocolate chips in the recipe but I wouldn’t stop you from adding a few on top. 

Personally I think chocolate and raspberries or chocolate and blueberries go together just as well as chocolate and strawberries. I’d recommend trying this one out with any berry you love most. 

Chocolate Covered Strawberry Smoothie

If you‘re a grown-up and don’t have chocolate milk you can use regular milk and add a little cocoa powder and a tablespoon of sugar or honey. Adding protein powder or chia seeds will help make this more fulling for a complete meal.   

Chocolate Covered Strawberry Smoothie

Prep time: 5 minutes

Cook time: 0 minutes

Ingredients(Makes 1 serving):

Method:

  1. Add all of the ingredients to a high-power blender. 

  2. Pulse briefly and then blend until the ingredients make a creamy smoothie.

  3. Pour into a tall glass and drink cold. 

Raw Chocolate Fudge Pie

Rich raw chocolate fudge pie

If there’s any way to make peace after 2 weeks of not posting it’s this recipe.

Spending the weekend with friends or family is great but usually leads to a week without recipes. Last weekend was the exception. My friend Eury visited and stayed with me and insisted(she’s going to hate that word–“suggested”) we make the raw fudge pie recipe she’s been working on.

Whether you’re gluten-free or gluten-full, vegan or a meat lover, there’s no denying raw desserts are just better than regular ones. They’re always fudgier, creamier, more flavorful, and easy to convince yourself they’re healthy so you can go back for seconds.

Rich raw chocolate fudge pie

With permission I’m sharing Eury’s recipe which’ll easily win over the staunchest crowd. The cashew filling has the same taste and texture as any milk chocolate fudge.  If you do not care about the health benefits of eating raw and only make this because raw desserts have amazing flavors and textures, feel free to substitute the maple syrup for honey, corn syrup, or simple syrup. 

Raw Chocolate Fudge Pie

Prep time: 20 minutes

Cook time: 0 minutes

Ingredients(Makes 16 servings):

For the crust:

  • 3/4 cup almonds
  • 1/2 cup walnuts
  • 1/4 cup + 2 Tablespoons unsweetened cocoa powder
  • 3 Tablespoons maple syrup
  • 1 teaspoon vanilla extract

For the filling:

  • 2 cups cashews
  • 1/2 cup maple syrup
  • 1/2 cup water
  • 1/2 cup coconut oil
  • 3/4 cup unsweetened cocoa powder
  • 2 teaspoons vanilla

Method:

  1. Pulse the almonds and walnuts in a food processor until finely chopped.
  2. Add in the syrup, cocoa powder, and vanilla for the crust and continue processing until it forms a mixed dough.
  3. Press the dough into a 9-inch pan until the bottom’s about 1/4-inch thick.
  4. For the filling, process the cashews into a fine powder. Make sure not to over blend them into cashew butter.
  5. Add in the maple syrup and water and continue blending until smooth.
  6. Add in the rest of the ingredients and process until it forms a smooth liquid filling.
  7. Pour the filling over the crust and spread into an even layer.
  8. Refrigerate for ~4 hours until the center has set. Cut with a sharp knife into servings. Refrigerate when not enjoying.

Peanut Butter Banana Refuel Smoothie

Peanut Butter Banana Smoothie

Marathon Monday is just a week away. Growing up in Massachusetts, it was always a big deal. I was shocked to find out it wasn’t actually a national holiday and most people work on Marathon Monday.

This year Stonyfield Greek is the official yogurt of the 2014 Boston Marathon. They asked their Clean Plate Club members to write how Stonyfield Greek helps us through the marathon of life.

When I was marathon training, there were 4 foods I constantly ate: Peanut butter, bananas, oatmeal, and greek yogurt. After so many weeks you learn the little ways to not make every snack or meal taste like the last.

Even though I haven’t registered for a marathon since 2011, I still make working out and running a routine. Making a smoothie instead of a meal is an easy, tasty way to refuel and move on to the next part of my day.

Peanut Butter Banana Smoothie

I never get tired of this recipe. It’s not too sweet or overly peanuty; it’s just the right balance of ingredients to be healthy and perfectly flavorful.

Peanut Butter Banana Smoothie

Prep time: 5 minutes

Cook time: 0 minutes

Ingredients(Makes 1 big or 2 small servings):

  • 1 banana, sliced
  • 1 Tablespoon peanut butter
  • 1 5.oz Stonyfield vanilla yogurt
  • 1/2 cup milk
  • 6-8 ice cubes

Method:

  1. Combine the banana, peanut butter, yogurt, and milk in a blender and mix until smooth.
  2. Add in the ice cubes and continue blending until they’re completely crushed and mixed in.
  3. Pour and serve cold.

Peanut Butter Banana Smoothie

Packed Lunch: Rice & Bean Bowl

Homemade rice and bean bowls for a healthy and affordable packed lunch

I’m one of those people at the office who brings in lunch every day. The same lunch every single day. The Huffington Post wrote an article about us.

Sure packing a lunch every day can get tiresome, but it’s cheaper and healthier to do it yourself. It’s hard to argue with that.

If you’re on board the lunch-packing train, even just a few days a week, this lunch will definitely keep you satisfied. It’s just as good as a Chipotle bowl but costs about $2 or less. It’s also perfect for packing on a Sunday night to have later in the week since you don’t have to worry about sogging bread or spoiling meat.

For a simple step-by-step photo guide, scroll below the recipe.

Rice & Bean Bowl

Prep time: 5 minutes

Cook time: 4 minutes

Ingredients(Makes 1 lunch):

  • 1 cup cooked brown rice
  • 3/4 cup(1/2 can) black beans
  • 3/4 cup fresh or frozen vegetables
  • 1/4 cup salsa
  • 1/4 cup shredded cheese

Method:

  1. In a microwavable bowl, layer the rice, beans, vegetables, salsa, and cheese in that order.
  2. Cover tight with a lid. Don’t keep at room temperature for more than 6 hours.
  3. When ready, microwave on full power for 3-4 minutes.

An easy, healthy and affordable meal you can pack for lunch every day