Tag Archive: Food

The New Petite Creme + A Smoothie

IMG_7302_2

As someone who’s eaten Greek yogurt religiously for 5 years, I was suspicious when Stonyfield announced a new protein-packed non-yogurt.

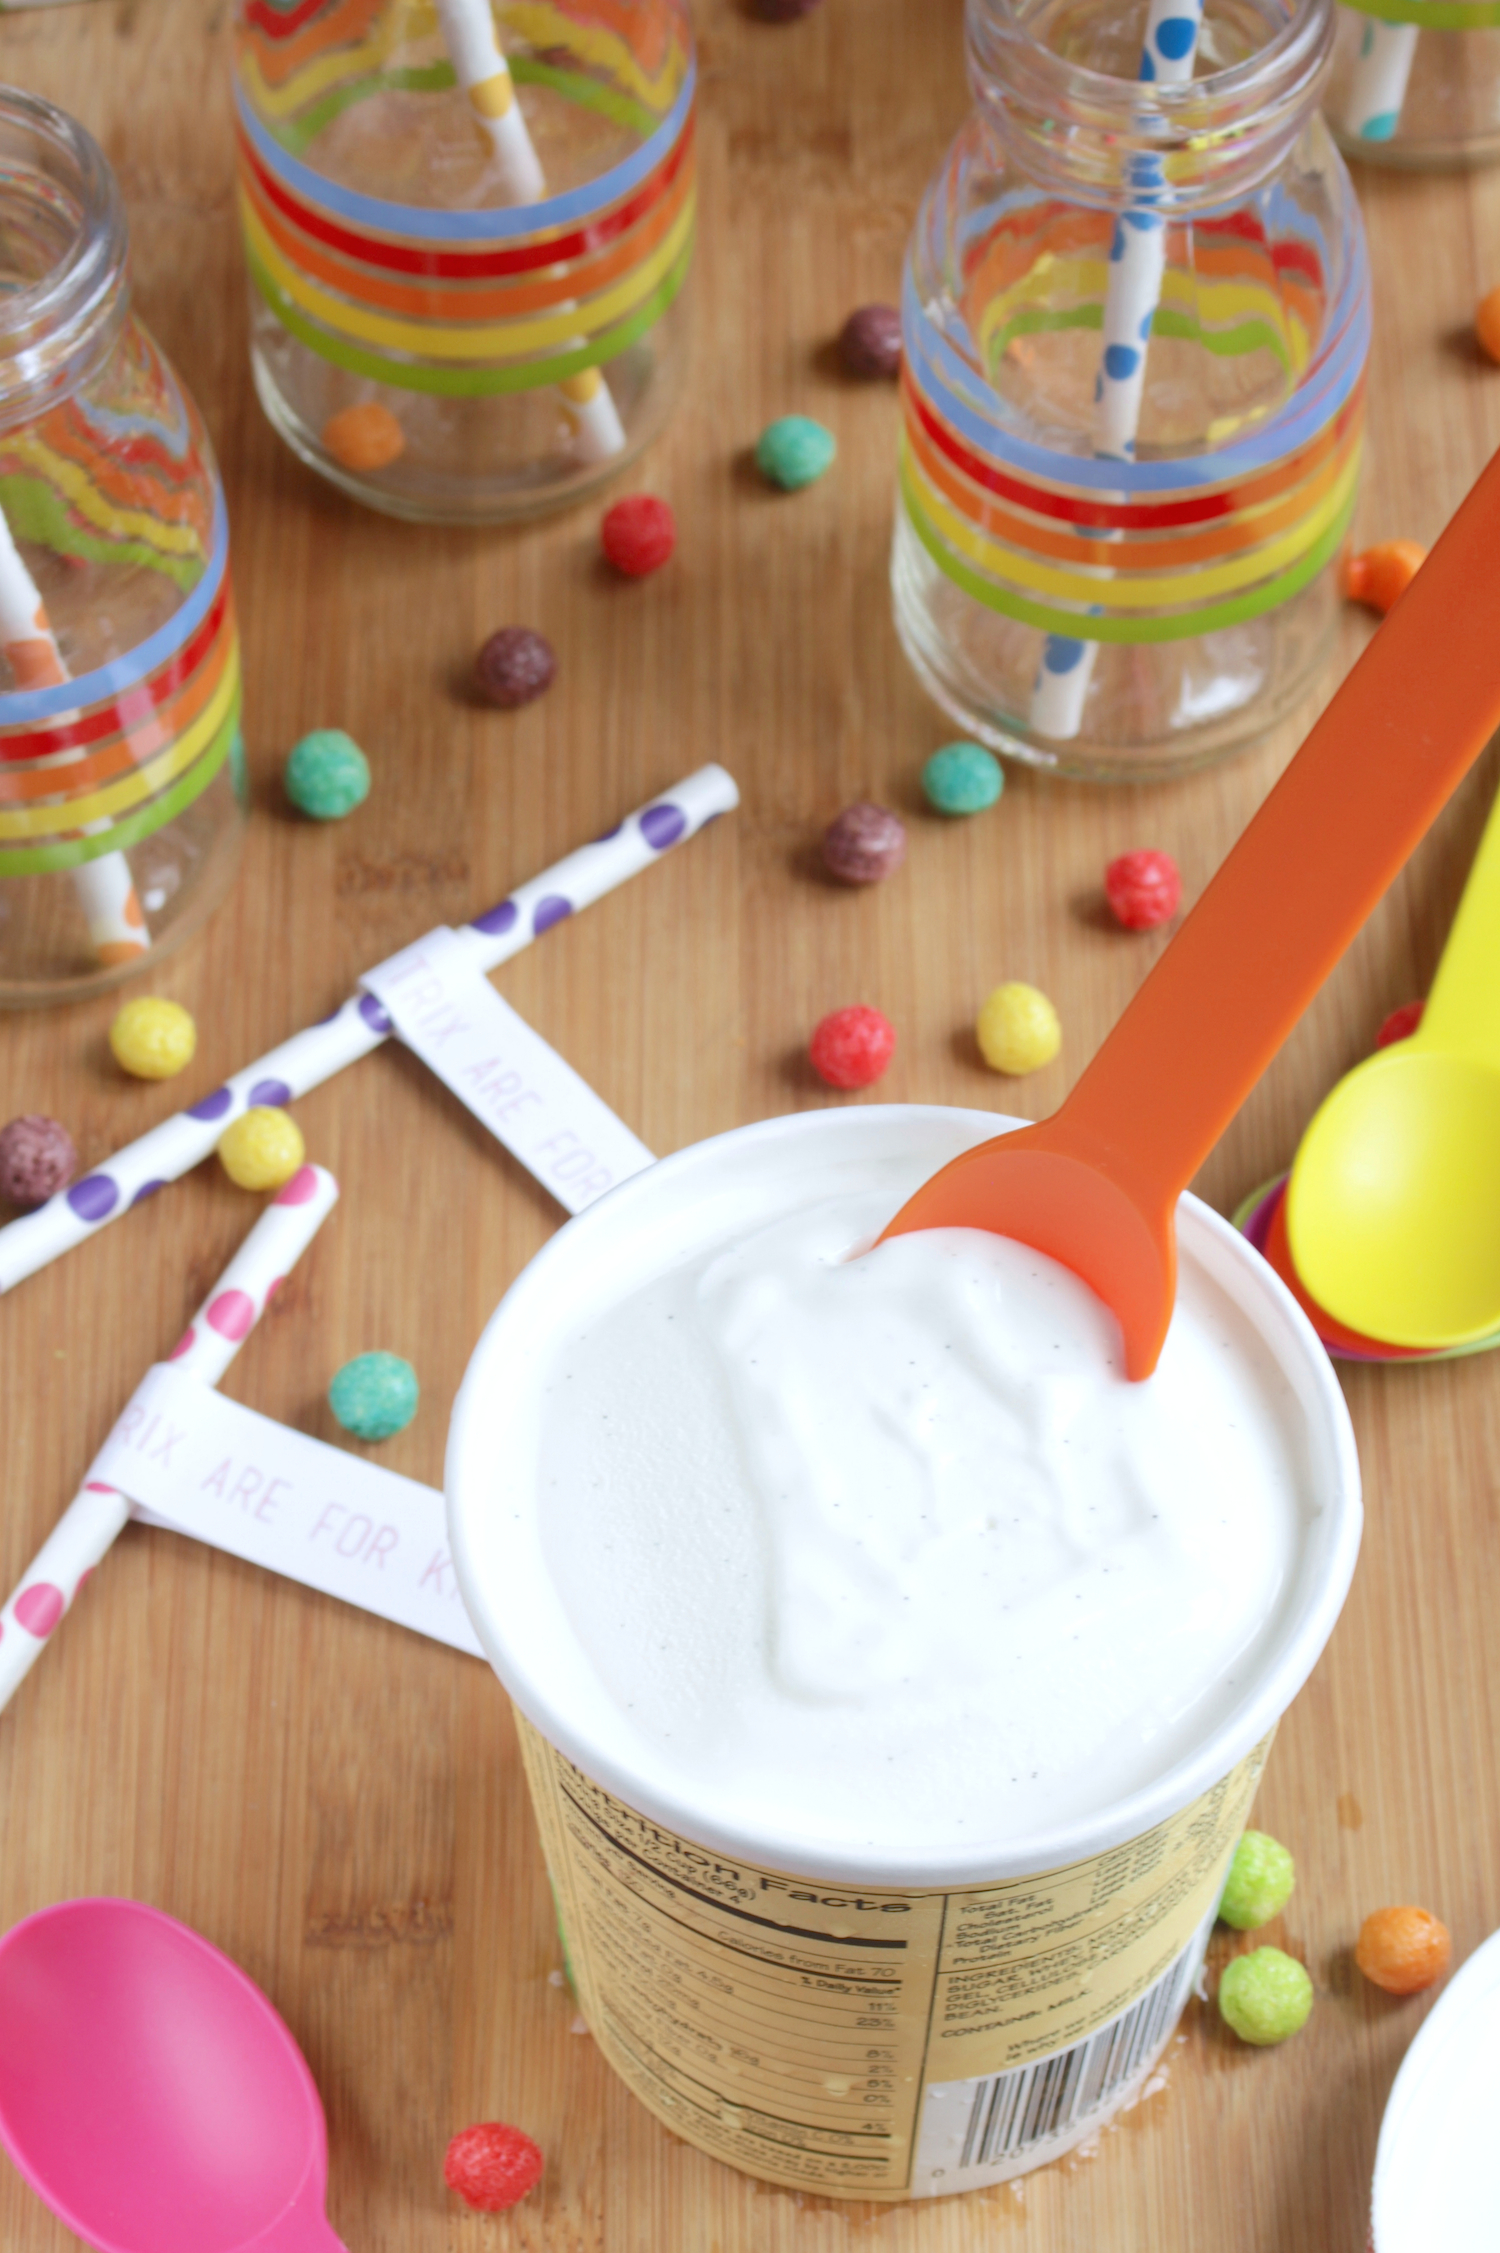
In July I got to go to Stonyfield’s launch party and try them out. It was swanky, it was fun, and–most importantly–it was delicious. The Petite Creme(technically a cheese and not a yogurt) is just as velvety smooth and sweet as you could hope.

It comes in 7 flavors; my favorite were the vanilla, which tastes like a rich vanilla bean, the strawberry, which tasted like a strawberry cream candy, and the plain. I rarely use plain greek yogurt in savory dishes because of the strong tang it has but this is something I’d put regularly on soup, dips, or even tacos.

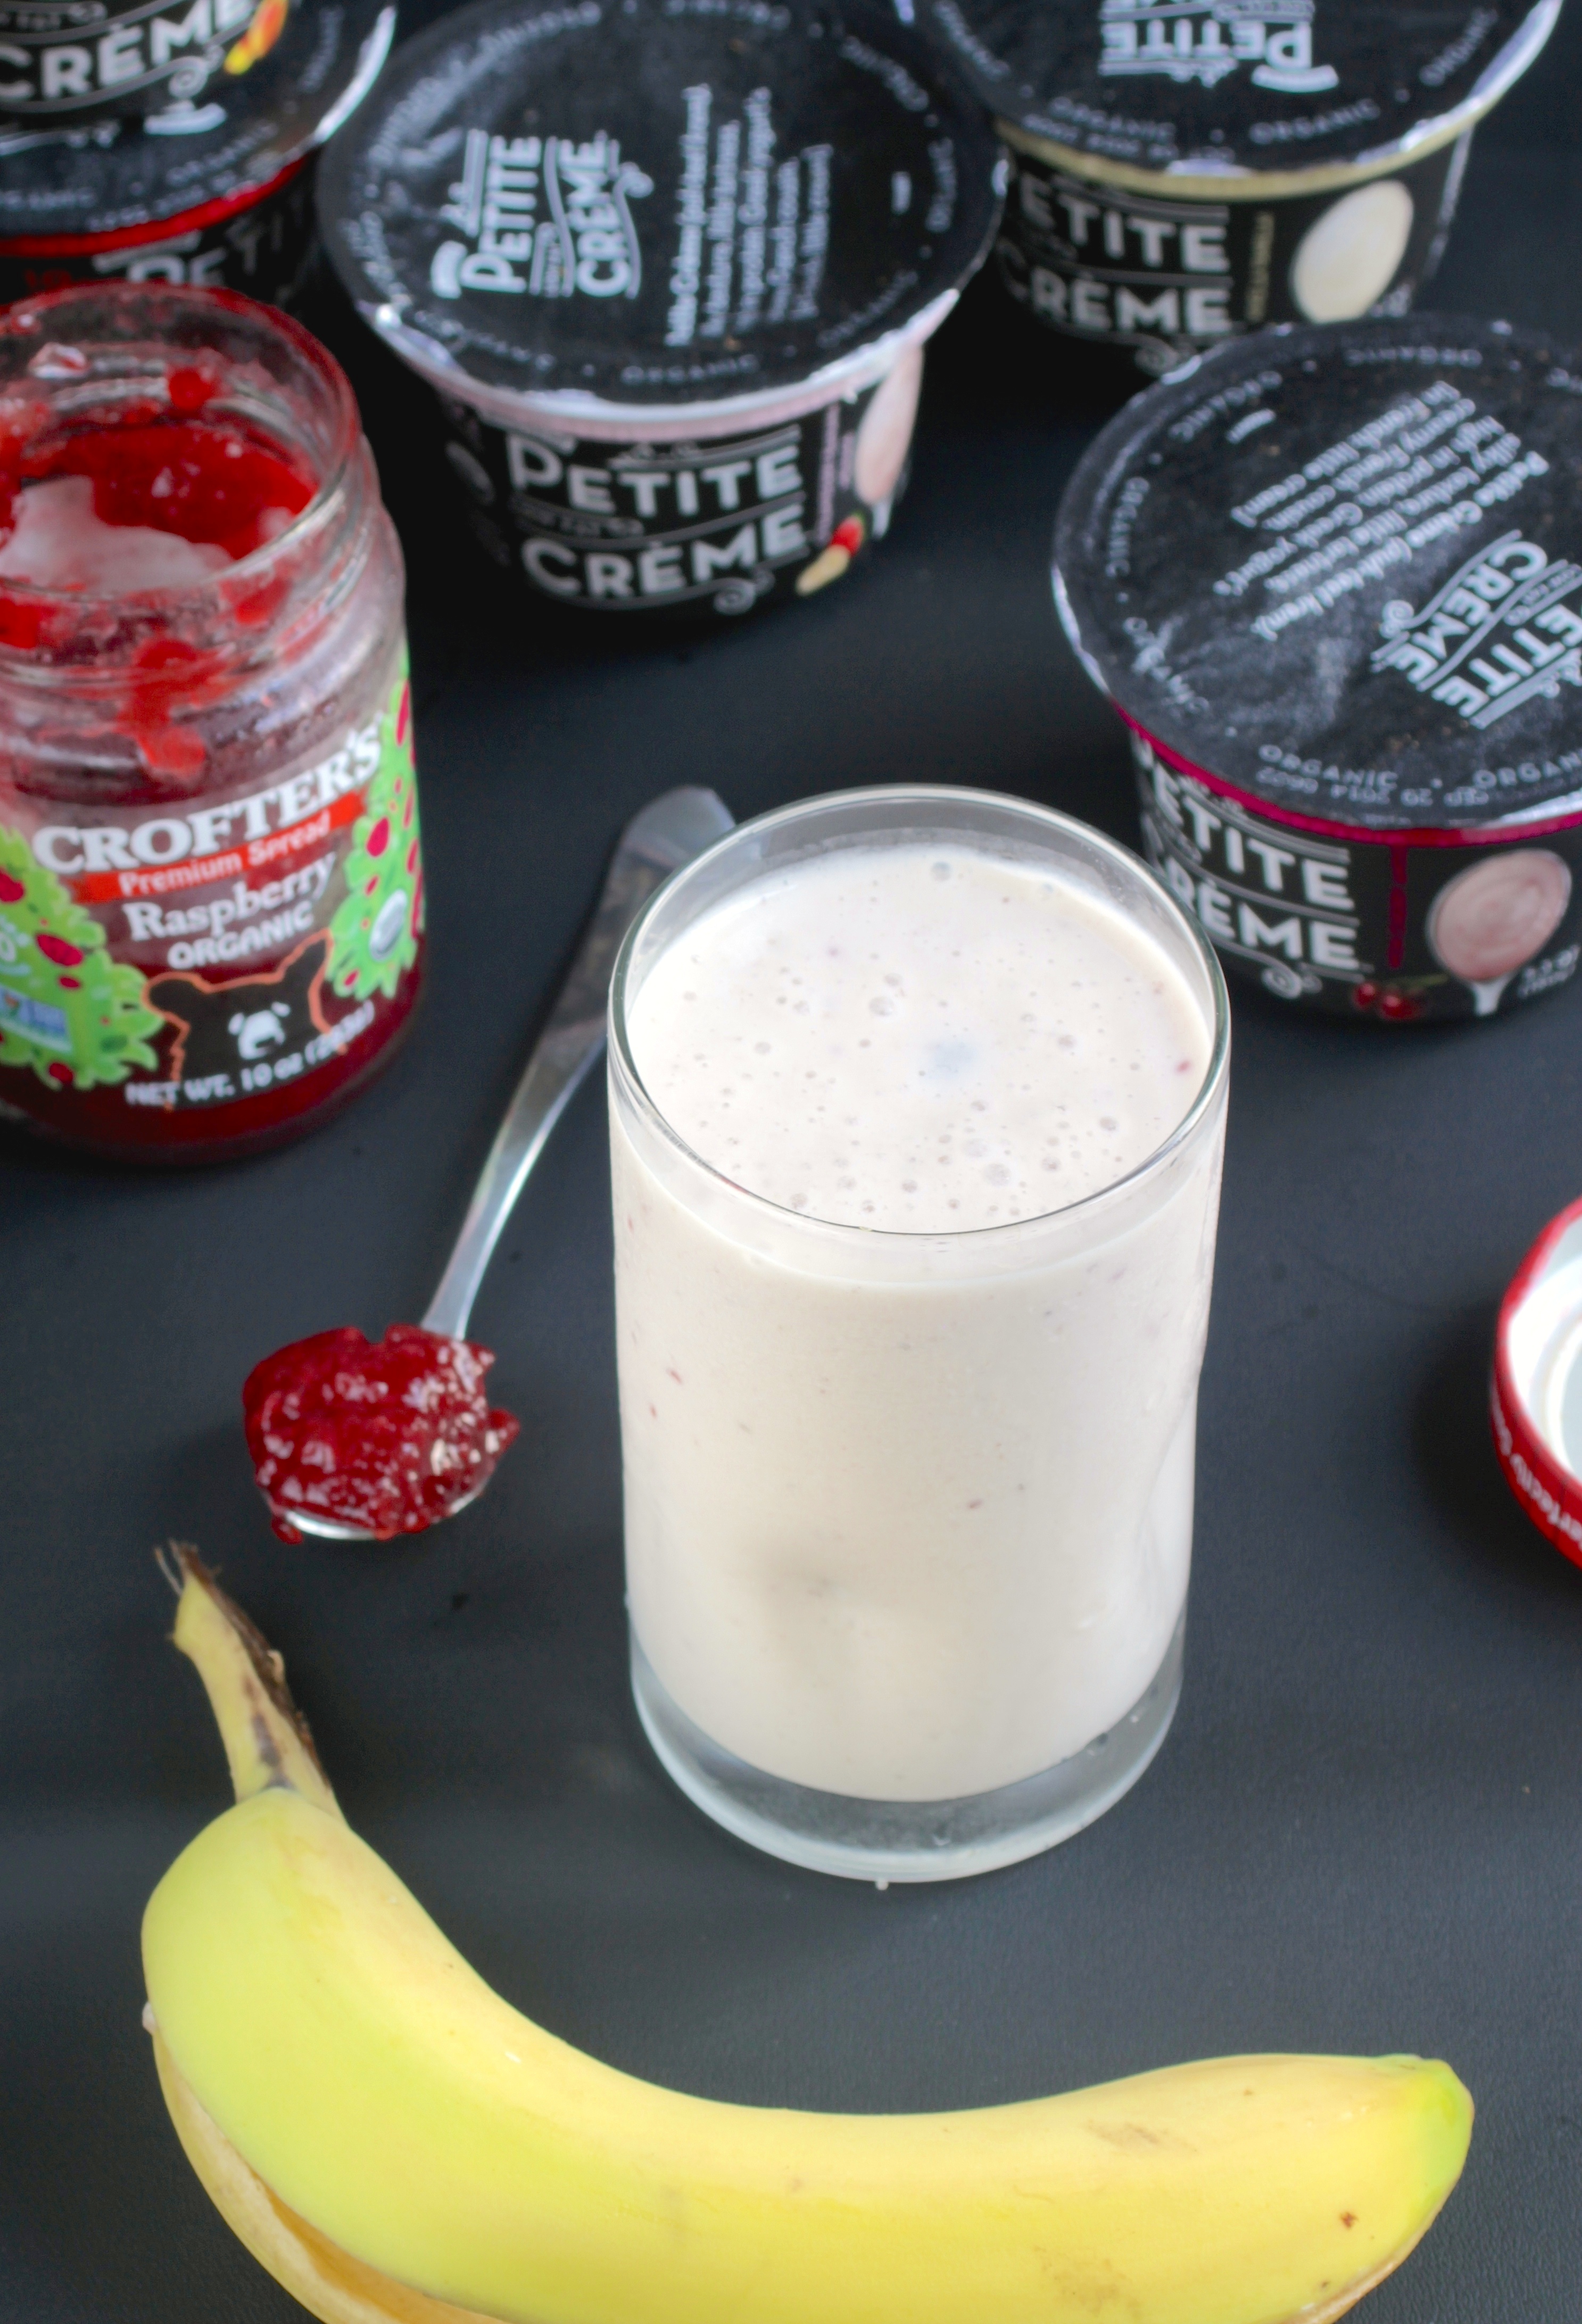
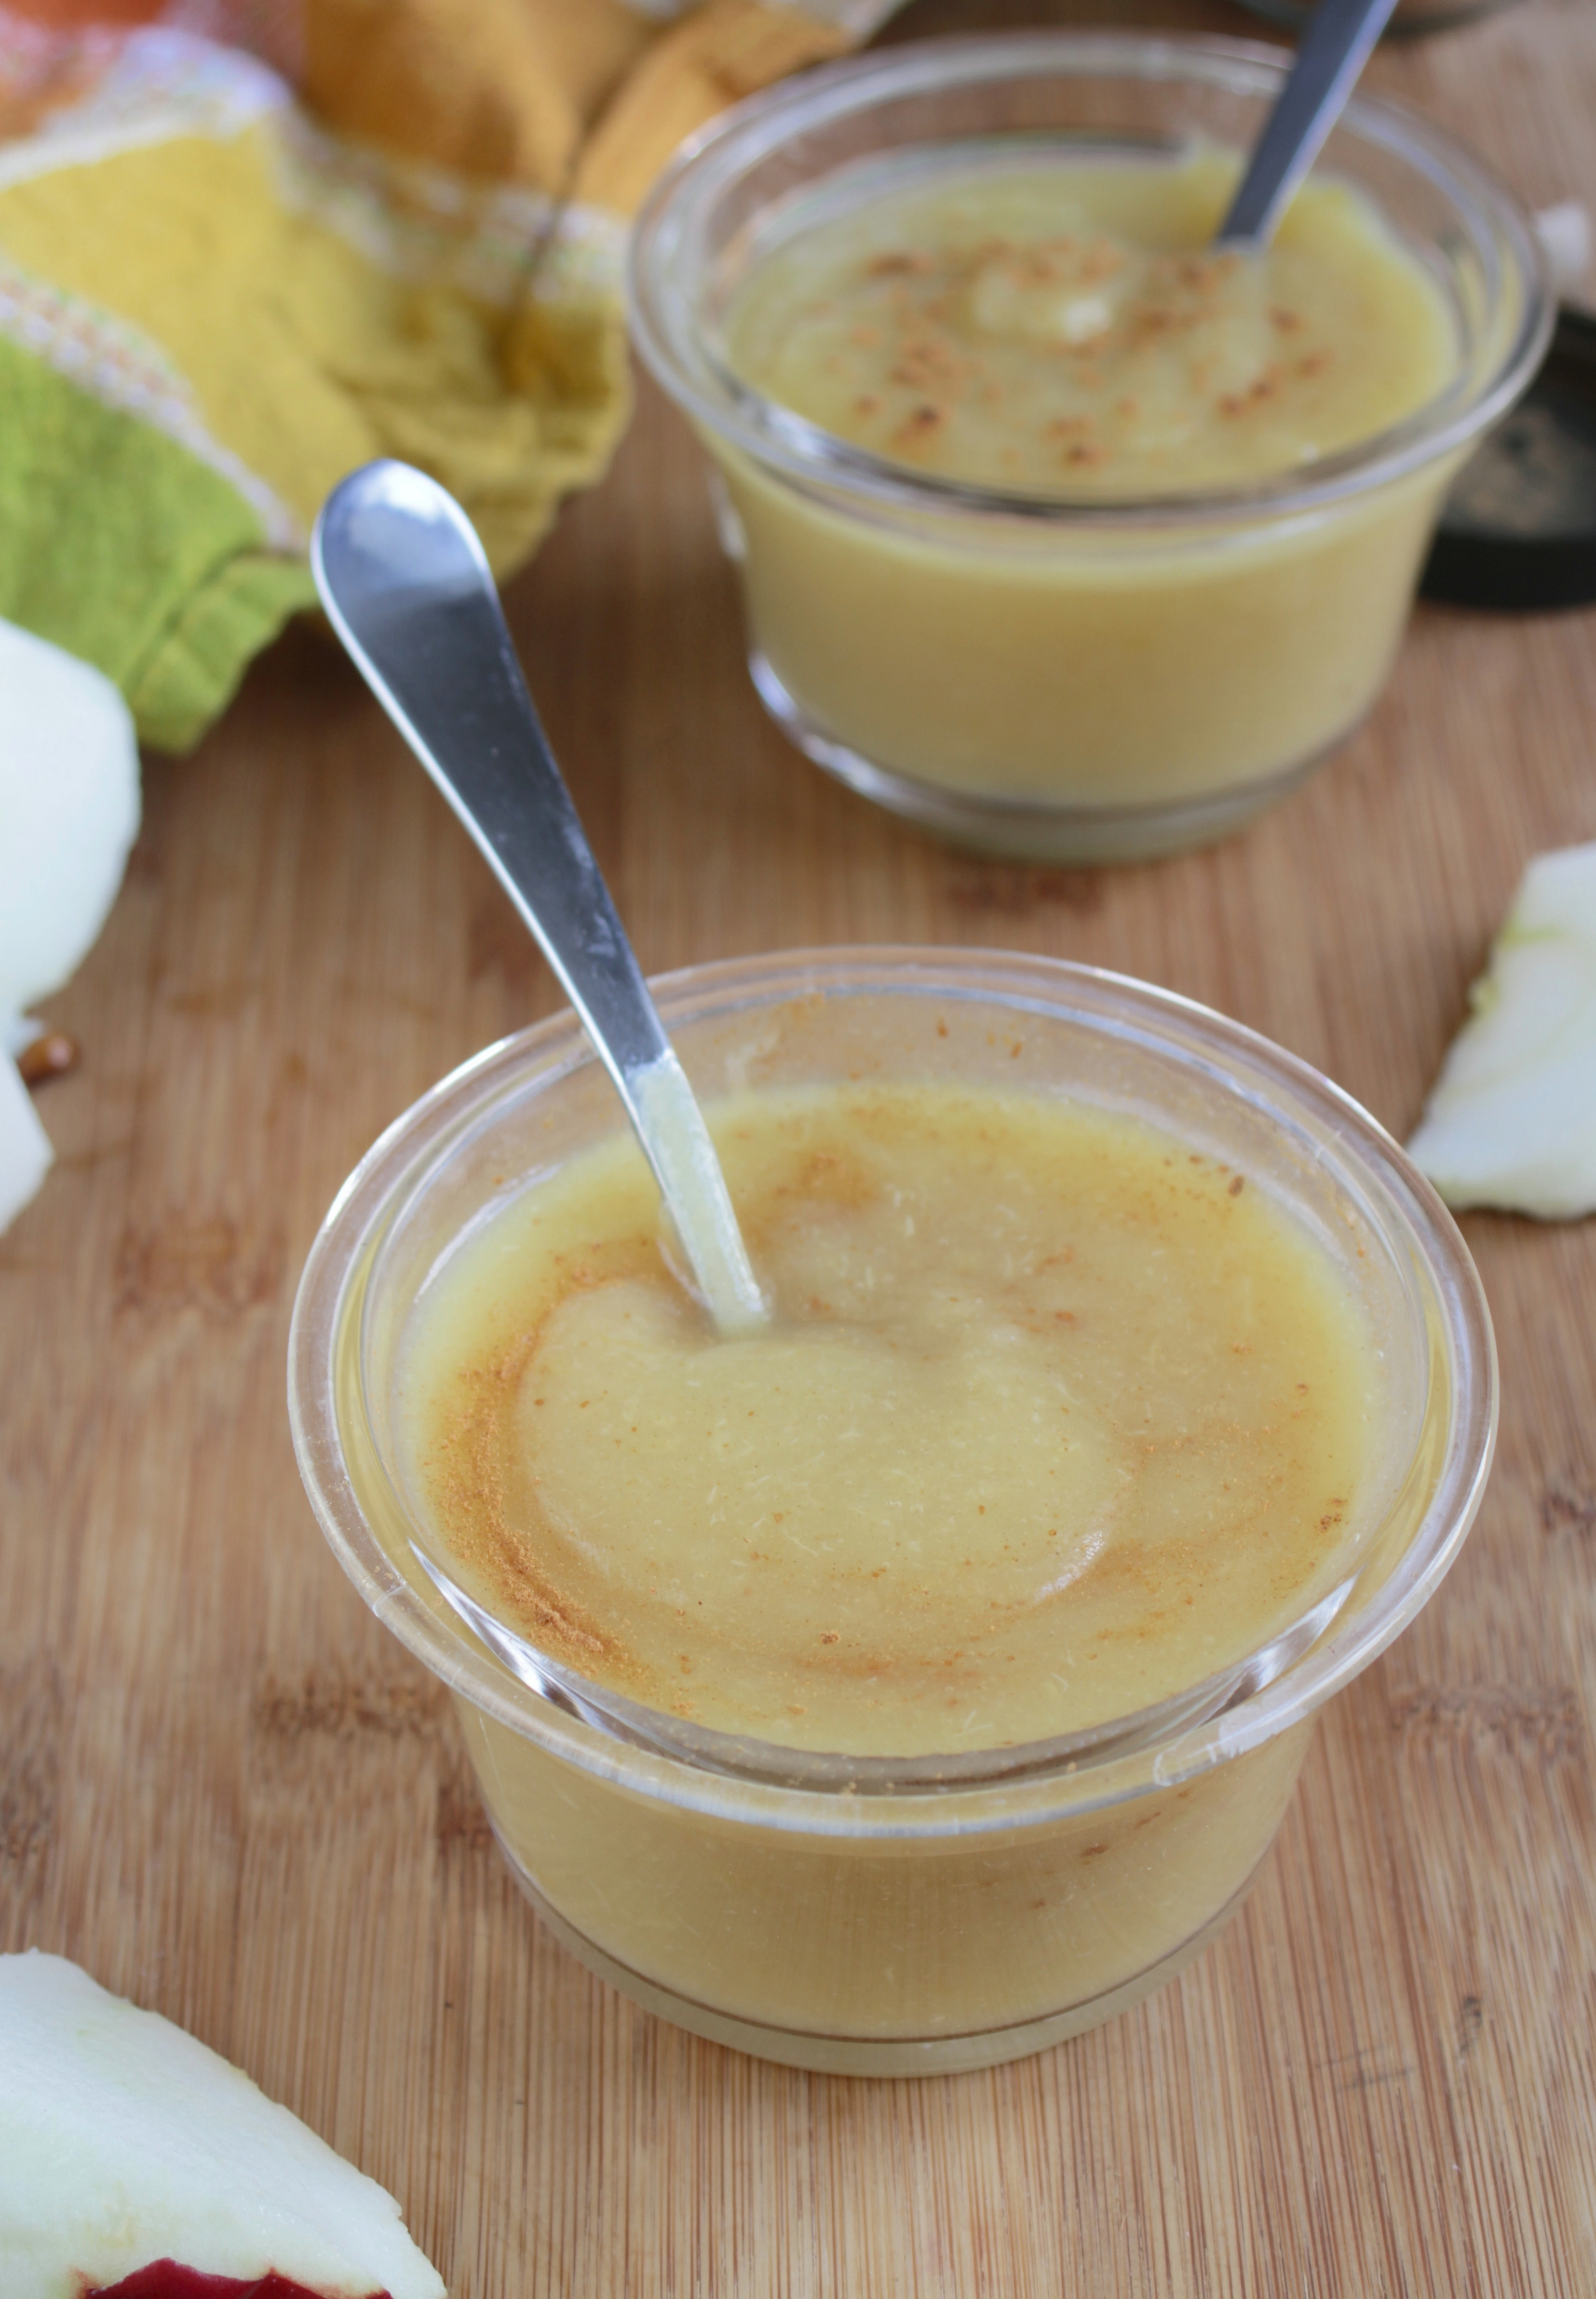
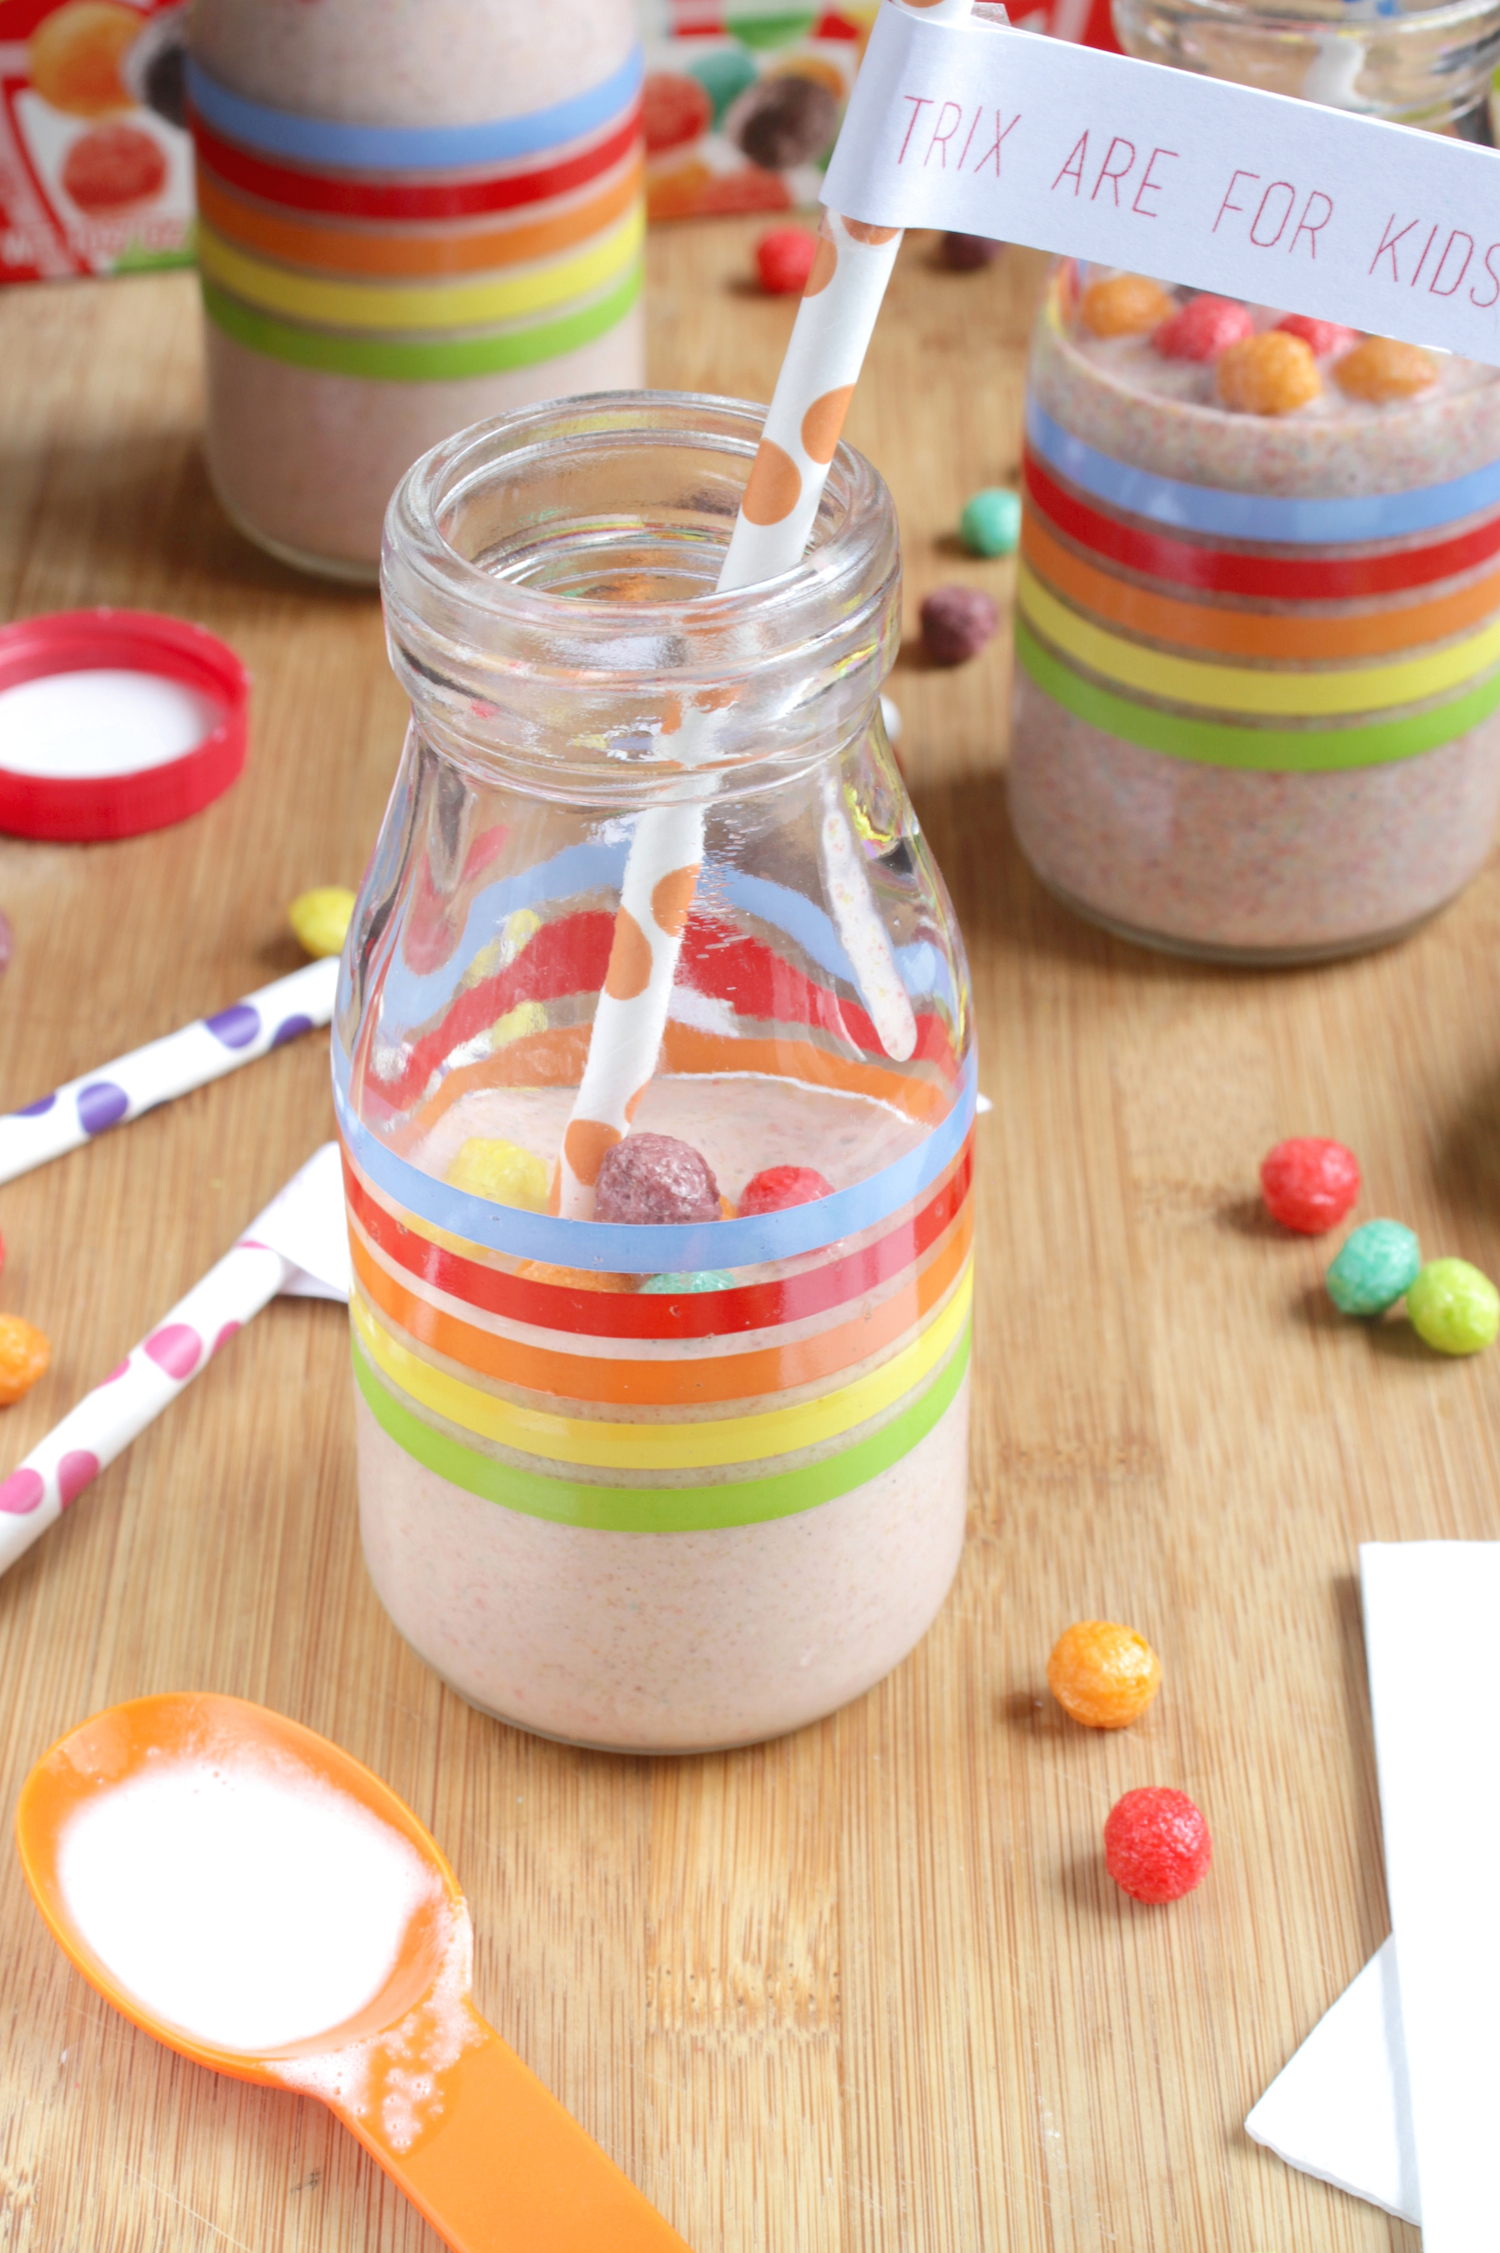
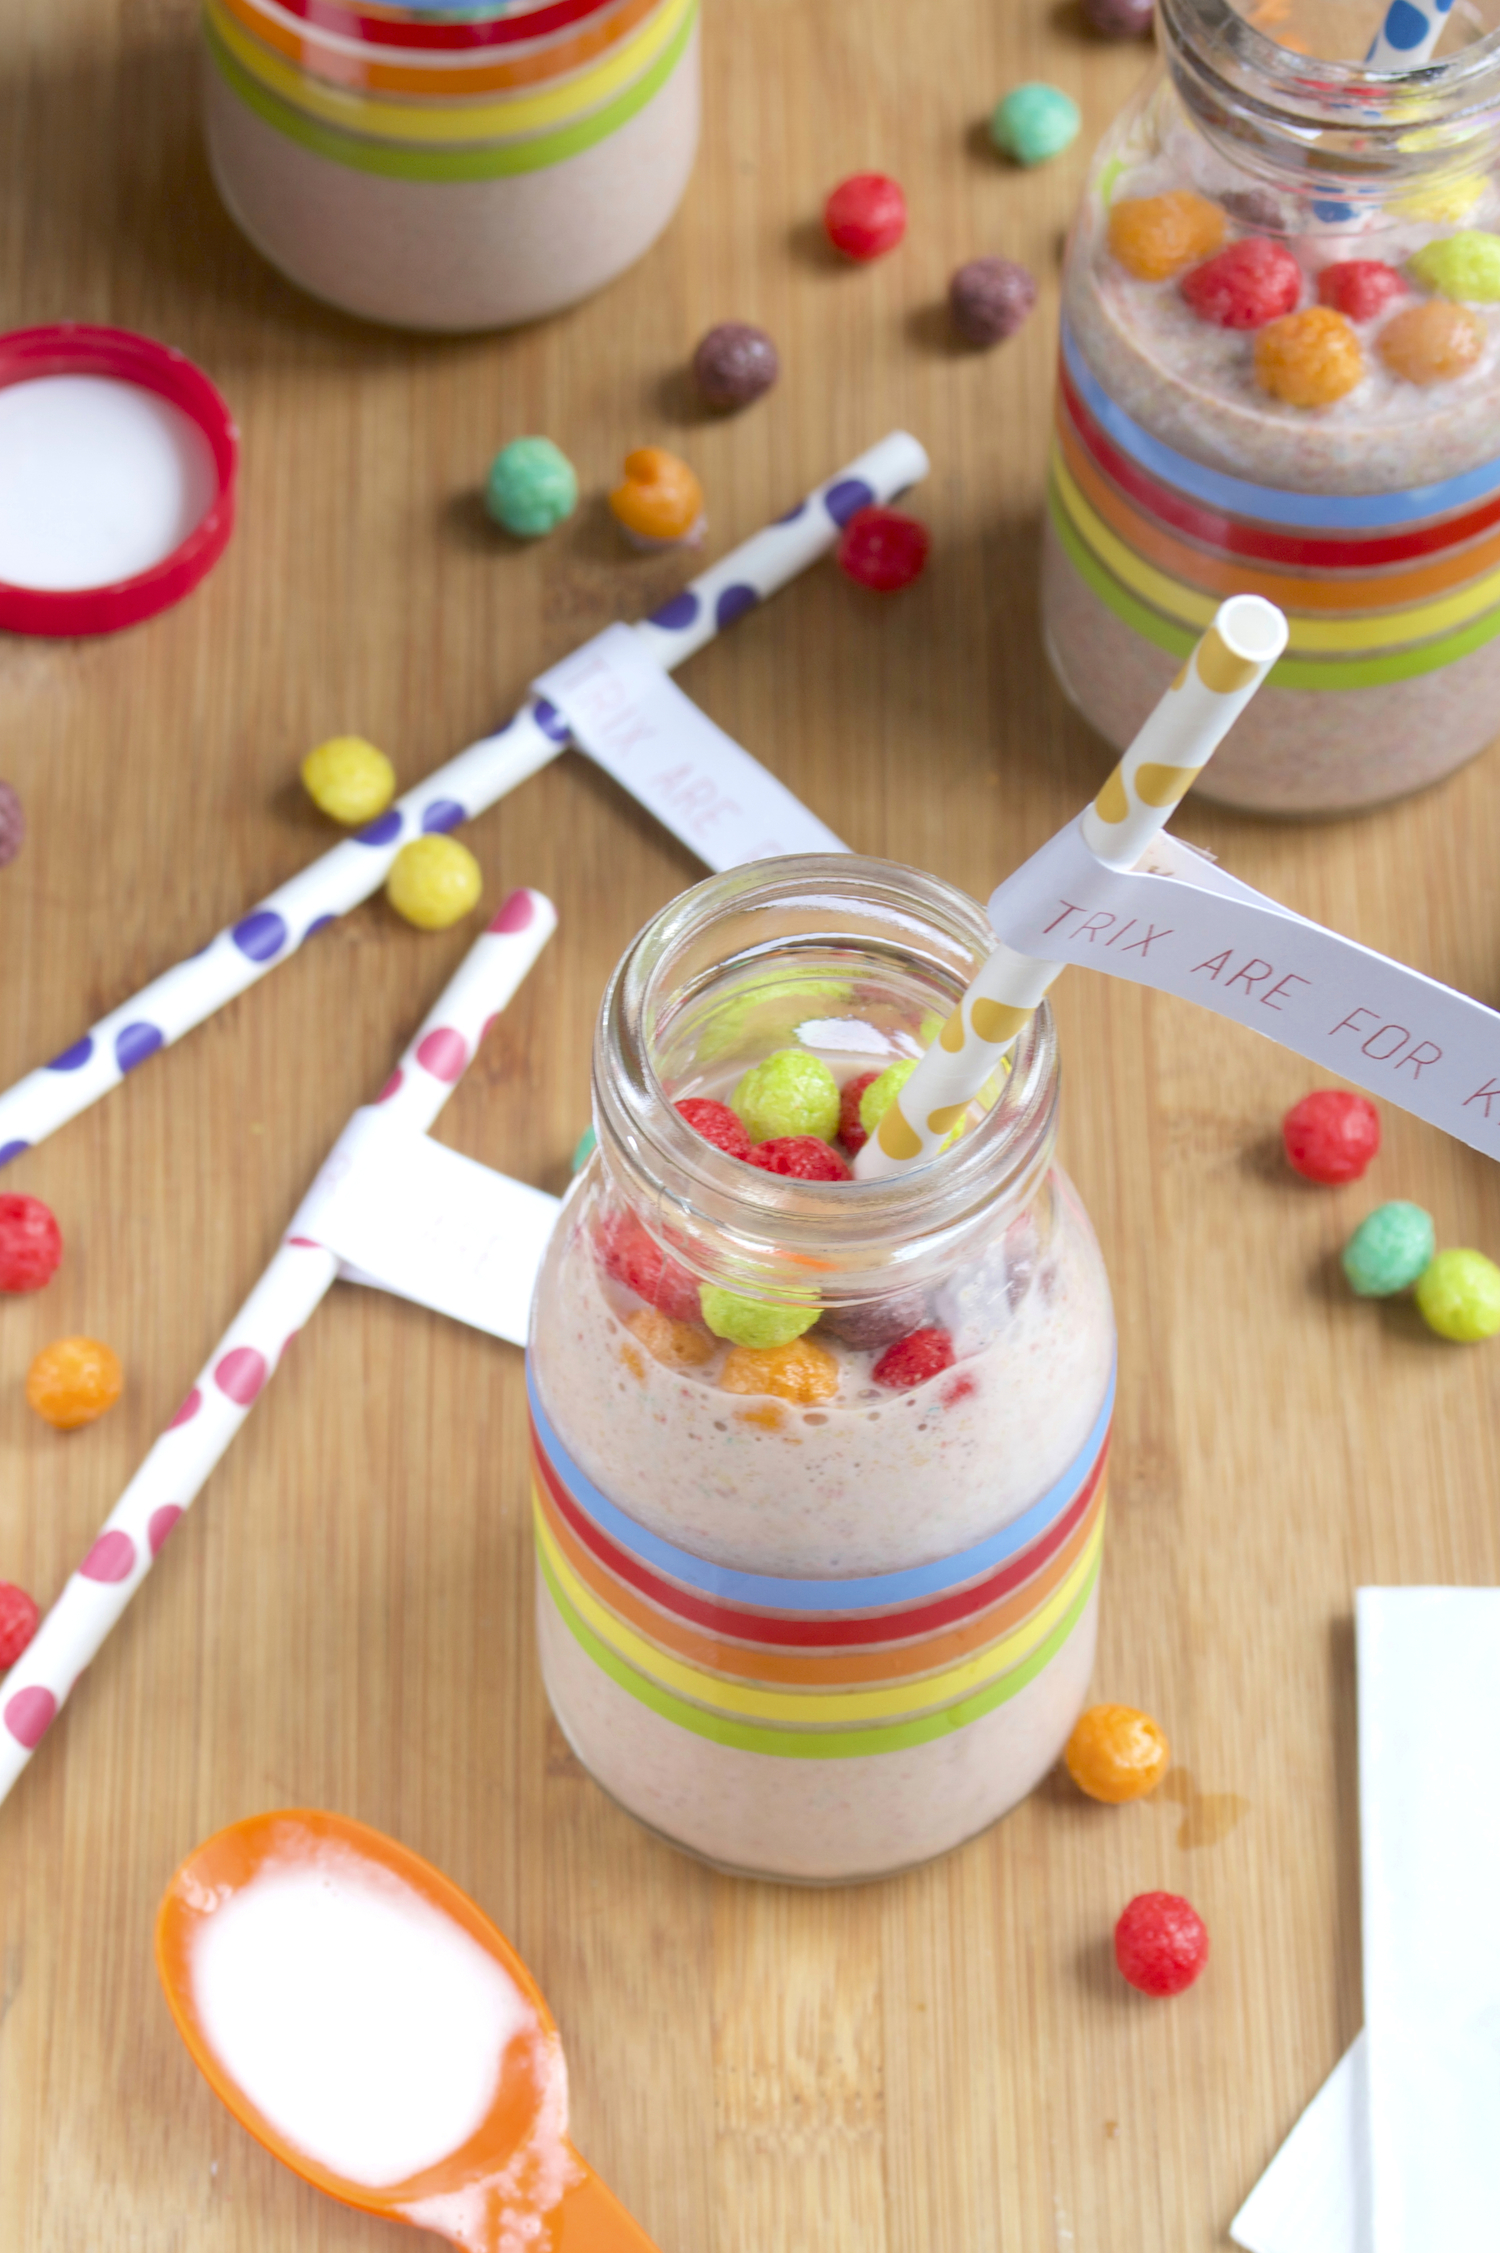
It was hard to make a recipe with any of these because I just wanted to eat them straight with a spoon. I thought this smoothie was a perfect compromise because it’s just as creamy and sweet as the yogurt itself.

Strawberry Banana Smoothie

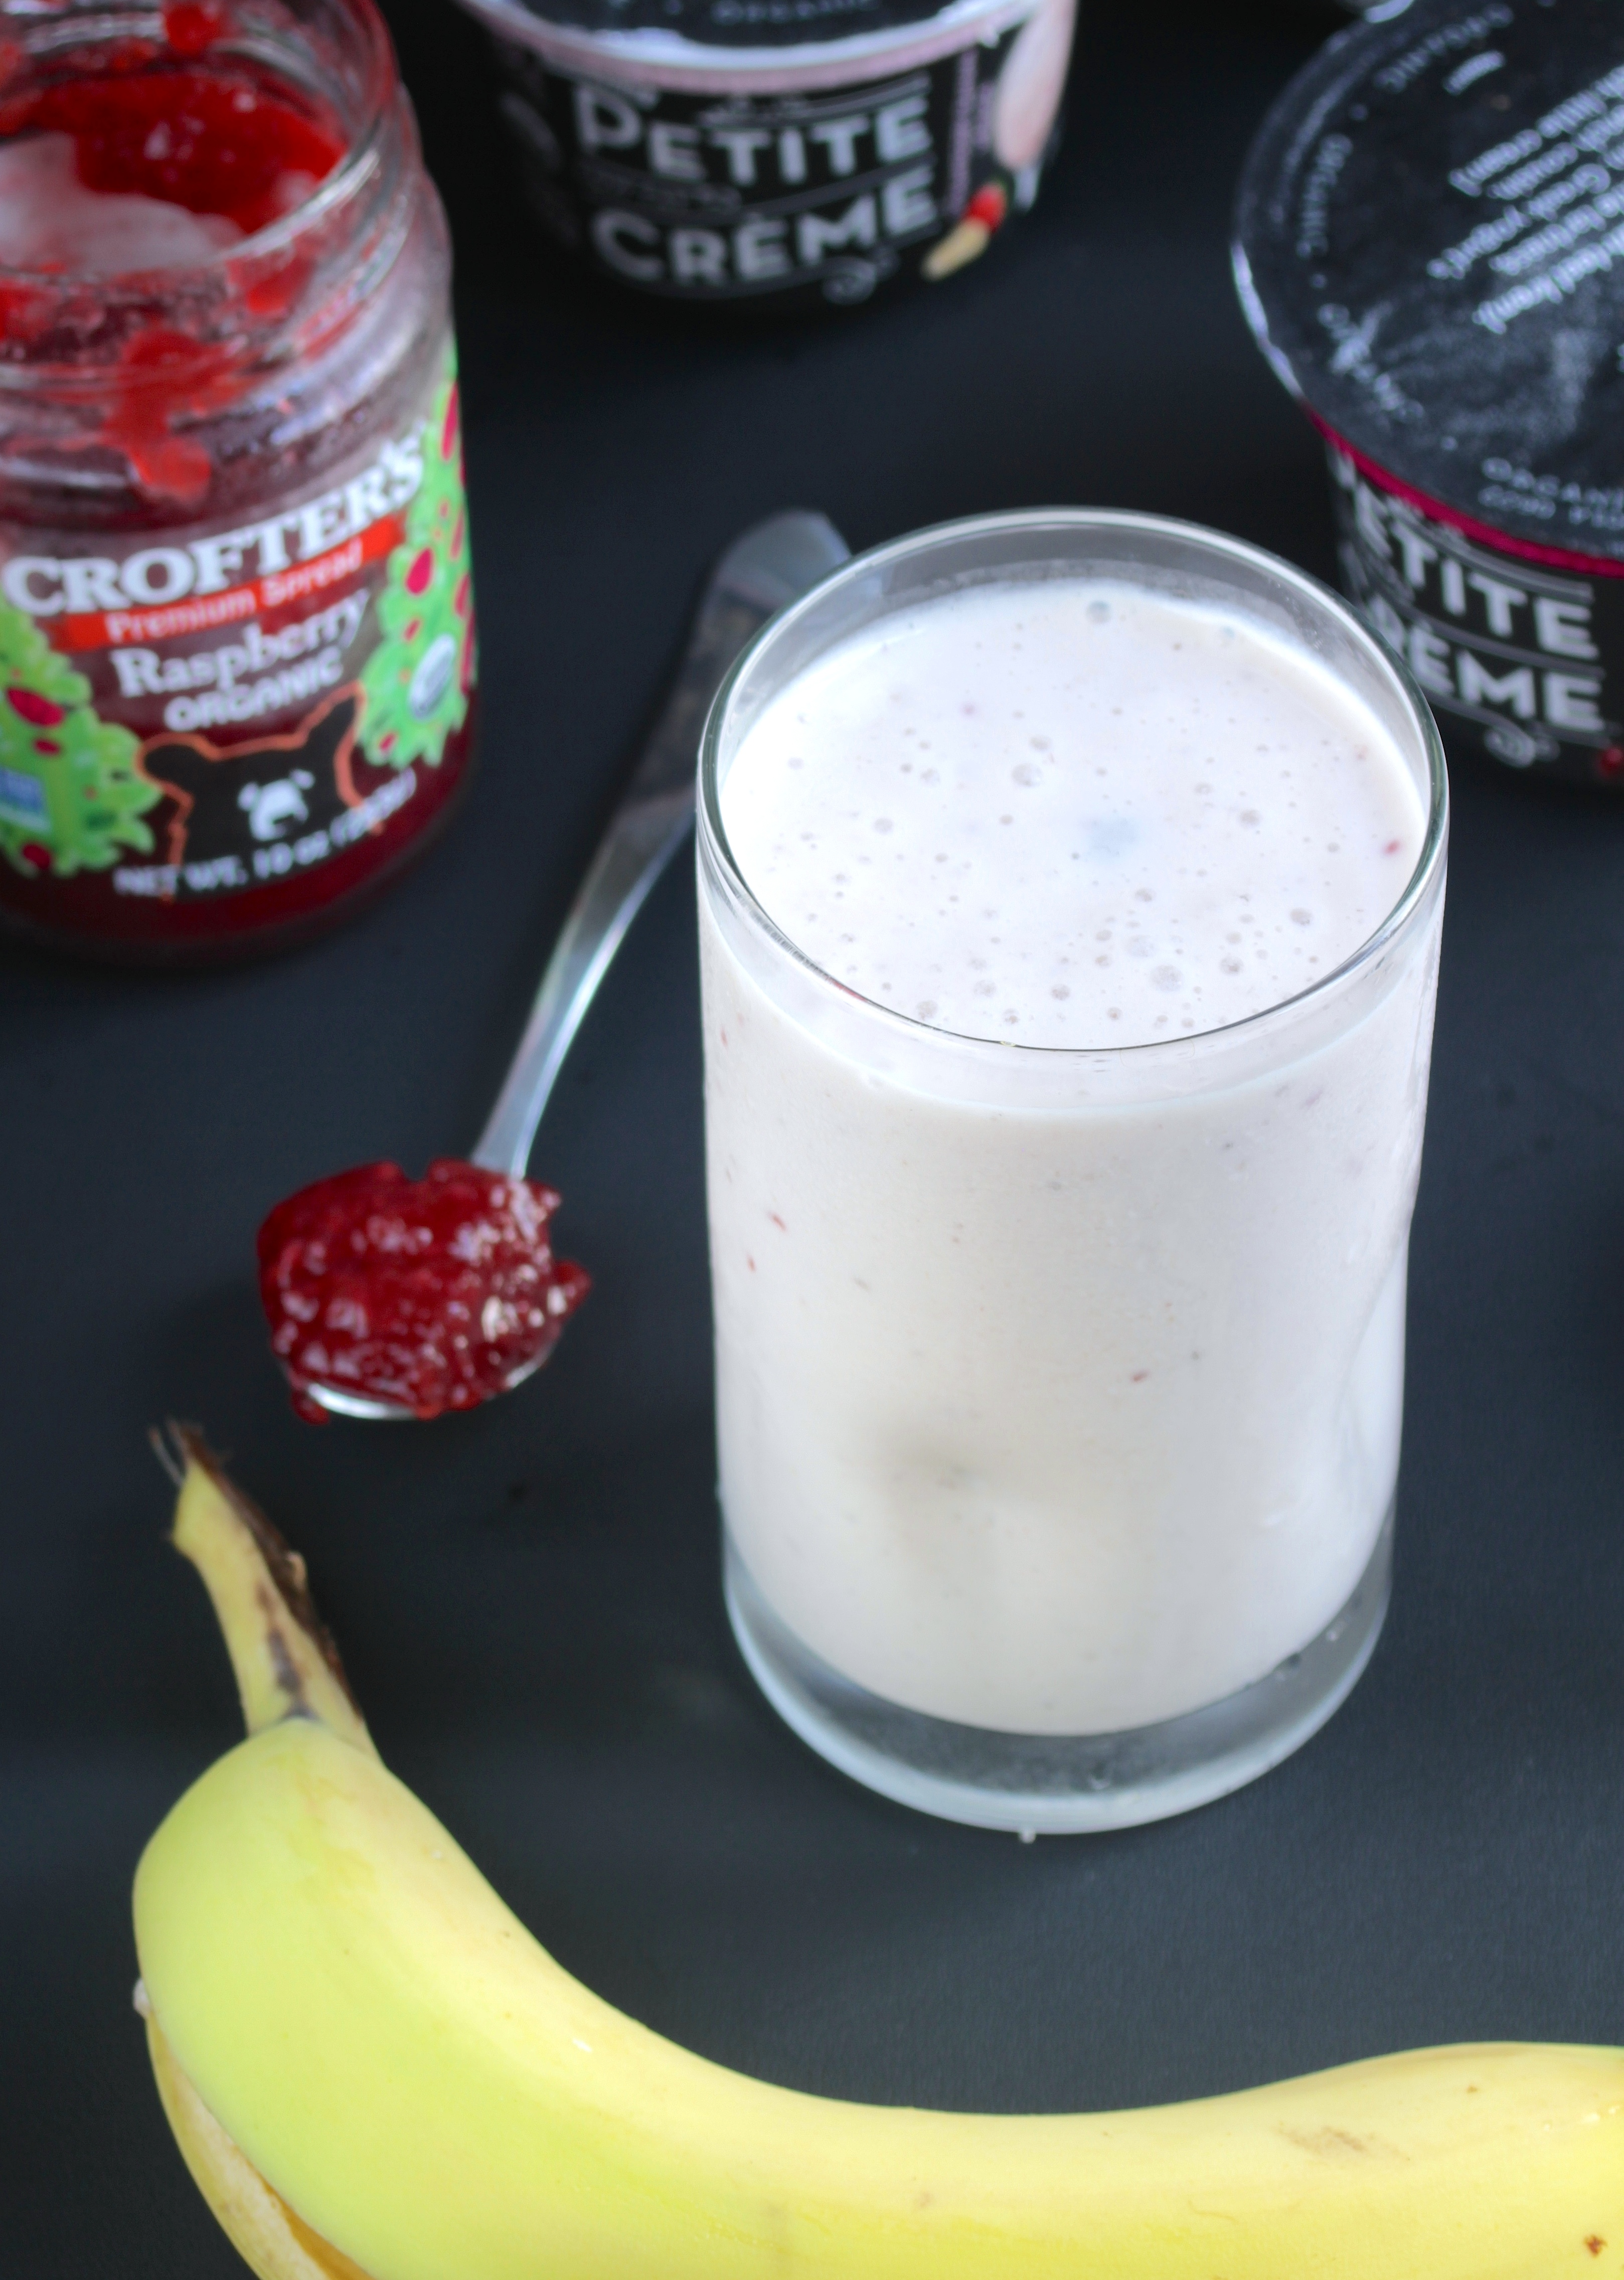
You can try this recipe with any of their flavors and any sort of jam. They all taste delicious so you can’t go wrong and make a bad batch. I love using jam as a sweetener in smoothies instead of sugar or honey because it’s a little bit more “natural”(albeit that depends on the brand) and can add an extra subtle flavor.  

Strawberry Banana Cream Smoothie

Prep time: 5 minutes

Cook time: 0 minutes

Ingredients(Makes 1 servings):

  • 1 5.3oz cup strawberry Petite Creme
  • 1 medium banana
  • 1 Tablespoon strawberry jam
  • 1/2 cup milk
  • 3-4 ice cubes

Method:

  1. Combine all of the ingredients in a blender.
  2. Blend until thick and smooth. Make sure not to over-blend.
  3. Poor into a glass and enjoy cool.

Stonyfield is also hosting an Instagram competition where you can win some Petite Creme from them! The contest is almost over but you can read how to enter here to win a case of Petite Creme or $1000 gift card. Look through the #cheatongreek hashtag for some inspiration. 

My First Life By Dailyburn Recipe

Low Sugar Chocolate Hazelnut Granola

The internet is a crazy awesome place because it’s full of resources for any life you want to live, whether it’s gluten-free recipes, vegetarian restaurant hot spots, of just a chocolate-filled life.

I’m excited that Dailyburn‘s blog Life By Dailyburn asked me to be a recipe contributor for their site. They’re an amazing resource for anyone looking to be healthier and get whipped into shape.

The first recipe I made for them will hopefully pique your interest. If you want to cut out sugar in the morning but still eat flavorful food making your own is a must. This cocoa hazelnut granola recipe only uses maple syrup for sweetness to keep the flavor but ditch the processed sugars. It also tastes great and can save you money–what’s not to love?

And if you’re also looking for a healthier life and haven’t yet, follow them on Facebook and Pinterest for some daily inspirations to eat great and workout.

Homemade Peach Applesauce

Homemade Peach Applesauce

I’ve eaten more applesauce over the last weekend than I probably had over the last decade. If there was a bright side to getting my wisdom teeth taken out Friday, it was rediscovering how good applesauce can be(and mashed potatoes but I already knew that).

Before my surgery I bought a jar of applesauce–that was gone by the second day. By the third day I had a bunch of recently picked peaches I couldn’t bite into to save my life. Making them into more applesauce was a no-brainer.

This recipe has a lot less added sugars than it looks at first when you consider most of it gets poured out with the water. The final recipe has a much lower sweetness than the store-bought kind which the fresh, natural flavors make up for. 

Homemade Peach Applesauce

The peaches in this aren’t an overwhelming flavor. If you want more of a peachiness to this, I’d recommend replacing a few more of the apples with peaches and making sure they’re slightly over ripened. You can also use the same recipe with no peaches and have a great, basic applesauce.

Homemade Peach Applesauce

Prep time: 10 minutes

Cook time: 15 minutes

Ingredients(Makes 6 servings):

  • 5 Macintosh apples, cored and peeled
  • 4 medium sized peaches, pitted and peeled
  • Water
  • 1 cup sugar
  • 1 Tablespoon honey
  • 3/4 teaspoon cinnamon
  • 1/4 teaspoon nutmeg

Method:

  1. Add all of the apples and peaches into a large boiling pot that has a lid to it.
  2. Cover with just enough water that the fruit begins to float.
  3. Add in the sugar and stir gently.
  4. Boil the fruit and water on high heat until the apples turn slightly brown and are tender to touch(about 15 minutes)
  5. Drain as much of the water from the pot as you can.
  6. Put the fruit into a high-speed blender. Add in the honey, cinnamon, and nutmeg.
  7. Pulse until the sauce is smooth.
  8. Remove from the blender and let cool before serving. Store in an airtight container in the refrigerator for up to a week.

Roasted Garlic Parmesan Brussels Sprouts

Roasted Garlic Parmesan Brussels Sprouts

Brunch is the best meal there is; the competition’s not even close. You can go sweet or you can go savory(you can even go both!). It can be at 10am or 3pm. And even when it’s at 10am it’s always acceptable to have alcohol. What could be better?

My favorite items on any brunch menu are the different roasted vegetables(and home fries, but that’s a given). They’re something that you have to put time into but end up being well worth the effort.

If you want to wake up with savory food, these brussels sprouts are perfect for you. They’re just the right amount of crispy, satisfying, and seasoning to wake you up. Combine them with a runny yolk from a fried egg and they’re that much better. 

Roasted Garlic Parmesan Brussels Sprouts

Roasted Garlic Parmesan Brussel Sprouts

Prep time: 10 minutes

Cook time: 35 minutes

Ingredients(Makes 2 servings):

  • 1 1/2 cups brussels sprouts, trimmed and washed
  • 1/4 teaspoon salt
  • 3 Tablespoons olive oil, divided
  • 1 large garlic clove, diced
  • 3 Tablespoons parmesan

Method:

  1. Preheat your oven to 350 degrees.
  2. Toss the brussels sprouts, salt, and 2 Tablespoons of oil together.
  3. Lay the brussels out on a non-stick baking try and roast until slightly crispy(about 30 minutes for small-medium brussels)
  4. Heat the remaining Tablespoon oil in a pan over low heat.
  5. Toast the garlic until browning.
  6. Add in the brussels sprouts and toss until well mixed and they’re cooked in the oil.
  7. Remove from the heat. Sprinkle the parmesan over and toss until well-mixed.
  8. Serve hot. 

Gluten-Free White Chocolate Raspberry Loaf

Gluten-Free White Chocolate Raspberry Loaf

I like to think I know everything but I don’t (of course). For instance, I don’t know if this is “bread” or a “cake”; I don’t even know if it’s a breakfast or dessert. But maybe not knowing is best because it means you can have it for both. 

As much as I love fresh berries for their sweetness, raspberries are by far my favorite for their sour punch. Fresh raspberries are an excuse for something special, like a hot sweet loaf straight out of the oven. 

This is right on par with Starbuck’s banana bread and pumpkin bread (or my very own). The addition of white rice flour gives it a light, airy texture. It’s sweet and moist and falls apart in your mouth. It’s as good in the morning heated up with some peanut butter as it is at night with a scoop of ice cream on top.

Gluten-Free White Chocolate Raspberry Loaf

3/4 cup milk is more of a guestimate than an exact number. Go for a soft, semi-fluid bater that you can pour into a loaf pan but that fights to leave the bowl a little. Depending on what kind of flour you’re using, you might need an extra 1/4 or 1/2 cup. 

Gluten-Free White Chocolate Raspberry Loaf 

Prep time: 15 minutes

Cook time: 50 minutes

Ingredients(Makes one loaf):

  • 1 3/4 cups gluten-free all purpose flour
  • 1 cup white rice flour
  • 3/4 cup brown sugar
  • 3/4 teaspoon baking powder
  • 1 5oz vanilla yogurt
  • 1/2 cup vegetable oil
  • 3 eggs
  • 3/4 cup milk
  • 3/4 cup fresh raspberries
  • 1/2 cup white chocolate chips

Method:

  1. Preheat your oven to 350 degrees.
  2. In a large bowl mix together the flours, sugar, and baking powder.
  3. Add in the oil, yogurt, eggs, and milk and beat well.
  4. Add in the rest of the ingredients and continue mixing until it forms a batter.
  5. Lightly grease a 9-inch loaf pan with oil.
  6. Pour the batter into the pan.
  7. Bake for 50 minutes or until the bread rises and sets.
  8. Remove from the oven and let cool before slicing. Store in a cool place when not enjoying.

Gluten-Free Coconut Chocolate Chip Cookies

Gluten-Free Coconut Chocolate Chip Cookies

Chocolate chip cookies can be as polarizing as politics. Some like chewy while others like crisp. Should they have nuts in them? Are raisins even a question? Everyone has an opinion.

After Pinterest did a Q&A with me my coworkers were interested to try something gluten-free. One of them asked me if I knew any good cookie recipes for his cousin and it seemed like as good a place to start as any. 

Lucky for me, when I brought them into work they didn’t stir up any chewy vs. crispy debates and they were all gone by lunch time–a success! They’re more chewy than crispy, not too sweet, and just rich enough to hit all the right notes. It’s hard to argue with chocolate chips and shredded coconut.

Gluten-Free Coconut Chocolate Chip Cookies

Probably the best thing to keep on hand for gluten-free baking is a bag of gluten-free all purpose flour you can use in recipes without having to mix ten different flours you’re not familiar with. I like Bob’s Red Mill’s but there are tons of different brands out there; try them out and find your favorite.

Gluten-Free Coconut Chocolate Chip Cookies

Prep time: 15 minutes

Cook time: 10 minutes

Ingredients(Makes 2 dozen cookies):

  • 1 1/2 cup gluten-free all purpose flour
  • 1/4 teaspoon salt
  • 1/2 teaspoon baking powder
  • 3/4 cup sugar
  • 2 large eggs
  • 1 teaspoon vanilla
  • 1/2 cup butter, melted
  • 1/4 cup peanut butter
  • 1/2 cup sweetened shredded coconut
  • 1/2 cup chocolate chips

Gluten-Free Coconut Chocolate Chip Cookies

Method:

  1. In a large bowl, mix together your flour, salt, baking powder, and sugar.
  2. Add in the eggs, vanilla, peanut butter and melted butter and mix.
  3. Add in the shredded coconut and chocolate chips and continue mixing until it forms a thick dough. If your dough is too dry add milk by the tablespoon until it’s just wet enough to stick together.
  4. Put the dough in your refrigerator and preheat your oven to 375 degrees.
  5. After 15 minutes of chilling, roll the dough into 1-inch balls.
  6. Put the doughballs onto a non-stick baking tray and bake for 10-12 minutes until the edges brown.
  7. Remove from the oven and let sit for 20 minutes before trying to move.
  8. Store in an airtight container at room temperature.

Trix Cereal-Milk Milkshake

Trix Cereal Milk Milkshake

If you’ve ever had a bowl of cereal, you probably know the best part is the last bit of milk at the bottom(unless the only cereal you’ve ever had is Bran Flakes or Fiber One but that’s a different problem). 

General Mills sent me some of their new Trix cereal to try out which was given a makeover for it’s 60th birthday (!!) to be fruitier than the old recipe. (Spoiler alert: No fruit shapes anymore; all of the pieces are circles) I can’t say I’m a Trix aficionado and remember what the old recipe tasted like but these are definitely fruity and delicious–by far the best lazy-night dinner I have in my cupboard when I get home past 8pm.

Living in NYC there’s no shortage of inspiration for out-of-the-box recipes whether it’s a cronut or a frozen hot chocolate. I’ve heard people rave about the cereal-milk from Momofuku’s and thought it was the perfect grown-up way to enjoy a kids’ favorite cereal. 

Trix Cereal Milk Milkshake

This is just a variation on your standard 2:1 ratio milkshake. Add extra milk or ice cream to make it smoother or thicker.

You can really customize a recipe like this with any cereal–it’s a blank canvas! If Trix aren’t your thing, try Lucky Charms or even Reese’s Puffs with a chocolate peanut butter ice cream.   

Trix Cereal-Milk Milkshake

Prep time: 10 minutes

Cook time: 0 minutes

Ingredients(Makes 2 servings):

  • 1/2 cup Trix cereal plus more for garnish

  • 3/4 cup whole milk

  • 1 1/2 cups vanilla ice cream, softened slightly

Trix Cereal Milk Milkshake

Method:

  1. Combine the Trix cereal and milk in a blender or food processor and mix until the Trix has fully dissolved into the milk. The milk should be smooth and darker in color. 

  2. Add in the ice cream and process until creamy.

  3. Pour out evenly into two glasses.

  4. Garnish with a little more Trix and enjoy with a straw or spoon.

Sweet Tea Vodka Lemonade

Sweet Tea Vodka Lemonade

Though it’s only Wednesday, this week definitely calls for a drink.

It’s funny how much the seasons and weather change our tastebuds. This is by far one of my favorite Summer drinks (though the elderflower fizz puts up a tough fight). It’s just light and sweet enough but also packs a punch. 

I’ve posted before on how to make a drink like this from scratch, but that’s not always the most efficient thing to do. This drink can absolutely taste just as good with ingredients from the store; it’s just important to buy quality ingredients. If they don’t taste good on their own, they won’t taste good mixed together. 

Sweet Tea Vodka Lemonade Pitcher

If you really want to kick this drink up a notch, I’d recommend adding crushed fresh herbs. You can add crushed mint for a classic sweet drink flavor or a little crushed basil for something more sophisticated.

Sweet Tea Vodka Lemonade

Prep time: 5 minutes

Cook time: 0 minutes

Ingredients(Makes 2 servings):

  • 1/2 cup quality iced tea
  • 1/2 cup lemonade (the fresher the better)
  • 2 oz Vodka
  • 1 cup ice cubes
  • Lemon wedges to garnish

Method:

  1. Combine the iced tea, lemonade, vodka, and ice cubes in a large cocktail shaker.
  2. Shake vigorously until well mixed and the ice begins to break up. 
  3. Pour equally into two tall glasses.
  4. Garnish with a lemon slice before serving.

Creamy Feta and Sun-Dried Tomato Dip

Creamy Feta and Sun-dried Tomato Dip

The best way to be a better cook is find recipes you like and learn to make them your own way. Some months I get lazy and never make anything new–I don’t mind the same lunch every day of the week. But reading blogs help me find recipes good enough to break me out of my rut.

This recipe from Mississippi Kitchen looked too good to pass up. I never buy as much spinach and salad mixins as I should so instead I wanted to take the same flavors and put them in a dip. This has a ton of savory, salty flavor and surprisingly healthy ingredients. You could serve this at a party and they’d never know it’s a bean dip!

Creamy Feta and Sun-Dried Tomato Dip

Seasoning should be the last step of this recipe. There’s no right amount of salt–you’ll need to taste it and figure out how much to add based on how salty your ingredients are.

Always taste a sauce or dip with whatever you’re using for dipping; if you’re using vegetables you’ll want the dip to be on the saltier side, while if you’re using seasoned crackers keep it on the bland side.   

Creamy Feta and Sun-Dried Tomato Dip

Prep time: 5 minutes

Cook time: 0 minutes

Ingredients(Makes 12 servings):

  • 1 can cannellini beans, drained

  • 1/2 cup sun-dried tomatoes

  • 1/3 cup sour cream

  • 1/2 cup – 3/4 cup buttermilk

  • 4oz feta, crumbled

  • Salt to taste

  • Vegetables for dipping 

Method:

  1. Add the beans to a food processor and pulse until smooth.

  2. Add in the tomatoes, sour cream, 1/2 cup buttermilk, and feta and process.

  3. Slowly add more buttermilk to get the dip to the right consistency while processing. Only add as much as you’d like to make it the right thickness.

  4. When done, season to taste with salt.

  5. Serve at room temperature. Store in an air-tight container in the refrigerator when not enjoying. 

The Elderflower Fizz

The Elderflower Fizz Cocktail

Every time I find something new I’m not sure how I lived so long without it.

Last Summer I couldn’t get enough of elderflower drinks. A friend made this awesome recipe I’m about to share a few weeks back and I had to recreate it. It also was the perfect excuse to use my SodaStream and silicone ice cube trays. Why did we settle for plastic, rectangular ice cube trays for so long?

This cocktail is the perfect balance between sour citrus and sweet elderflower liqueur. It’s a great introduction if you haven’t tried it before. Using soda makes it even more Summery and refreshing.

The Elderflower Fizz Cocktail

Make sure not to shake the ingredients too vigorously or you’ll lose the carbonation. I used SodaStream’s diet grapefruit soda for this. If you don’t have that, you can opt for Fresca or a different brand. 

The Elderflower Fizz

Prep time: 2 minutes

Cook time: 0 minutes

Ingredients(Makes 2 drinks):

  • 1.5oz Vodka

  • 1.5oz Elderflower liqueur

  • 6oz Grapefruit soda

  • 2 Tablespoons orange juice

  • Ice

Method:

  1. Mix the vodka, elderflower liqueur, soda, and juice delicately in a cocktail shaker.

  2. Pour into two glasses over ice. Drink cold.