Tag Archive: Easy

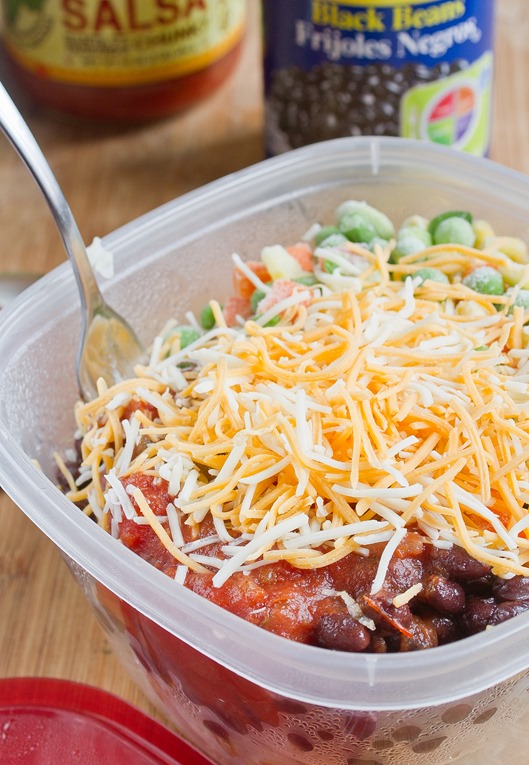
Packed Lunch: Rice & Bean Bowl

Homemade rice and bean bowls for a healthy and affordable packed lunch

I’m one of those people at the office who brings in lunch every day. The same lunch every single day. The Huffington Post wrote an article about us.

Sure packing a lunch every day can get tiresome, but it’s cheaper and healthier to do it yourself. It’s hard to argue with that.

If you’re on board the lunch-packing train, even just a few days a week, this lunch will definitely keep you satisfied. It’s just as good as a Chipotle bowl but costs about $2 or less. It’s also perfect for packing on a Sunday night to have later in the week since you don’t have to worry about sogging bread or spoiling meat.

For a simple step-by-step photo guide, scroll below the recipe.

Rice & Bean Bowl

Prep time: 5 minutes

Cook time: 4 minutes

Ingredients(Makes 1 lunch):

  • 1 cup cooked brown rice
  • 3/4 cup(1/2 can) black beans
  • 3/4 cup fresh or frozen vegetables
  • 1/4 cup salsa
  • 1/4 cup shredded cheese

Method:

  1. In a microwavable bowl, layer the rice, beans, vegetables, salsa, and cheese in that order.
  2. Cover tight with a lid. Don’t keep at room temperature for more than 6 hours.
  3. When ready, microwave on full power for 3-4 minutes.

An easy, healthy and affordable meal you can pack for lunch every day

4 Easy Nutella Recipes

I have two half-eaten jars of Nutella in my kitchen. I think I have a problem. (I need more Nutella.)

There’s a store near me that sells imported European jars for less than $4($3 each if you buy 3). At that price it’s hard not to turn into an addict. Not that Nutella on oatmeal or bagels could ever get old, but using it in recipes helps mix it up from time to time.

Here are 4 recipes that take about as much time to make as it does to eat an entire jar. Also, all of these recipes are 4 ingredients or less, so there’s no reason not to enjoy them all. Maybe even in one day.

Easy Nutella Brownies

Easy Nutella Brownies are exactly what they sound like. You can instantly make any brownie mix into Nutella brownies with just Nutella and eggs. There’s no reason to make any other kind.

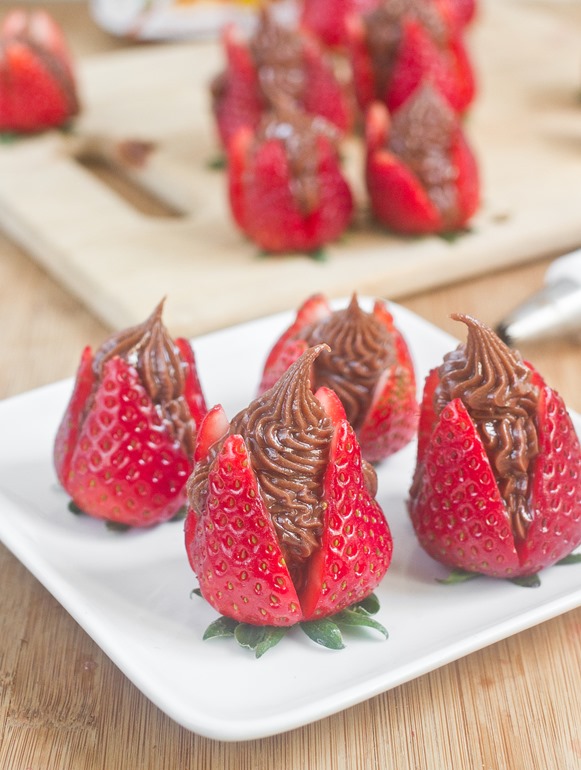
Nutella Cheesecake Strawberries

Nutella Cheesecake Strawberries impressed everyone the last time I made them, which isn’t bad for something with just 4 ingredients. The hardest part is slicing and stuffing the strawberries, but it’s fine if you have a little patience.

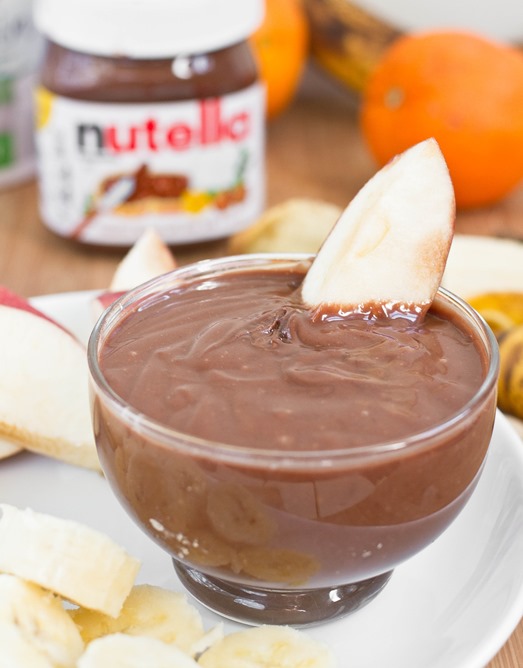
Nutella Yogurt Dip

Nutella Yogurt Dip will make you feel a little better about eating Nutella by the spoonful. It’s just as tasty but a little more healthy. I like it with fruit and veggies but graham crackers and pretzel sticks work just as well.

IMG_6448_thumb

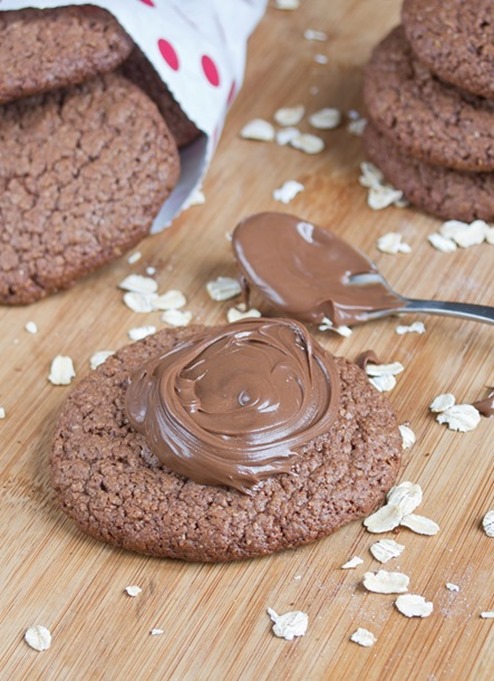
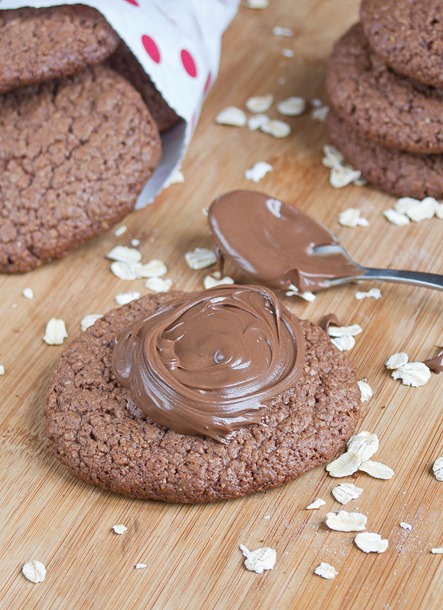
Gluten-Free Nutella Cookies have been my afternoon snack since I made them. Since they’re crispy and chewy when they’re done I like to break them up and add it to yogurt. That practically makes them a health food, right? 

Gluten-Free Nutella Cookies

Gluten-Free Nutella Cookies

Caught the day before Valentine’s Day with out a dessert? Don’t worry, I’ve got you covered.

These are some of the easiest cookies I’ve ever made. At first I was sure they wouldn’t work and would come out flat as a pancake but I’m glad they didn’t. And they tasted great, too!

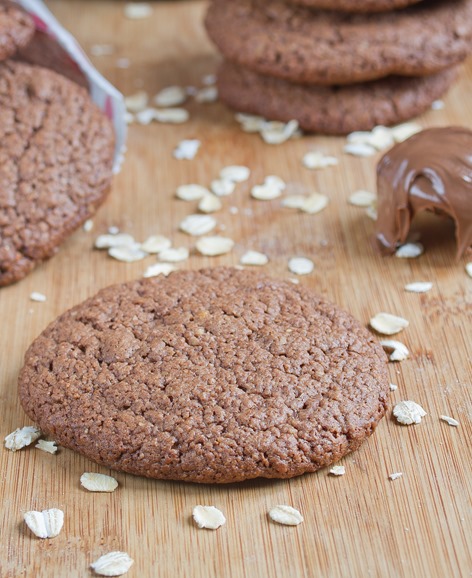
These cookies are chewy and crunchy. The texture reminds me of a Little Debbie oatmeal raisin cookies. They’d be perfect for making sandwich cookies with raspberry jam or ice cream sandwiches. I only made half a batch because 9 seemed like more than enough, but these would be just as good for a party as they are for a valentine.

Gluten-Free Nutella Cookies

To make sure these are 100% gluten-free make sure you’re using gluten-free oats. These cookies would probably work gluten-full with regular all-purpose flour but I haven’t tried that myself.

Gluten-Free Nutella Cookies

Prep time: 5 minutes

Cook time: 15 minutes

Ingredients(Makes 18 cookies):

  • 1 cup Nutella
  • 2 cups oat flour*
  • 1/2 teaspoon baking soda
  • 2 eggs

*I always make my own by blending oats in a high-power food processor.

Gluten-Free Nutella Cookies

Method:

  1. Preheat your oven to 350 degrees.
  2. In a large bowl, beat all of the ingredients together until well mixed. If your Nutella is hard to mix you might want to soften it a bit first.
  3. Roll the dough into balls and place them on a non-stick baking surface. Do not flatten them out at all.
  4. Bake for 12-15 minutes until the cookies are firm.
  5. Remove from the oven and let them cool before moving.

Cowboy Caviar

Cowboy Caviar

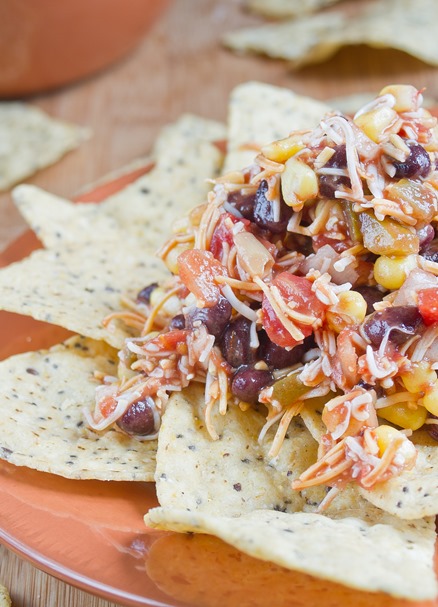
My favorite recipes all have two things in common: They’re easy and they’re delicious. This one’s both.

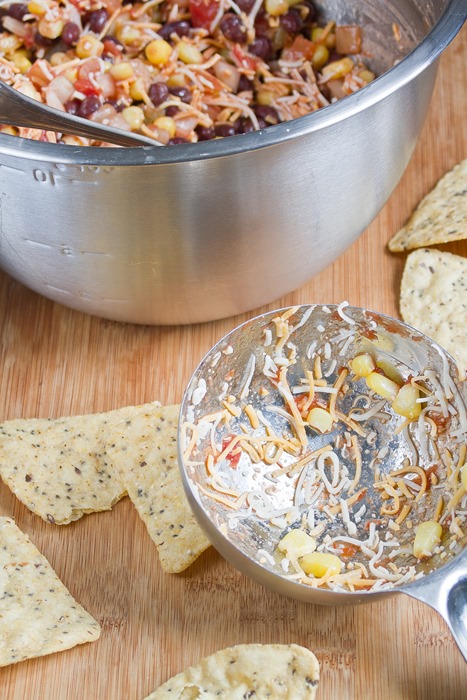
This dip’s about as easy as it comes. There’s no cooking or processing. Just mix all the ingredients and voila! (Or whatever the Mexican equivalent of voila is.)

Make sure to soak the onions before adding them to the dip. Soaking them takes away the sharp bite that raw onions have so they don’t overpower the rest of the ingredients. You can add some diced avocado in as well for an added touch.

Cowboy Caviar

Cowboy Caviar

Prep time: 10 minutes

Cook time: 0 minutes

Ingredients(Serves about 6 people):

  • 1/2 large red or white onion
  • 1 cup black beans
  • 1/2 cup salsa
  • 3/4 cup corn kernels
  • 1 cup shredded Mexican cheese blend
  • 1/2 teaspoon salt

Method:

  1. Dice the onion with a sharp knife.
  2. Soak the diced onion in cold water for 5 minutes to remove the raw onion bite.
  3. While the onion’s soaking, mix the rest of the ingredients together in a large bowl.
  4. Strain the water from the onion and add it to the mixture.
  5. Mix well. Serve at room temperature.

Homemade Buckeyes Recipe

Homemade Buckeyes Recipe Portion

As fun as it is to try new recipes and explore new flavors, some recipes you inevitably come back to season after season, year after year.

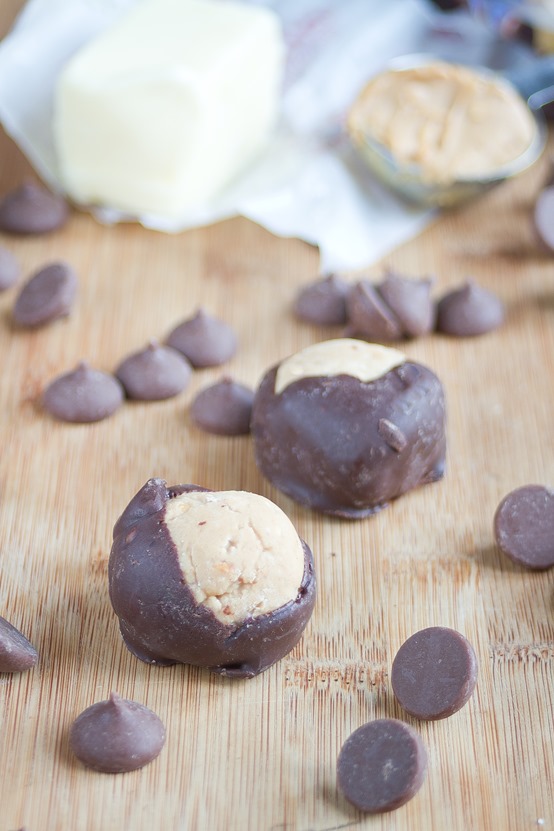
Last week I made these buckeyes for a holiday party, only to realize I did the same exact thing last year. Desserts like this are just too easy not to choose and always please a crowd. They’re also naturally gluten-free and can be made vegan by using margarine instead of butter.

These didn’t come out nearly as pretty as store-bought candies, but I always like it when you can tell something’s homemade.

Homemade Buckeyes Recipe

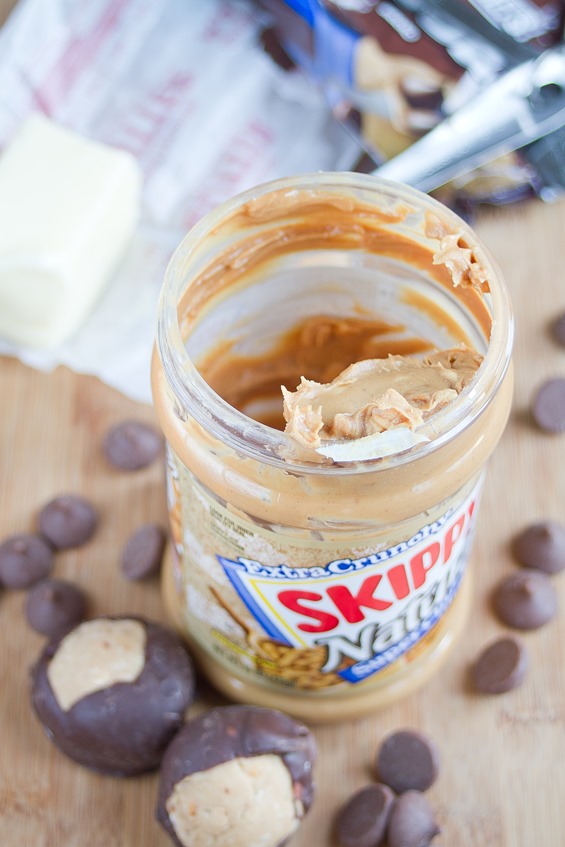
A recipe like this may not seem too versatile, but you can use any kind of peanut butter or other nut butter to make it unique. Chocolate peanut butter would be a perfect substitution for any chocolate lover.

Peanut Butter Buckeyes

Prep time: 20 minutes

Cook time: 0 minutes

Ingredients(Makes about 20 buckeyes):

  • 1 cup creamy peanut butter, softened
  • 6 Tablespoons butter, melted
  • 1 1/2 cups powdered sugar, sifted
  • 1 teaspoon vanilla extract
  • Pinch of salt
  • 1 1/4 cups bittersweet chocolate chips OR 10oz bittersweet chocolate, chopped

Method:

  1. In a large bowl mix together the peanut butter, butter, powdered sugar, vanilla extract and salt until it forms a dough that sticks to itself. If for some reason your dough is too thin, slowly add more powdered sugar until it’s workable.
  2. Roll the dough into 1-inch balls and place them on a non-stick surface.
  3. Put the peanut butter balls in the freezer to set.
  4. While the peanut butter balls are hardening, melt the chocolate in a microwave or over a double boiler.
  5. One by one dip the peanut butter balls into the melted chocolate to coat their outside and put them back on the non-stick surface.
  6. Refrigerate the peanut butter balls until the chocolate has set. Keep cold until ready to serve.

Gluten-Free Brown Sugar & Cinnamon Oatmeal

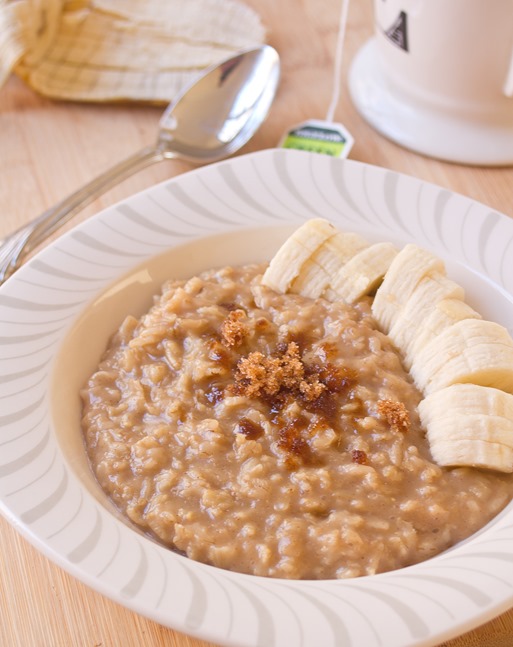
Gluten-Free Brown Sugar & Cinnamon Oatmeal

Breakfast is always my laziest meal of the day. More often than not I won’t spend more than 5 minutes getting it ready and spend another 5 eating it.

When I had to go without a microwave for a couple weeks last month it forced me out of my instant-microwaved oatmeal rut. Even still most mornings I spent 5 minutes cooking plain oatmeal while throwing on shoes and packing lunch. But some mornings I played around and made more delicious bowls using flavors and spices.

If you grew up enjoying Quakers instant oatmeal pouches, then you’ll love this. The taste and feel is the same, but making it yourself adds a special satisfaction and makes the whole bowl more hearty. You can use instant oats instead of thick-cut, just reduce the water accordingly and cook for less time.

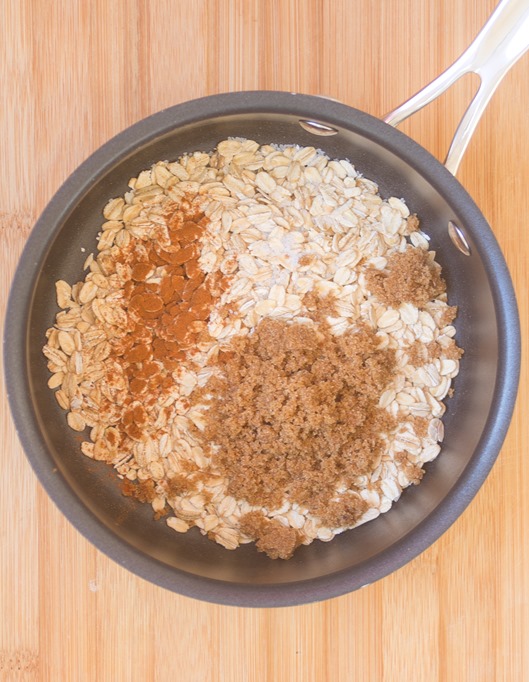
Gluten-Free Brown Sugar & Cinnamon Oatmeal Ingredients

  Gluten-Free Brown Sugar & Cinnamon Oatmeal

Prep time: 5 minutes

Cook time: 10 minutes

Ingredients(Makes 1 serving):

  • 1/2 cup thick-cut gluten-free rolled oats
  • 2 heaping Tablespoons dark brown sugar
  • 1/4 teaspoon cinnamon
  • pinch of salt
  • 2/3 cup water
  • 1/2 Tablespoon butter
  • Brown sugar for garnish

Method:

  1. Combine the oats, sugar, cinnamon, salt, and water in a pot and stir gently.
  2. Bring the water to a slight boil. Stir constantly so that the bottom doesn’t burn.
  3. Keep stirring until the oats are cooked and stick will stick to your spoon.
  4. Add in the butter and stir until it has completely melted.
  5. Move to a bowl and garnish with extra brown sugar before serving.

Italian White Bean Salad

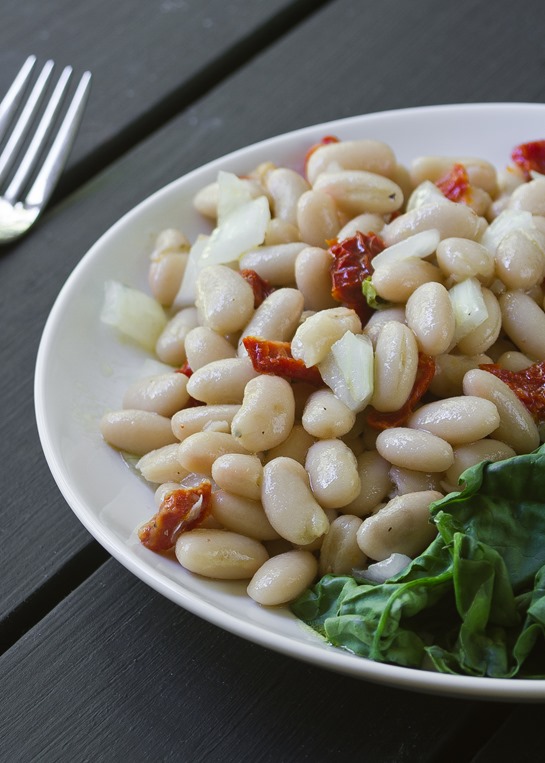
Italian White Bean Salad Yield

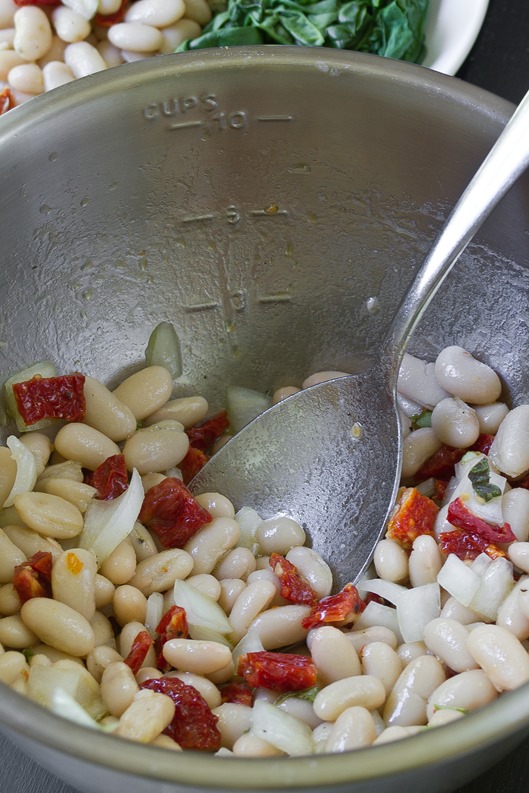
This is one of my favorite things I’ve eaten this Summer, which is saying a lot since I love sweets and it’s a savory recipe. It’s just the prefect, refreshing thing to throw together and put on a plate and enjoy without ever turning on the oven.

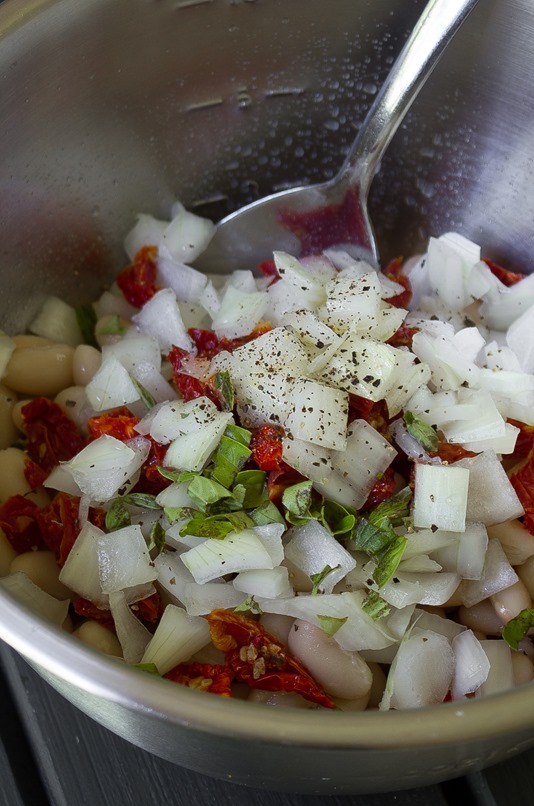
The ingredients here are really simple: White beans, sundried tomatoes, onions, basil, dressing and seasoning. That’s all you need! Don’t let the raw onions scare you; soaking them in a little cold water first takes out the bite in their flavor but leaves them cool and crunchy. You might want to freshen your breath afterwards with a homemade peppermint patty.

Italian White Bean Salad Ingredients

Like all recipes, make sure to season these to taste. If the beans you used were cooked in salt, make sure to use less to keep the flavor light and fresh.

Italian White Bean Salad

Prep time: 10 minutes

Cook time: 0 minutes

Ingredients(Makes 4 servings):

  • 2 cans white beans, drained
  • 1/4 cup chopped sundried tomatoes
  • 1/4 cup chopped onions
  • 3 Tablespoons extra virgin olive oil
  • 1 1/2 Tablespoons lemon juice
  • 2 Tablespoons fresh chopped basil
  • 1/2 teaspoon cracked black pepper
  • 1/4-1/2 teaspoon salt

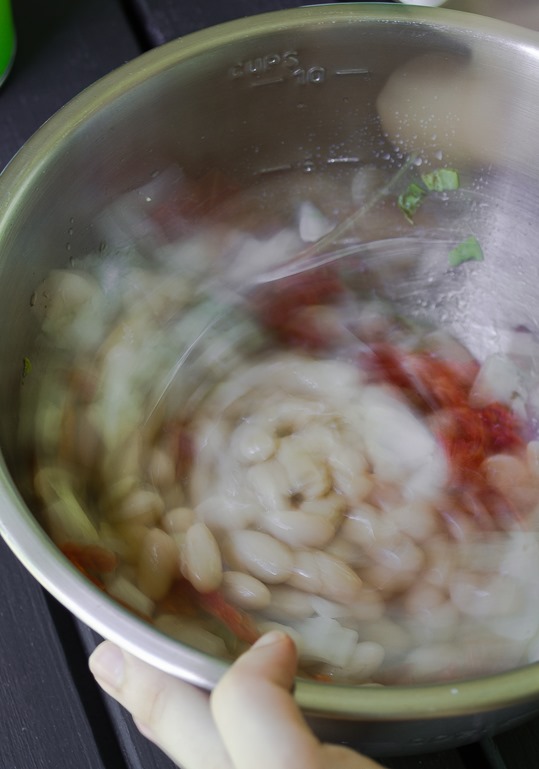
Italian White Bean Salad Mixing

Method:

  1. Let the onions soak in cold water for 5-10 minutes. Drain the water from the onions and lightly pat them dry.

  2. Toss all of the ingredients except for the salt together in a large bowl.
  3. Taste the beans and season with the salt as necessary.
  4. Serve cold or at room temperature.

Italian White Bean Salad

Nutella Cheesecake Strawberries

Nutella Cheesecake Strawberries

A jar of Nutella never lasts very long in our kitchen. One of my favorite snacks is to take a spoon and just dig in. That’s probably reason enough to stop keeping a jar of Nutella around all the time.

I’ve seen cheesecake-stuffed strawberries online for years now and never tried them before these. I think they’re originally a Paula Dean invention. It’s incredibly convenient if you’re looking for a gluten-free dessert because the strawberries take care of the crust for you; besides, you can convince yourself that a little bit of fruit makes it all healthier.

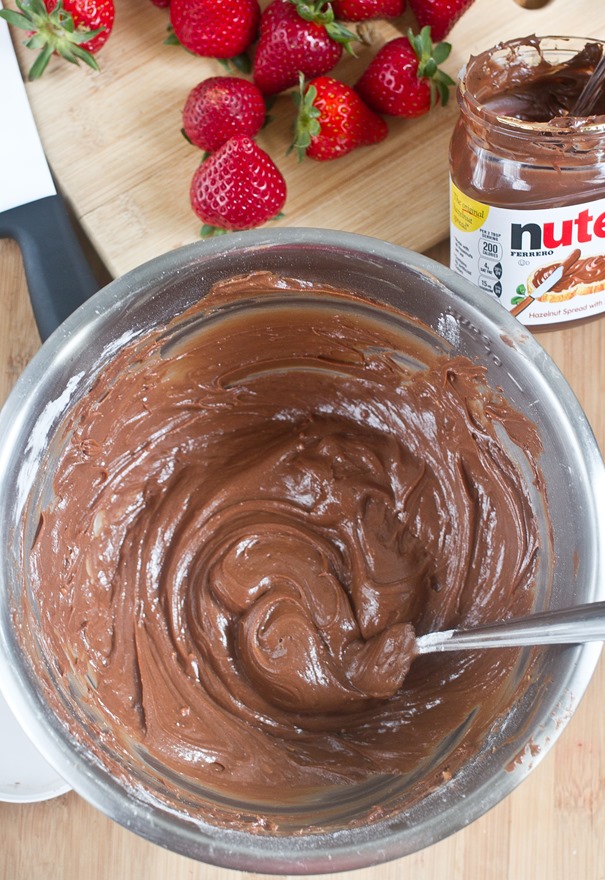
Nutella Cheesecake Strawberries Filling

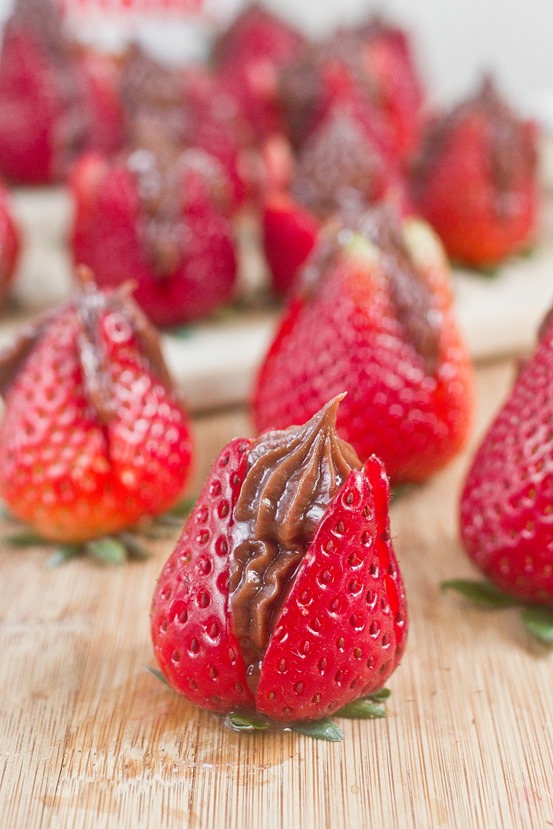
Filling these can be frustrating; a lot of the first ones came out lopsided and a couple of them even got thrown away. But don’t worry! It’s an easy skill to pick up as you do more and more.

Nutella Cheesecake Strawberries

Prep time: 20 minutes

Cook time: 0 minutes

Ingredients(Makes about 24 servings):

  • 1lb strawberries
  • 3/4 cup Nutella
  • 1/2 cup cream cheese, room temperature
  • 3/4 cup powdered sugar, sifted

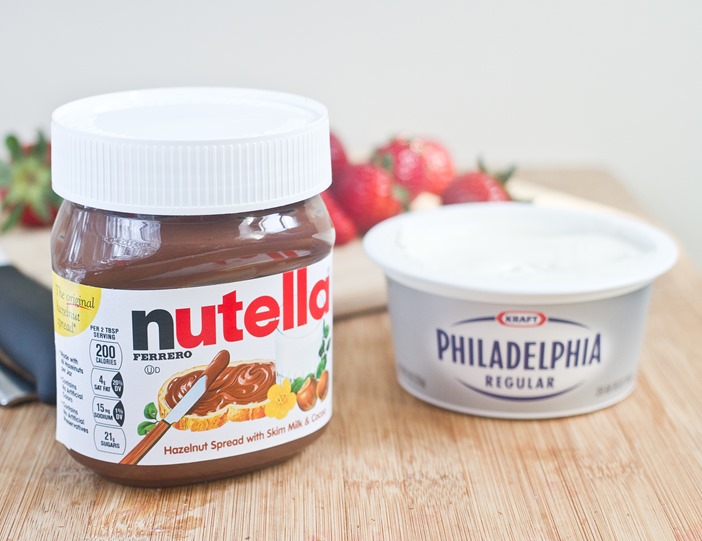
Nutella Cheesecake Strawberries Ingredients

Method:

  1. In a large bowl, beat together the Nutella, cream cheese, and powdered sugar until smooth. Move the filling to a pastry bag or Ziploc with a corner cut off.
  2. Using a sharp knife, slice each strawberry twice perpendicularly along the tip almost all the way through, leaving a little bit uncut.
  3. Separate the 4 tips of the strawberry and gently push the filling in until it reaches the top.
  4. Repeat with all of the strawberries.
  5. Store in a refrigerator until ready to serve; leave at room temperature for 30 minutes before eating.

Nutella Cheesecake Strawberries Serving

If you’re scared off by filling them or get too frustrated you can always cut up the strawberries and serve the filling as a dip. That was how I used up the leftover filling and it was just as good.

Hazelnut Mocha Trail Mix

Hazelnut Mocha Trail Mix

Surprisingly for all the sweet teeth I have and my love of chocolate I’ve never been a fan of the fancy drinks at Starbucks. I love the occasional bitterness of black coffee but more often than not I’ll choose green or herbal tea, and if you try swirling chocolate syrup and whipped cream into your green tea you’ll get a few odd looks.

Chocolate covered coffee beans and the like, however, are a different story. They’re right up there with chocolate covered almonds, chocolate covered raisins, and chocolate covered everything else. I’ve never found chocolate covered hazelnuts but something tells me if I did I’d love them, too.

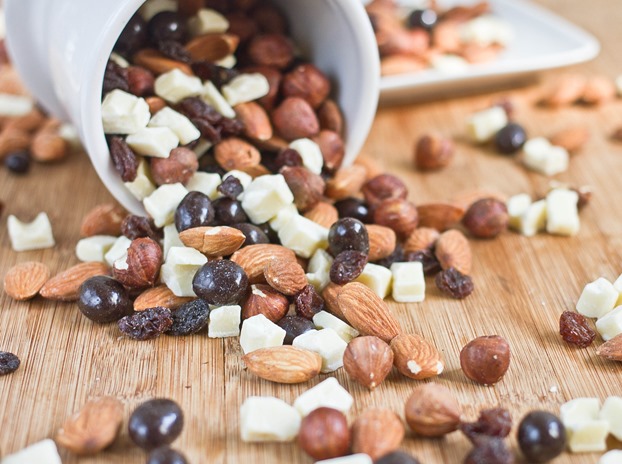
Hazelnut Mocha Trail Mix Yield

This trail mix hits just about every note that a good cup of coffee should. It has bitterness from the coffee beans, sweetness from the white chocolate and raisins, and a rich nuttiness from the hazelnuts and almonds. I think that hazelnuts pair great with chocolate and coffee but if you find yourself lacking them you can easily double the almonds in the recipe.

Hazelnut Mocha Trail Mix

Prep time: 5 minutes

Cook time: 0 minutes

Ingredients(Makes 3 cups):

  • 3/4 cup hazelnuts
  • 3/4 cup roasted almonds
  • 1/2 cup raisins
  • 1/2 cup chocolate covered coffee beans
  • 1/2 cup white chocolate chips

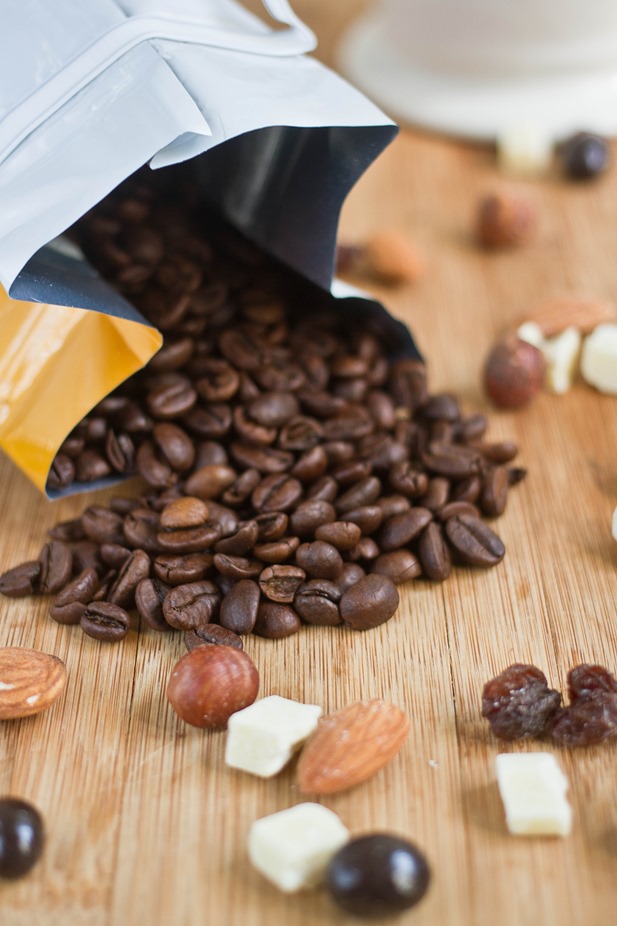
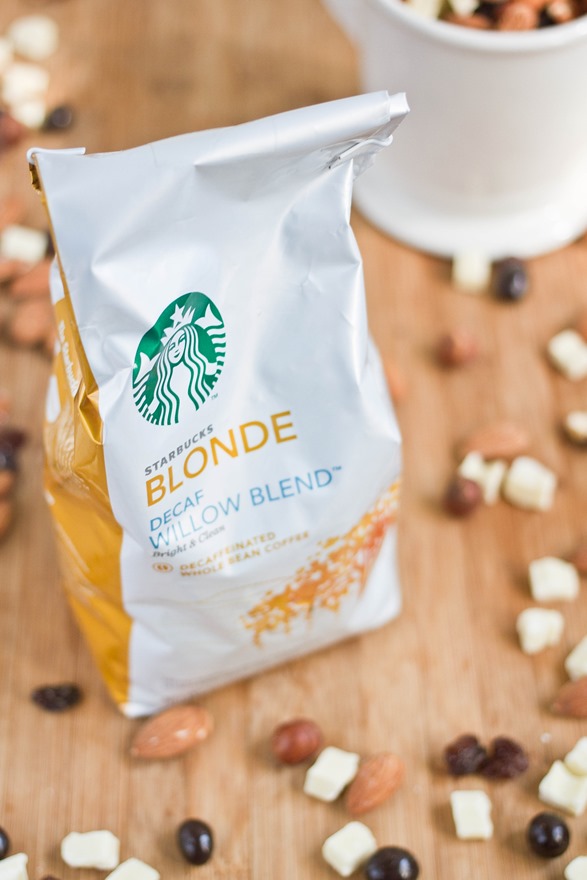
Hazelnut Mocha Trail Mix Coffee Bag

Method:

  1. In a large bowl, combine all of the ingredients and mix well.
  2. Store at room temperature when not enjoying.

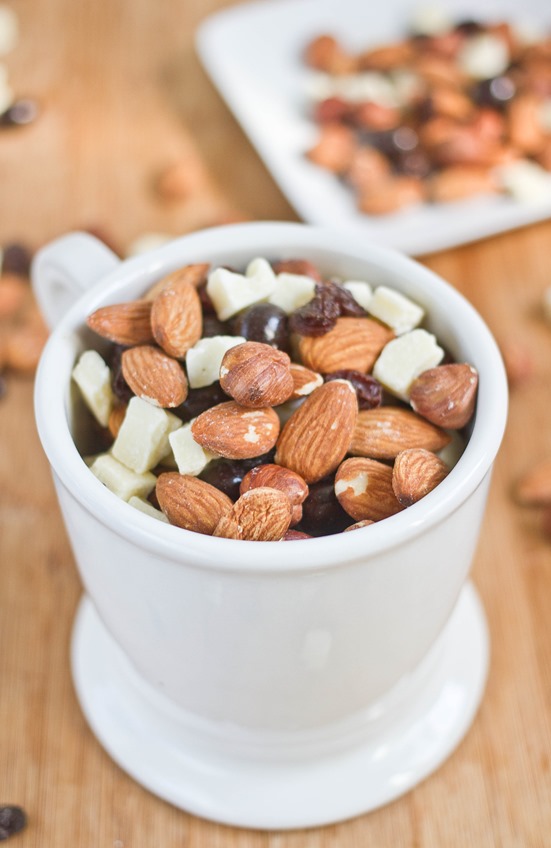
Hazelnut Mocha Trail Mix Cup

Mushroom and Herb Cheese Omelette

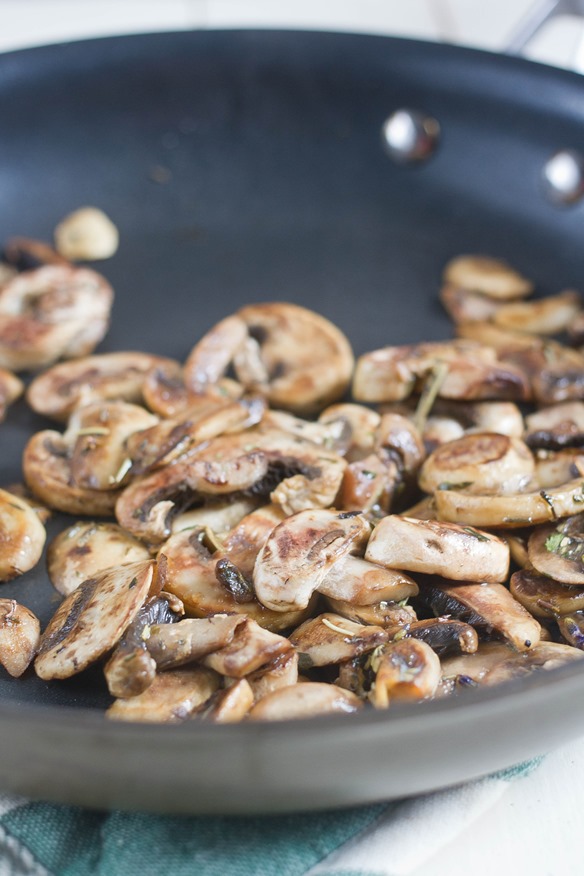
Mushroom and Herb Cheese Omelette Mushrooms

A lot of the best food just isn’t very photogenic. Eggs and melted cheese always taste good without fail, but they don’t come off as pretty on a plate. Still—how could you say no to making anything with melted cheese?

I’m not a big fan of mushrooms on their own but they add a great flavor and texture to just about anything. They also soak up all of the flavors around them so chances are if you don’t like mushrooms you just haven’t made them properly yet. Sautéing them in oil and herbs before adding them to the omelette gives them extra flavor and keeps them from tasting like rubber. 

Mushroom and Herb Cheese Omelette Eggs

If you don’t have herbs or want to flavor this differently, you can sauté some garlic and onions or fresh peppers with the mushrooms for something spicy or sweet instead of savory.

Mushroom and Herb Cheese Omelette

Prep time: 5 minutes

Cook time: 10 minutes

Ingredients(For 2 servings):

  • 3/4 cup mushrooms
  • 2 Tablespoons olive oil
  • 1/2 Tablespoon dried herbes de Provence
  • 1/2 teaspoon salt
  • 5 extra large eggs
  • 1/2 cup grated sharp cheddar cheese

Mushroom and Herb Cheese Omelette Finished

Method:

  1. Heat the oil in a pan over a burner set to medium.
  2. Sauté the mushrooms for about 5 minutes until they brown on both sides. Add in the herbs halfway through your cooking.
  3. Remove the mushrooms from the heat and season them with the salt. Set them aside in a separate bowl.
  4. Crack and beat the eggs together. Return the pan to the burner with a little bit of oil on the bottom to prevent the eggs from sticking.
  5. Pour in the beaten eggs and let them cook until the bottom has set.
  6. Spread the mushrooms and half of the cheese out over half of the pan of eggs. Carefully with a spatula lift the other half to fold it over the mushroom and cheese.
  7. Cover the omelette and let it cook through until the egg has set.
  8. Lift the cover and add the remaining cheese on top. Cover again until the cheese has melted.
  9. Move to a plate and serve hot.