Category Archives: How To

How To Dress Up Hot Chocolate

How To Dress Up Hot Chocolate

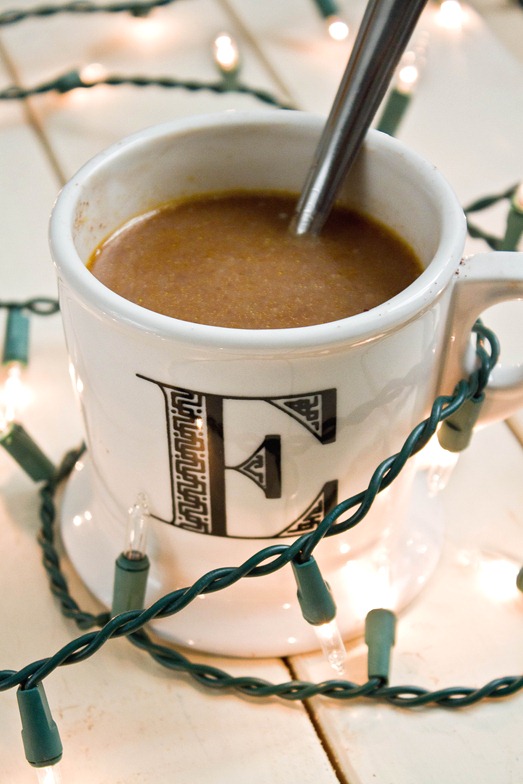
One of my favorite things about this time of year is the endless holiday parties. But that’s also one of the more stressful things about the holidays, too. When you have a different party to go to every night, it’s hard to think of something unique and delicious to bring that’s going to stand out. Hot chocolate is always a crowd pleaser but gets a little boring after the 4th or 5th time with just marshmallows to dress it up.

How To Dress Up Hot Chocolate Alcohol

Chocolate doesn’t have to go with just marshmallows. There are plenty of ways to flavor hot chocolate that go beyond vanilla. Whether you’re using milk or water, cocoa mix or from scratch, you can always infuse more flavor into the chocolate with one or two ingredients.

How To Dress Up Hot Chocolate

You’ll need:

  • Hot chocolate recipe or mix(preferably for 2 cups or more of hot chocolate)
  • Orange zest
  • Coconut milk
  • Spices: Cinnamon, Nutmeg
  • Baileys or Amaretto

How To Dress Up Hot Chocolate Orange

Orange Hot Chocolate:

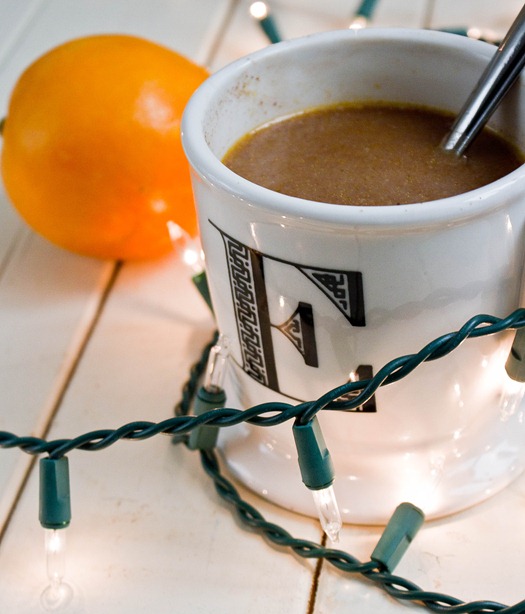
One great flavor combination is orange and chocolate. Add about a 1/4 Tablespoon of orange zest for every 1/2 cup of hot chocolate you’re making to the boiling milk or water. Right before you serve the hot chocolate, strain it to get the orange solids out. The oils will stay and flavor the hot chocolate.

Orange-Coconut Hot Chocolate

For every 2 cup of water or milk you would use to make the hot chocolate, use 1/4 cup less. Use the same technique for orange hot chocolate but add 1/4 cup full-fat coconut milk after the hot chocolate is made.

How To Dress Up Hot Chocolate Brady's

Adult Hot Chocolate:

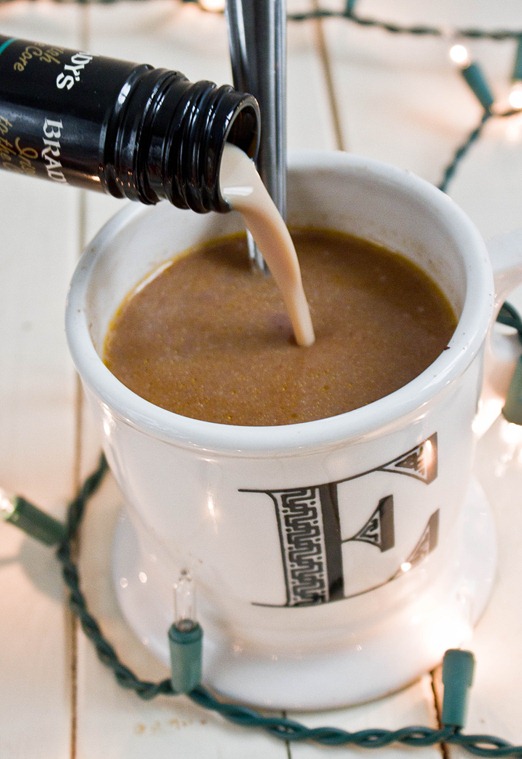
I feel like we all know how to make these. Just add a few splashes of Irish cream or amaretto into your hot chocolate and enjoy.

Cinnamon Hot Chocolate:

Another great way to make your hot chocolate is spicy. For every 2 cups of hot chocolate, add in 1/4 teaspoon of cinnamon and a pinch of nutmeg and mix them in well.

Salt Roasted Beets

Salt Roasted Beets

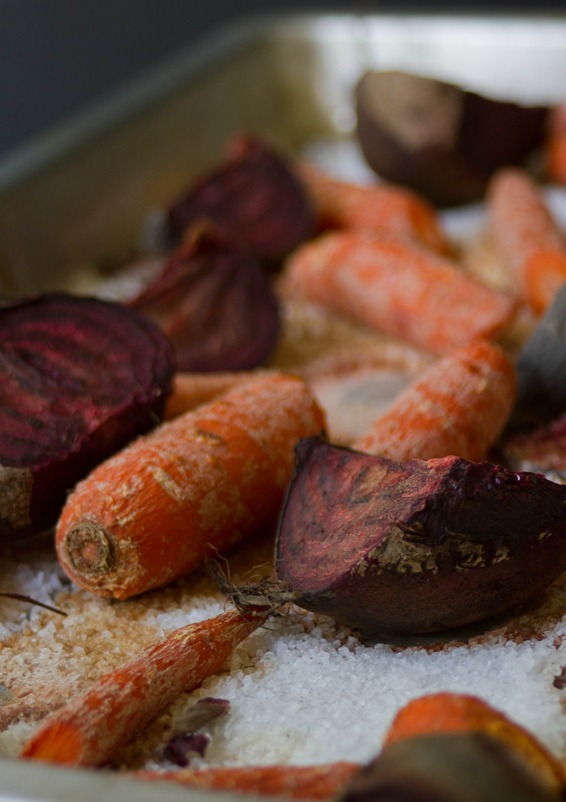
Salt is something that a lot of people don’t understand; too much can make anything a disaster, but just a touch on fruits and vegetables always helps to make them taste sweeter. When you eat something with natural sugars that’s been seasoned right, it touches more taste sensations on your tongue and you’ll enjoy it more.

Salt roasting is a technique I learned last Summer when I was interning in a restaurant. It was something that the lunch crew trusted that I couldn’t possibly screw up so I did it quite a bit whenever we got more beets in. Since then I’ve done it at home whenever I have the chance; you really can’t screw it up! Beyond the ease, I swear it makes the vegetables taste like candy.

Salt Roasted Beets Whole

This may seem like it’d be a hassle to clean up after but it’s really not. Just put the pan with the burnt salt under the sink and run hot water on it until the salt dissolves.

Salt Roasted Beets

Prep time: 10 minutes

Cook time: 1-2 hours

  • 3/4 cup coarse grain salt
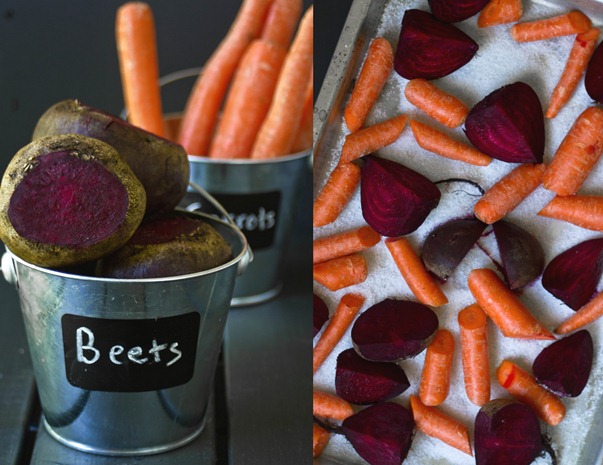
  • Beets, tops trimmed and peel on

Salt Roasted Beets Collage

Method:

  1. Preheat your oven to 400 degrees.
  2. Lay the salt out in a single layer on a roasting tray.
  3. Wash the outside of the beets. If your beets are large you can cut them into quarters or leave them whole. The larger they are, the longer they’ll take to cook.
  4. Lay the beats on top of the salt and place them in the oven.
  5. Roast for 1-2 hours until you can poke a fork through the skin with some ease.
  6. Remove from the oven and begin peeling off the skin while still hot. You may want to use gloves or a towel to keep the beets from burning your hands. Brush off any remaining salt on the outside.
  7. Serve hot or chilled.

Salt Roared Beets Salad

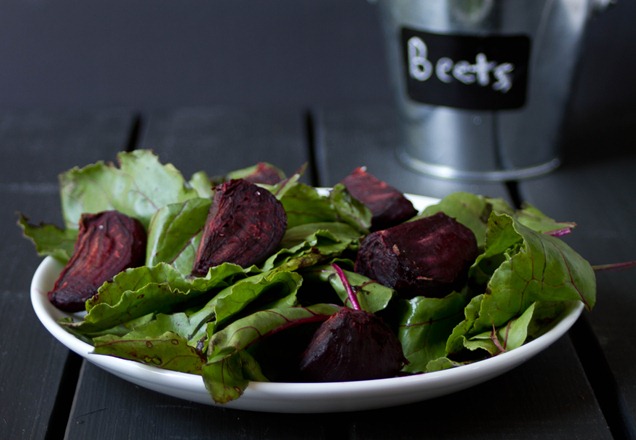
What do you do with your beets? Well they make a good salad, for one, especially if you keep those beet greens. Vegetables roasted in salt don’t need any further seasoning so you can just pop them in your mouth.

How To Make Brown & Powdered Sugar

May 29th 028

I’m not the best at planning ahead for what I want to bake. Not by a long shot. Sometimes that means “interesting” substitutions like strawberries for blueberries or carob for chocolate; other times it’s just a pain.

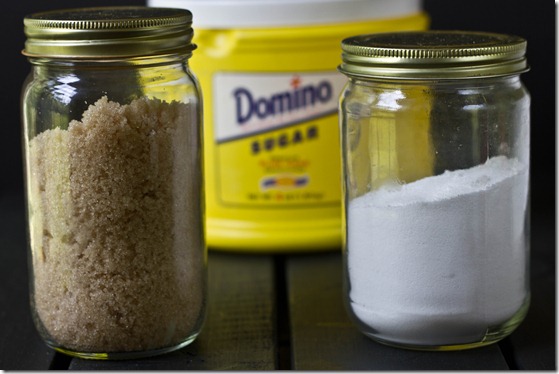
The kind of sugar you use in recipes is very important. Besides being sweet, each type offers its own flavor and texture. You use powdered sugar in frosting recipes so that the result is smooth and not grainy while you use brown sugar in cookie recipes to get a rich, dark buttery flavor.

If you’re in a pinch and only have white sugar on hand, you’re in luck. With standard cane sugar you can make both brown and powdered sugar.

How To Make Brown Sugar

How to make brown sugar

Prep time: 5 minutes

Ingredients:

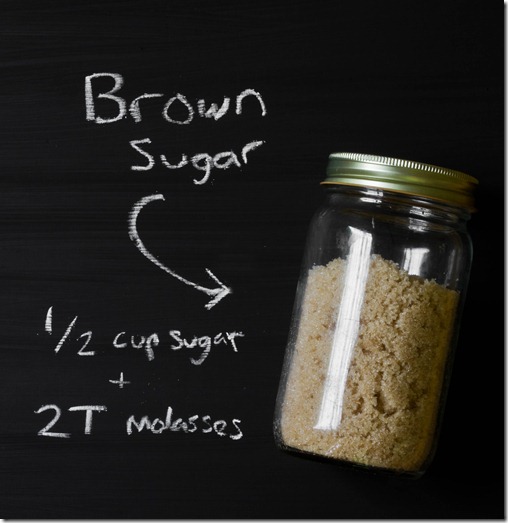
  • 1/2 cup white sugar
  • 2 Tablespoons molasses

Method:

  1. Mix both of the ingredients thoroughly.
  2. Store in an airtight container in the refrigerator for up to a month

You can also use this process to make maple sugar by substituting maple syrup in for the molasses. While the nutritional benefits of maple sugar can’t be imitated, the light, amber flavor comes through.

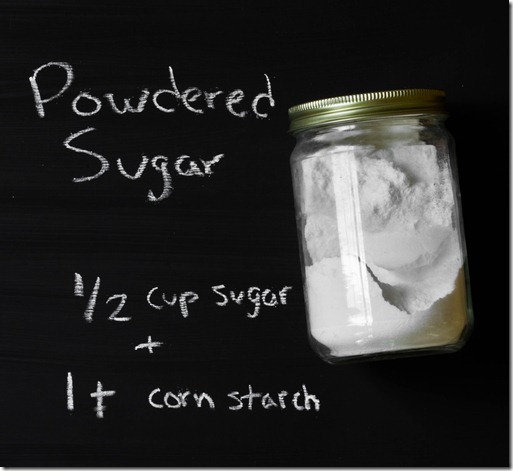
How To Make Powdered Sugar

How to make powdered sugar

Prep time: 5-10 minutes

Ingredients:

  • 1/2 cup white sugar
  • 1 teaspoon corn or tapioca starch

Method:

  1. Combine the sugar and starch in a food processor or high-powered blender.
  2. Mix on high for 5-10 minutes until the sugar is pulverized to the consistency of powdered sugar.
  3. Store at room temperature in an airtight container.

If you have the option, buy and stock up on these types of sugar at the store; while these homemade ones are good last minute substitutions, they aren’t exactly the same quality you can buy. Also make sure that you’re starting out with white sugar and not something with color like turbinado sugar which has too much moisture in it. 

Hope you found this post helpful. Now that Summer’s here and backyard barbeques are back, I for one will be going through bags of sugar like crazy.

What Makes A Good Brownie Recipe

March 13th 073

I’ve gotten a name for posting brownie recipes. I don’t think I post them that often, but there are plenty of worse things to be called than “Brownie blogger” so I’ll take it. I do love brownies(I don’t know who wouldn’t). And I’ve made them often enough to know a good brownie recipe from a bad one when I see it.

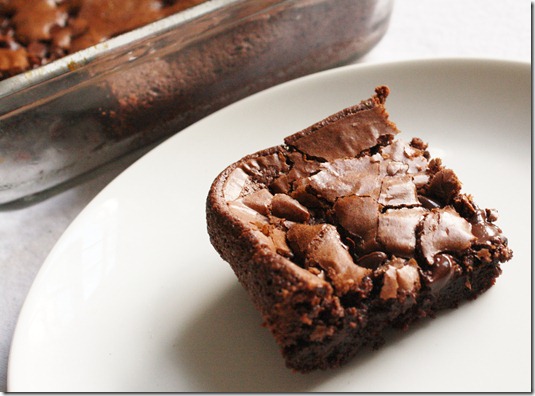
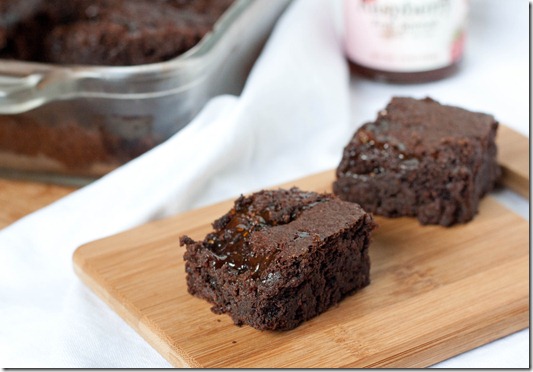
But first I should probably clarify what I mean by “good”, because with something like brownies that can be very subjective. A good brownie to me is dense and fudgy with a dark and complex flavor—not too sweet—, and not at all cakey. If I wanted something cakey I’d bake a cake. A good recipe could set even a novice baker up to making the best brownies of their life.

gluten-free-raspberry-swirl-brownies

A good brownie recipe should have melted chocolate in the batter. If a recipe only has cocoa powder but no melted chocolate, just keep looking. It’s not going to be as fudgy or dark a flavor without the cocoa butter.

A good brownie recipe should have butter. Real butter. Now, no offense to vegans because I love vegan baking, too. But butter really makes all the difference in the flavor of brownies. I’d stay clear of a recipe that uses all oil, margarine, or even applesauce or yogurt. It’s dessert; it’s not meant to be healthy.

IMG_0677

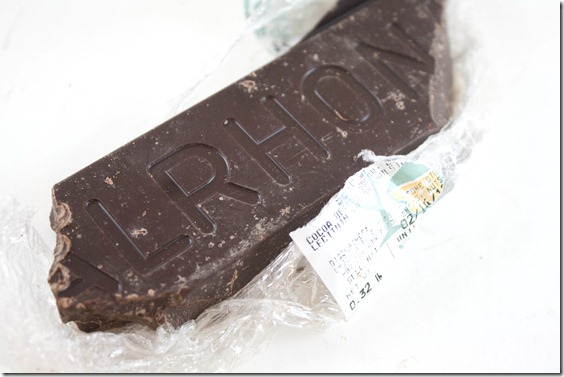
The quality of your chocolate/butter matter. One of the simplest things you can do to elevate any brownie recipe is use really good chocolate. Chocolate chips may work in cookies, but they aren’t really right for melting into brownie batter. A high quality baking chocolate is going to have a much better texture and flavor. I would recommend using whatever you would eat on its own(I say that as someone who regularly eats chocolate chips from the bag but let’s pretend I don’t). Some good brands I’d recommend that would make really impressive brownies are Scharffen Berger, Callebaut, and Valrhona. There are plenty others, too.

The butter also matters and is something often overlooked. A European butter or butter made from grass-fed cows has a much stronger flavor than something like Land O Lakes that comes through in the finished recipe. I suggest Kerrygold or Smor.

almond-flour-brownies

The flour matters. Brownies made with whole wheat flour are going to be tougher and cakier than ones made with cake flour, which is more refined. If you insist on a whole grain flour, look for pastry flour for something a little lighter. Better yet, skip the gluten altogether and bake gluten-free with almond flour, which doesn’t act as a binder and so won’t make your brownies tough. Avoid starchy gluten-free flours like coconut flour or garbanzo bean flour that will also make the brownies tough.

January 19th 050

The little touches matter. Most brownie recipes will be improved with a little vanilla extract, some instant coffee granules, and a pinch of salt. Even if the recipe doesn’t call for any of those, don’t be shy to add them in and boost the flavor; you should always keep these on hand when baking with chocolate. And just because they’re brownies doesn’t mean they couldn’t use a frosting or ganache.

Did I forget anything? What makes your favorite brownie recipe the best brownie recipe?

On a completely separate note, this is the last weekend to vote in the Nutty About Yogurt contest hosted by Stonyfield Farm and Peanut Butter & Co. If you haven’t voted yet, I would really appreciate your vote for my muffin recipe. And you’ll be entered to win a Stonyfield and Peanut Butter & Co. prize pack, too.

How To Season Rice

how-to-season-rice

I never really liked rice. Growing up we would have Chinese takeout at least once a week—usually Friday nights—and the last thing I would touch would be the rice. It always tasted so plain. I even bought a rice cooker and for a year never made rice in it; why would I?

how-to-season-rice-chopsticks

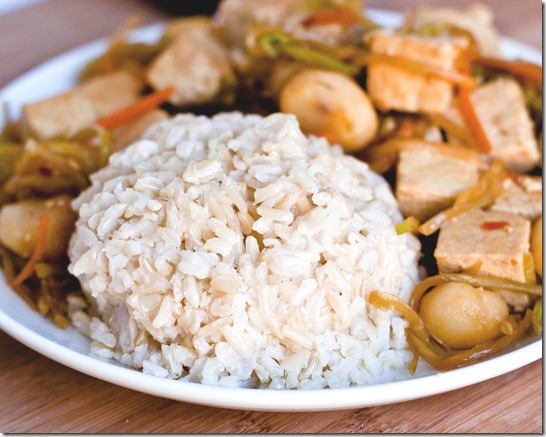
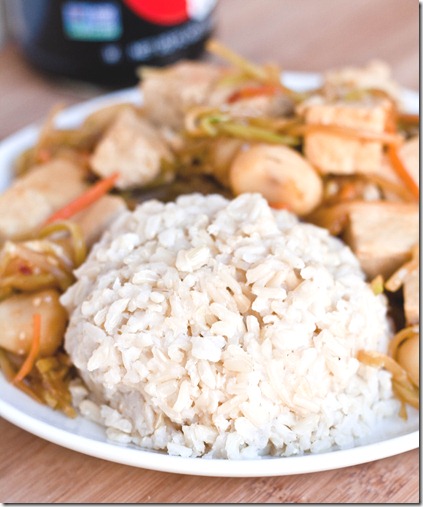
That’s probably because all the rice I had tried was just rice—nothing added to it—and that’s just not good. Add a little seasoning, however, and rice goes from a side dish to a star on the plate.

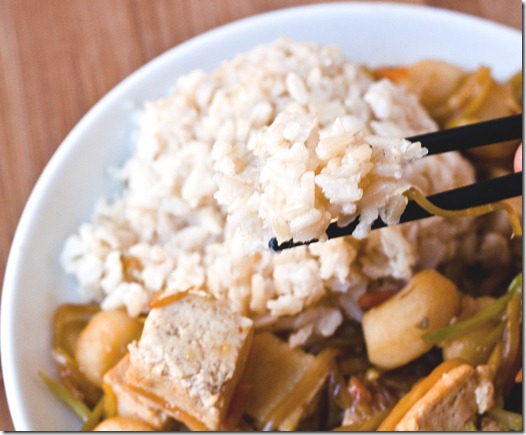
Seasoning rice is so easy and just requires a few pantry staples. The flavor is similar to the seasoned rice in sushi rolls. And because the sugar makes the rice sticky, it’s easier to eat with chopsticks! I used brown basmati rice because that’s what was on hand, but you can use brown or rice, long or short grain.

How To Season Rice

You’ll need:

  • 2 cups cooked rice
  • 2 Tablespoons sugar
  • 1 1/2 Tablespoons unseasoned rice vinegar*
  • 1/2 Tablespoon Sesame oil
  • 1/2 teaspoon salt

*Can use white vinegar in a pinch

how-to-season-rice-serving

Method:

  1. Heat up the rice in a pot or microwave if it’s not already hot.
  2. Add in the sugar, vinegar, sesame oil, and salt and mix thoroughly.
  3. Scoop onto plates and serve hot.

how-to-season-rice-plate

Once you’ve mastered making delicious rice, everything else on the plate instantly tastes better, too. You can mix in whole sesame seeds or chili powder for a stronger flavor if you’d like.

How To Make Pumpkin Puree

how-to-make-pumpkin-puree

Now that it’s officially November, chances are there are a lot of pies in our future. Pumpkin pie is iconic for American Thanksgiving. I wrote a post on making your own pumpkin puree last year but figured I should rewrite it again since it’s definitely a skill that comes in handy for you and me to know.

how-to-make-pumpkin-puree-pumpkins

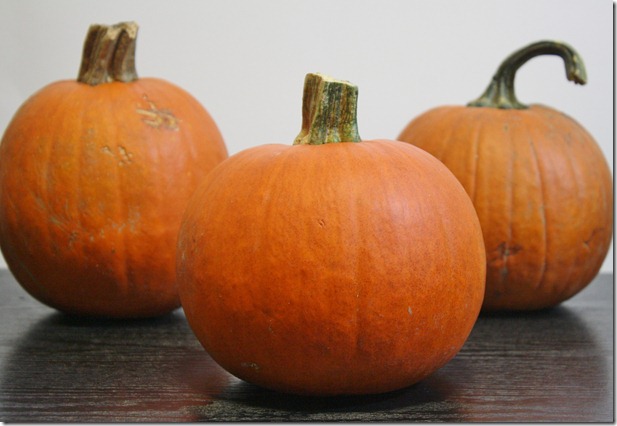
Some people will argue that the type of pumpkin you roast makes all the difference. I’m not going to say one way or the other since I haven’t tried many varieties out; I simply go down to the store and pick up what’s usually called a “Sugar pumpkin” or “Pumpkin pie pumpkin” because the sign tells me that’s what to buy for roasting your own pumpkin.

how-to-make-pumpkin-puree-halved

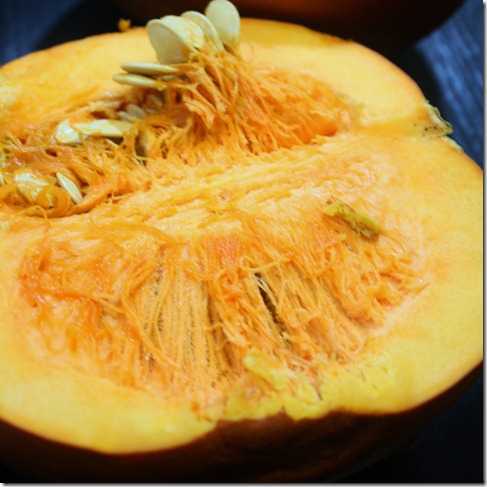
To roast it, start by cutting the pumpkins in half and remove the seeds and stringy filling. You can save the seeds to clean them and roast them.

After that, preheat your oven to 375 degrees. Lay the pumpkins out face down on a roasting tray and bake for 70-90 minutes. When they’re done the skin should have the appearance and texture of a deflated football.

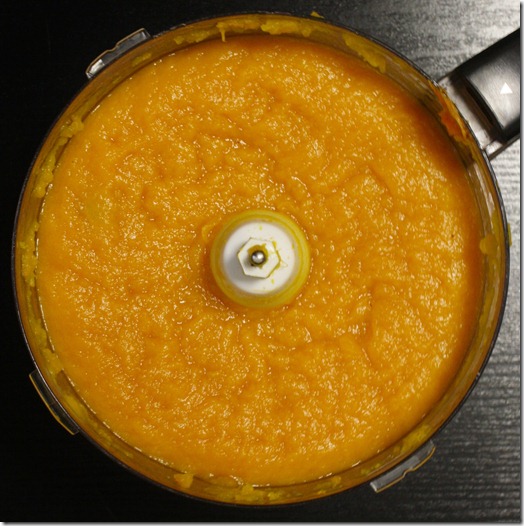
how-to-make-pumpkin-puree-food-processor

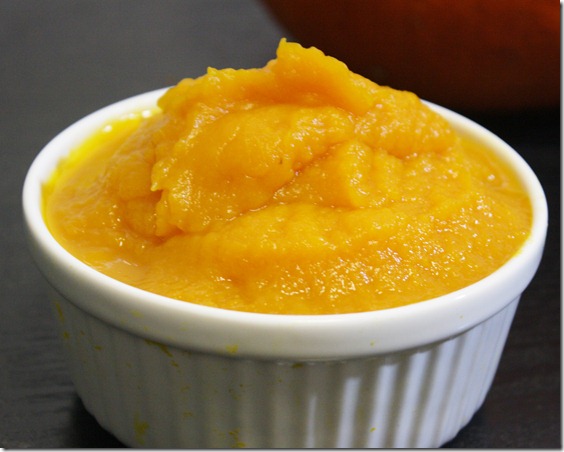
Remove the skin(it should peel off fairly easily) and scoop out the insides into a food processor. Blend and pulse until it’s completely smooth. Move the puree into air-tight containers for storing in the refrigerator or freezer.

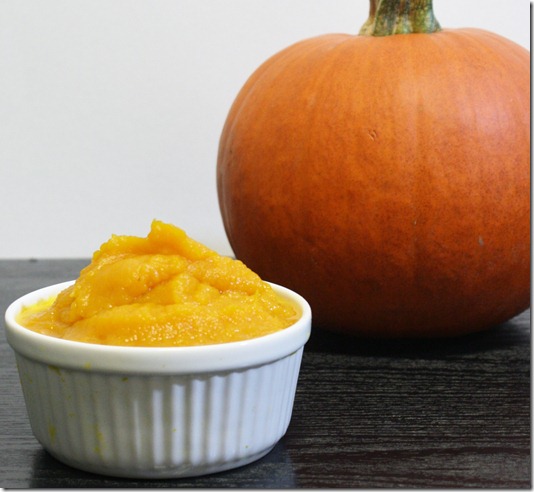
how-to-make-pumpkin-puree-finished-product

From 2 small-medium sugar pumpkins that cost $1.50 each I got just over 3 1/2 pounds of pumpkin puree, which would cost around $5-6 for canned pumpkin puree. You’re not going to be able to retire off of making your own pumpkin puree but it’s undoubtedly cheaper, not a lot of work, and an impressive boast to say you made something completely from scratch. It should keep around 5 days in the refrigerator and much longer if frozen.

Of course you don’t have to make a pumpkin pie with this puree; I sure as hell haven’t yet this year. There are plenty of other uses for pumpkin puree such as pumpkin breakfast quinoa, Keep in mind, too, that pumpkin’s a squash just like butternut or acorn and you can substitute it for other squash purees in soup or mashes with very little change in taste or texture. 

How To Cook Quinoa In A Rice Cooker

how-to-cook-quinoa-in-a-rice-cooker

Last year around this time I bought a rice cooker. Since then I’ve made rice approximately 2 times, both being for other people. I just don’t care for rice. Why’d I buy it then? To cook other things like quinoa.

Quinoa is traditionally made in a pot on the stove. That method works well if you have a full kitchen, but there are definitely benefits to using a rice cooker, too.

    • You don’t have to watch a rice cooker as much as a burner.
    • Rice cookers with “keep warm” settings make it easy to serve warm food even during a busy party.
    • You can use a rice cooker almost anywhere there’s an electrical outlet—even in a dorm room.

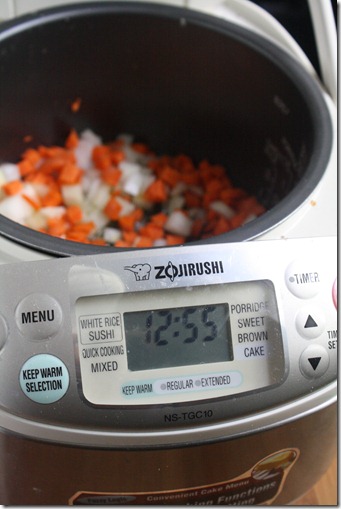
how-to-cook-quinoa-in-a-rice-cooker-brand

I use a Zojirushi rice cooker. They’re one of the more expensive brands but totally worth the extra cost. This will last for years and years, is easy to clean, and has plenty of cooking features. I’ve made a number of different things in it, from quinoa to date paste. It’s worth the investment if you’re in the market for a rice cooker.

How To Cook Quinoa In A Rice Cooker

Prep time: 5 minutes

Cook time: 30 minutes

Ingredients(Makes 4 servings):

  • 1/2 an onion, small diced
  • 1 large carrot, small diced
  • 2 Tablespoons olive oil
  • 1 cup quinoa, rinsed and drained
  • 2 1/2 cups water or stock
  • 3/4 teaspoon salt(omit if using salt)

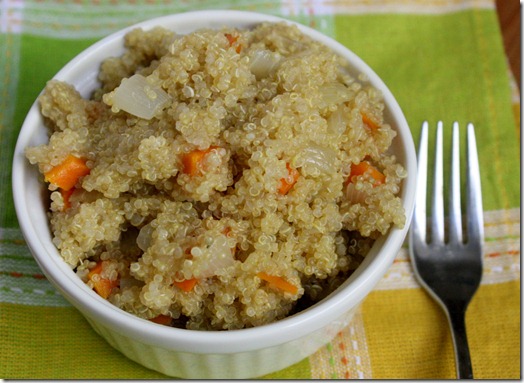
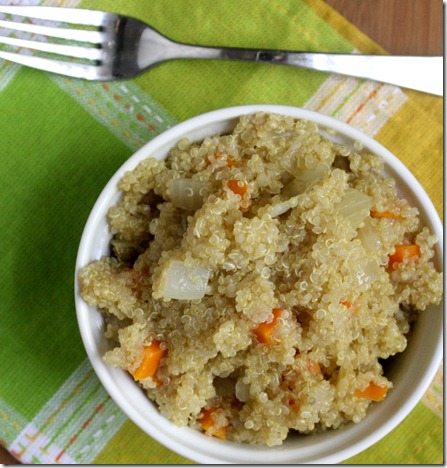
how-to-cook-quinoa-in-a-rice-cooker-finished

Method:

  1. “Sauté” the carrots and onion in the bottom of the rice cooker by cooking them in the oil on a high-heat setting until the onions are translucent.
  2. Add in the quinoa, liquid, and seasoning if using. Close the lid on the rice cooker and cook on high for 15-20 minutes until the liquid has boiled off. The quinoa will be ready when it has doubled in volume and a “tail” sprouts from the end.
  3. Fluff the quinoa with a serving spoon and serve hot or let cool and store in a sealed container in the refrigerator for 2-3 days.

how-to-cook-quinoa-in-a-rice-cooker-overhead

Once you get comfortable preparing basic quinoa, you can make more complex recipes, all while still using your rice cooker. Here are a few of my favorites that I have picked to make for Fall:

Vegged-Out Quinoa

The Best Quinoa Dressing

Savory Pumpkin Quinoa

How To Prepare Beets + A Beet Salad Recipe

How-To-Prepare-Beets

When I worked in a restaurant over the Summer, I spent more time with beets than I’d ever thought I would. I would work on preparing them for service for hours. I thought I’d never touch them again until I saw them at the farmers’ market last week and decided to grab some to share my knowledge.

Beets aren’t exactly difficult to prepare, just a bit tedious. First we roasted them in a salt bath. The theory is that the beets absorb the salt, making their sweetness more potent. Whether that worked or not we constantly debated. Once they came out of the oven, we had to peel them, all done by hand while still piping hot. It was not the most fun job to have to do for an hour, and my fingers often looked like I had just committed a murder afterwards.

How-To-Prepare-Beets-Stem

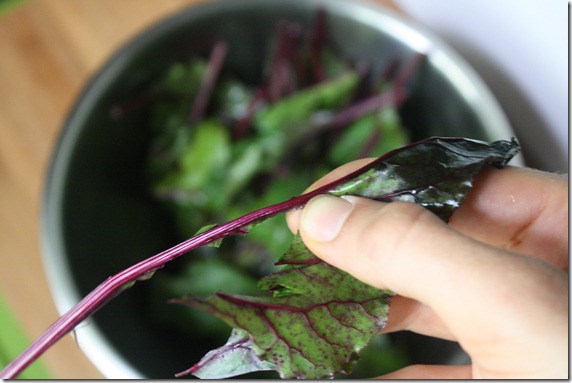
The other part of beet preparation was the greens. I didn’t know beet greens were even edible; I had always thrown mine away thinking they were poisonous like radish leaves. The proper way to peel a beet green is to pinch the leaves and remove the long, thick, purple spine in the middle. Doing this with one bunch of beets isn’t too troubling; doing it with 30 bunches of beets—well, that was anther story.

Roasted Beets

Prep time: 5 minutes

Cook time: 1 hour 10 minutes

Ingredients:

  • 1 bunch of beets, stems removed
  • 1/2 cup salt

How-To-Prepare-Beets-Raw

Method:

  1. Preheat your oven to 400 degrees.
  2. Pour the salt down on a baking tray.
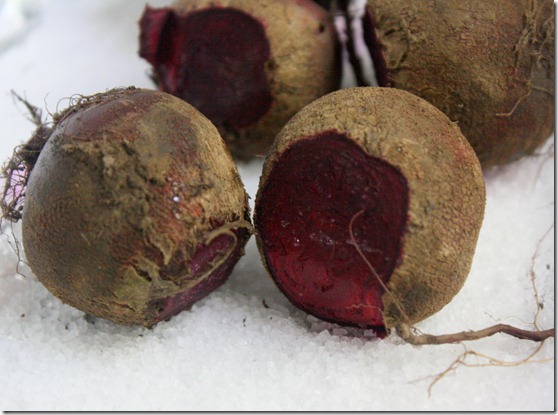
  3. Lay the beets down on top of the salt. Roast for 60-70 minutes until a fork can pass through easily.
  4. Remove the tray from the oven and let cool slightly for 5 minutes or so.
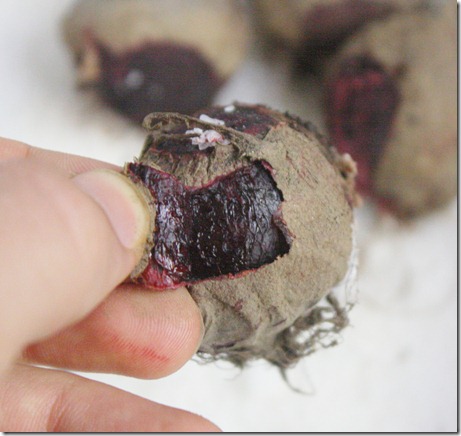
  5. Gently peel the skin off of the beets using your hands. You might want to use a dish towel to protect your hands from the heat and dye of the beets.

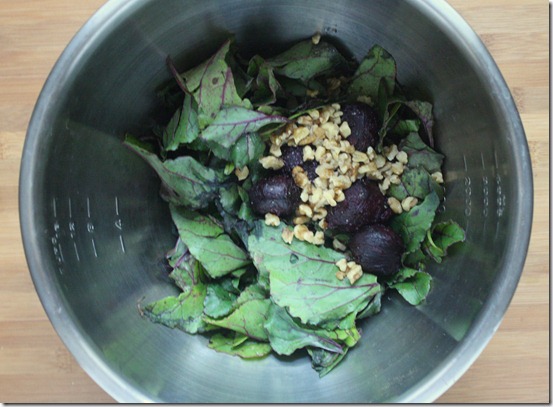
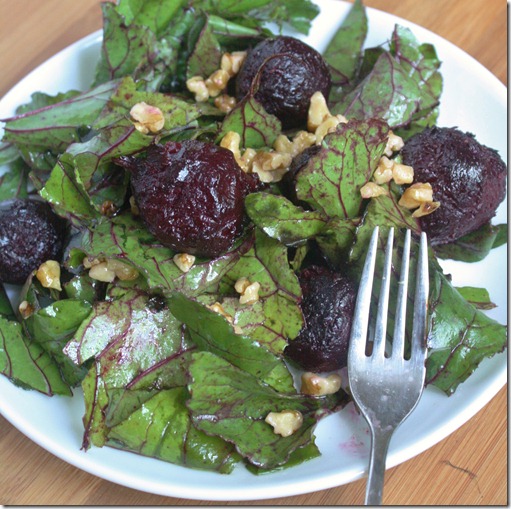
We served our beets in the restaurant in a salad. The salad prepared there had goat cheese and pistachios in it. Since I don’t eat cheese and didn’t have pistachios, I made a modified version with oil and walnuts. The recipe below could work for either variation.

Roasted Beet Salad

Prep time: 5 minutes

Cook time: 0 minutes

Ingredients(for 1 serving):

  • 6 medium-sized roasted beets, cooled to room temperature
  • Greens from one bunch of beets, washed and deveined
  • 1/4 cup crumbled goat cheese(optional)
  • 1/4 teaspoon salt(omit if using goat cheese)
  • 1 Tablespoon olive oil(omit if using goat cheese)
  • 2 Tablespoons crushed walnuts or pistachios

How-To-Prepare-Beets-Ingredients

Method:

  1. Combine all of the ingredients in a large bowl
  2. Toss the ingredients until thoroughly mixed together.
  3. Plate and serve at room temperature.

How-To-Prepare-Beets-Salad

If my restaurant experience taught me anything, it’s that I’m perfectly happy eating canned beets. They’re cheaper, more convenient, and just as nutritious. That being said, preparing your own beets from scratch makes for an impressive dish.

StumbleUpon Part 2: How & Why

Since I wrote How To Use StumbleUpon To Gain Traffic I’ve gotten a lot of other questions on exactly how to use it and what the benefits are, so I thought a follow-up post might be helpful. To be honest, when I wrote it I hardly new the answer to either of those questions. I—like most people—had just begun to learn how to use it and hadn’t yet experienced first hand the kind of traffic it could bring. That changed in August.

Capture8

August 16th I was poking around the backworks of this blog and noticed that the page views were off the charts for this little dog and pony show of mine. All of the traffic was coming from StumbleUpon. I clicked on the link and realized my Hazelnut Chocolate Cake was getting viewed. A lot. And it kept being viewed, and kept being viewed until now over 2 weeks later it finally died down.

I knew StumbleUpon was powerful for sharing content but I didn’t quite realize it was that powerful. Now that I’ve experienced that, I think I can write better on it. In this post I’ll share all the nitty-gritty analytic numbers and tell you how do it for yourself.

Why

2011-08-27 August 27th

These graphs from top to bottom show the page hits per day, per week, and per month. It’s very obvious where on each graph the spike occurs. What’s amazing to me is how long the effect lasts. Most link-backs create quick spikes that are over after a day but StumbleUpon’s content clearly lasts a lot longer than that.

Capture5

Another look at the numbers clearly shows where readers were brought from and what they looked at, and it’s no contests against StumbleUpon. What I found interesting was that my About Me page also saw a spike of traffic in that time; it’s the most convenient way for a potential reader to get to know the blogger and so should be eye-catching and kept up to date to keep readers around.

How

Capture9

The first step towards getting traffic through StumbleUpon is actually getting your content on StumbleUpon. As far as I can tell, there are two ways for either you or a reader to submit it. The first is to manually go into StumbleUpon, click on the Favorites tab and choosing “Add a Site”.

Capture

The other more simpler way is to install a plugin that adds a StumbleUpon button into every blog post(I recommend Share & Follow). All it takes is someone clicking that button to submit or favorite a page.

That’s the relatively easy part. From there, it’s really out of your control for the most part if a post will get picked up. It takes lots of strangers favoriting and sharing your post to gain momentum. You can share the link to the page in StumbleUpon on Twitter, Facebook, or through email to increase the odds of the page being seen. But if they aren’t motivated to share it with their friends and followers, then it’s not going anywhere. That’s what makes it so difficult for content to be picked up on StumbleUpon. Personally I only submit and share about 1/3rd of the posts I write because I don’t think the other 2/3rds stand a chance of being picked up. Even then in 6 months I’ve had maybe 2 or 3 successes, including this huge one. Be judicious in what you do submit and share knowing not every post you write is a gem.

Caveat

Capture12

All that traffic is nice, but what about subscribers? Above is data from my feedburner account. The green line represents feed subscribers. As you can see, there’s no spike whatsoever; instead, it’s just a slow and gradual increase. This means that, while StumbleUpon drives traffic, it doesn’t bring in consistent readers. 99% of people who saw the cake recipe either clicked around and left or just clicked Stumble and moved on.

Basically, StumbleUpon is good for giving 15 minutes of fame(or 2 weeks, which is even better) but it’s hardly consistent in its effect or very lasting. At the end of the day it would take a lot of posts being picked up consistently to turn a hokey blog like this one into something more main stream.

Do you have any more questions? Leave them in the comments.

How To Make Mint Simple Syrup

How-to-make-mint-simple-syrup

One thing I’ve had to get used to working in a restaurant this Summer is never having a recipe. Chef’s don’t use recipes, don’t you know; so when I’m doing something for the first time, it’s usually with one or two of the chefs giving me directions one step at a time, not always agreeing with each other on their methods. It’s definitely a “dive in” approach to learning that usually leaves me wanting to sit down, read a recipe through, and then start cooking.

All of that is a roundabout way of saying that I learned how to make simple syrup and now I’m obsessed with the idea. The first one I wanted to make was a mint flavor, because mint makes everything better. With it you can make mint drinks, mint soda,—mint anything. I’m more interested in making frozen desserts with it.

How To Make Mint Simple Syrup

For 1 cup of simple syrup, you’ll need:

  • 1 cup sugar
  • 1 cup water
  • 10 mint leaves

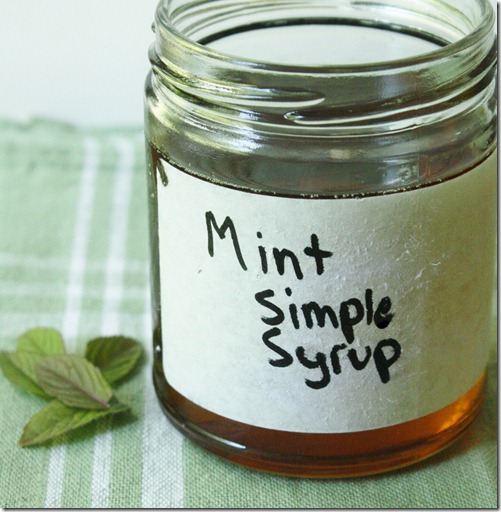
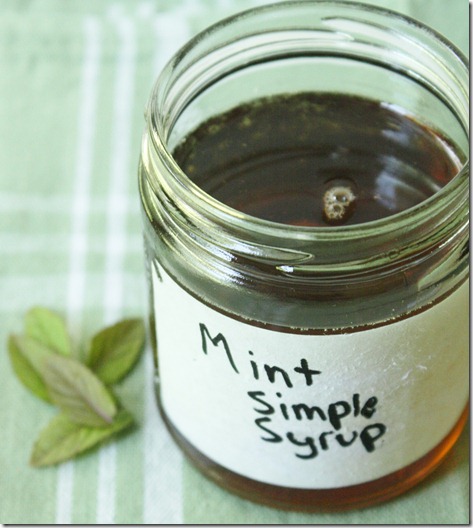
how-to-make-mint-simple-syrup-syrup

Method:

  • Combine all of the ingredients together in a small sauce pan
  • Over a burner, bring the mixture up to a rolling boil keeping an eye that the mixture doesn’t boil over.
  • Once the consistency of the mixture turns from a free-flowing liquid to a syrup(about 10 minutes), turn off the burner and remove the sauce pan from the heat.
  • With a mesh strainer, strain the mint leaves from the syrup while pouring it into a container.
  • Let the syrup cool and store in the refrigerator when not using.

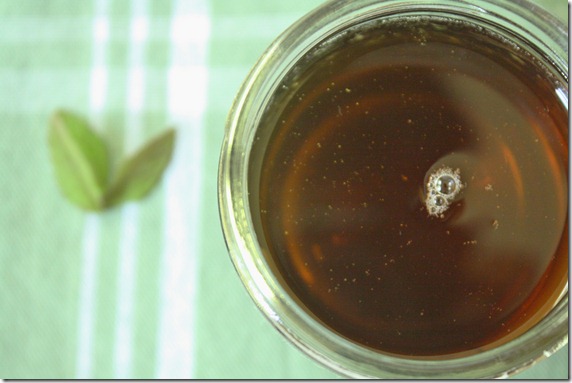
how-to-make-mint-simple-syrup-jar

If you’re curious about the color of the syrup, it comes from the sugar granules. For a clear white syrup, use sugar that’s completely white. I used cane sugar that had a slight beige tint from trace B vitamins which created a darker, amber syrup.